Capturing Datasets
Inspector can capture images directly from connected cameras to be used to train Brains in Brain Builder. Those images are collected into Datasets.
If already have training images, you can import them directly into Brain Builder. Instructions for importing images and training Brains in Brain Builder can be found in Creating Datasets and Uploading Images.
Prerequisites
Before capturing images with Inspector, ensure that the line is set up with lighting, cameras, triggers, and product to generate the images that you wish to use to train the Brain.
It is important that the images used to train the Brain match those that will be inspected during production. If the production images vary greatly from the training images (such as different lighting, different product packaging, etc.), then the Brains will not perform well when analyzing production images.
📸 Creating datasets
- On the left side of the Inspector application window, click the Datasets icon.
- Click the + button at the top of the left column to create a new dataset. Complete the following fields:
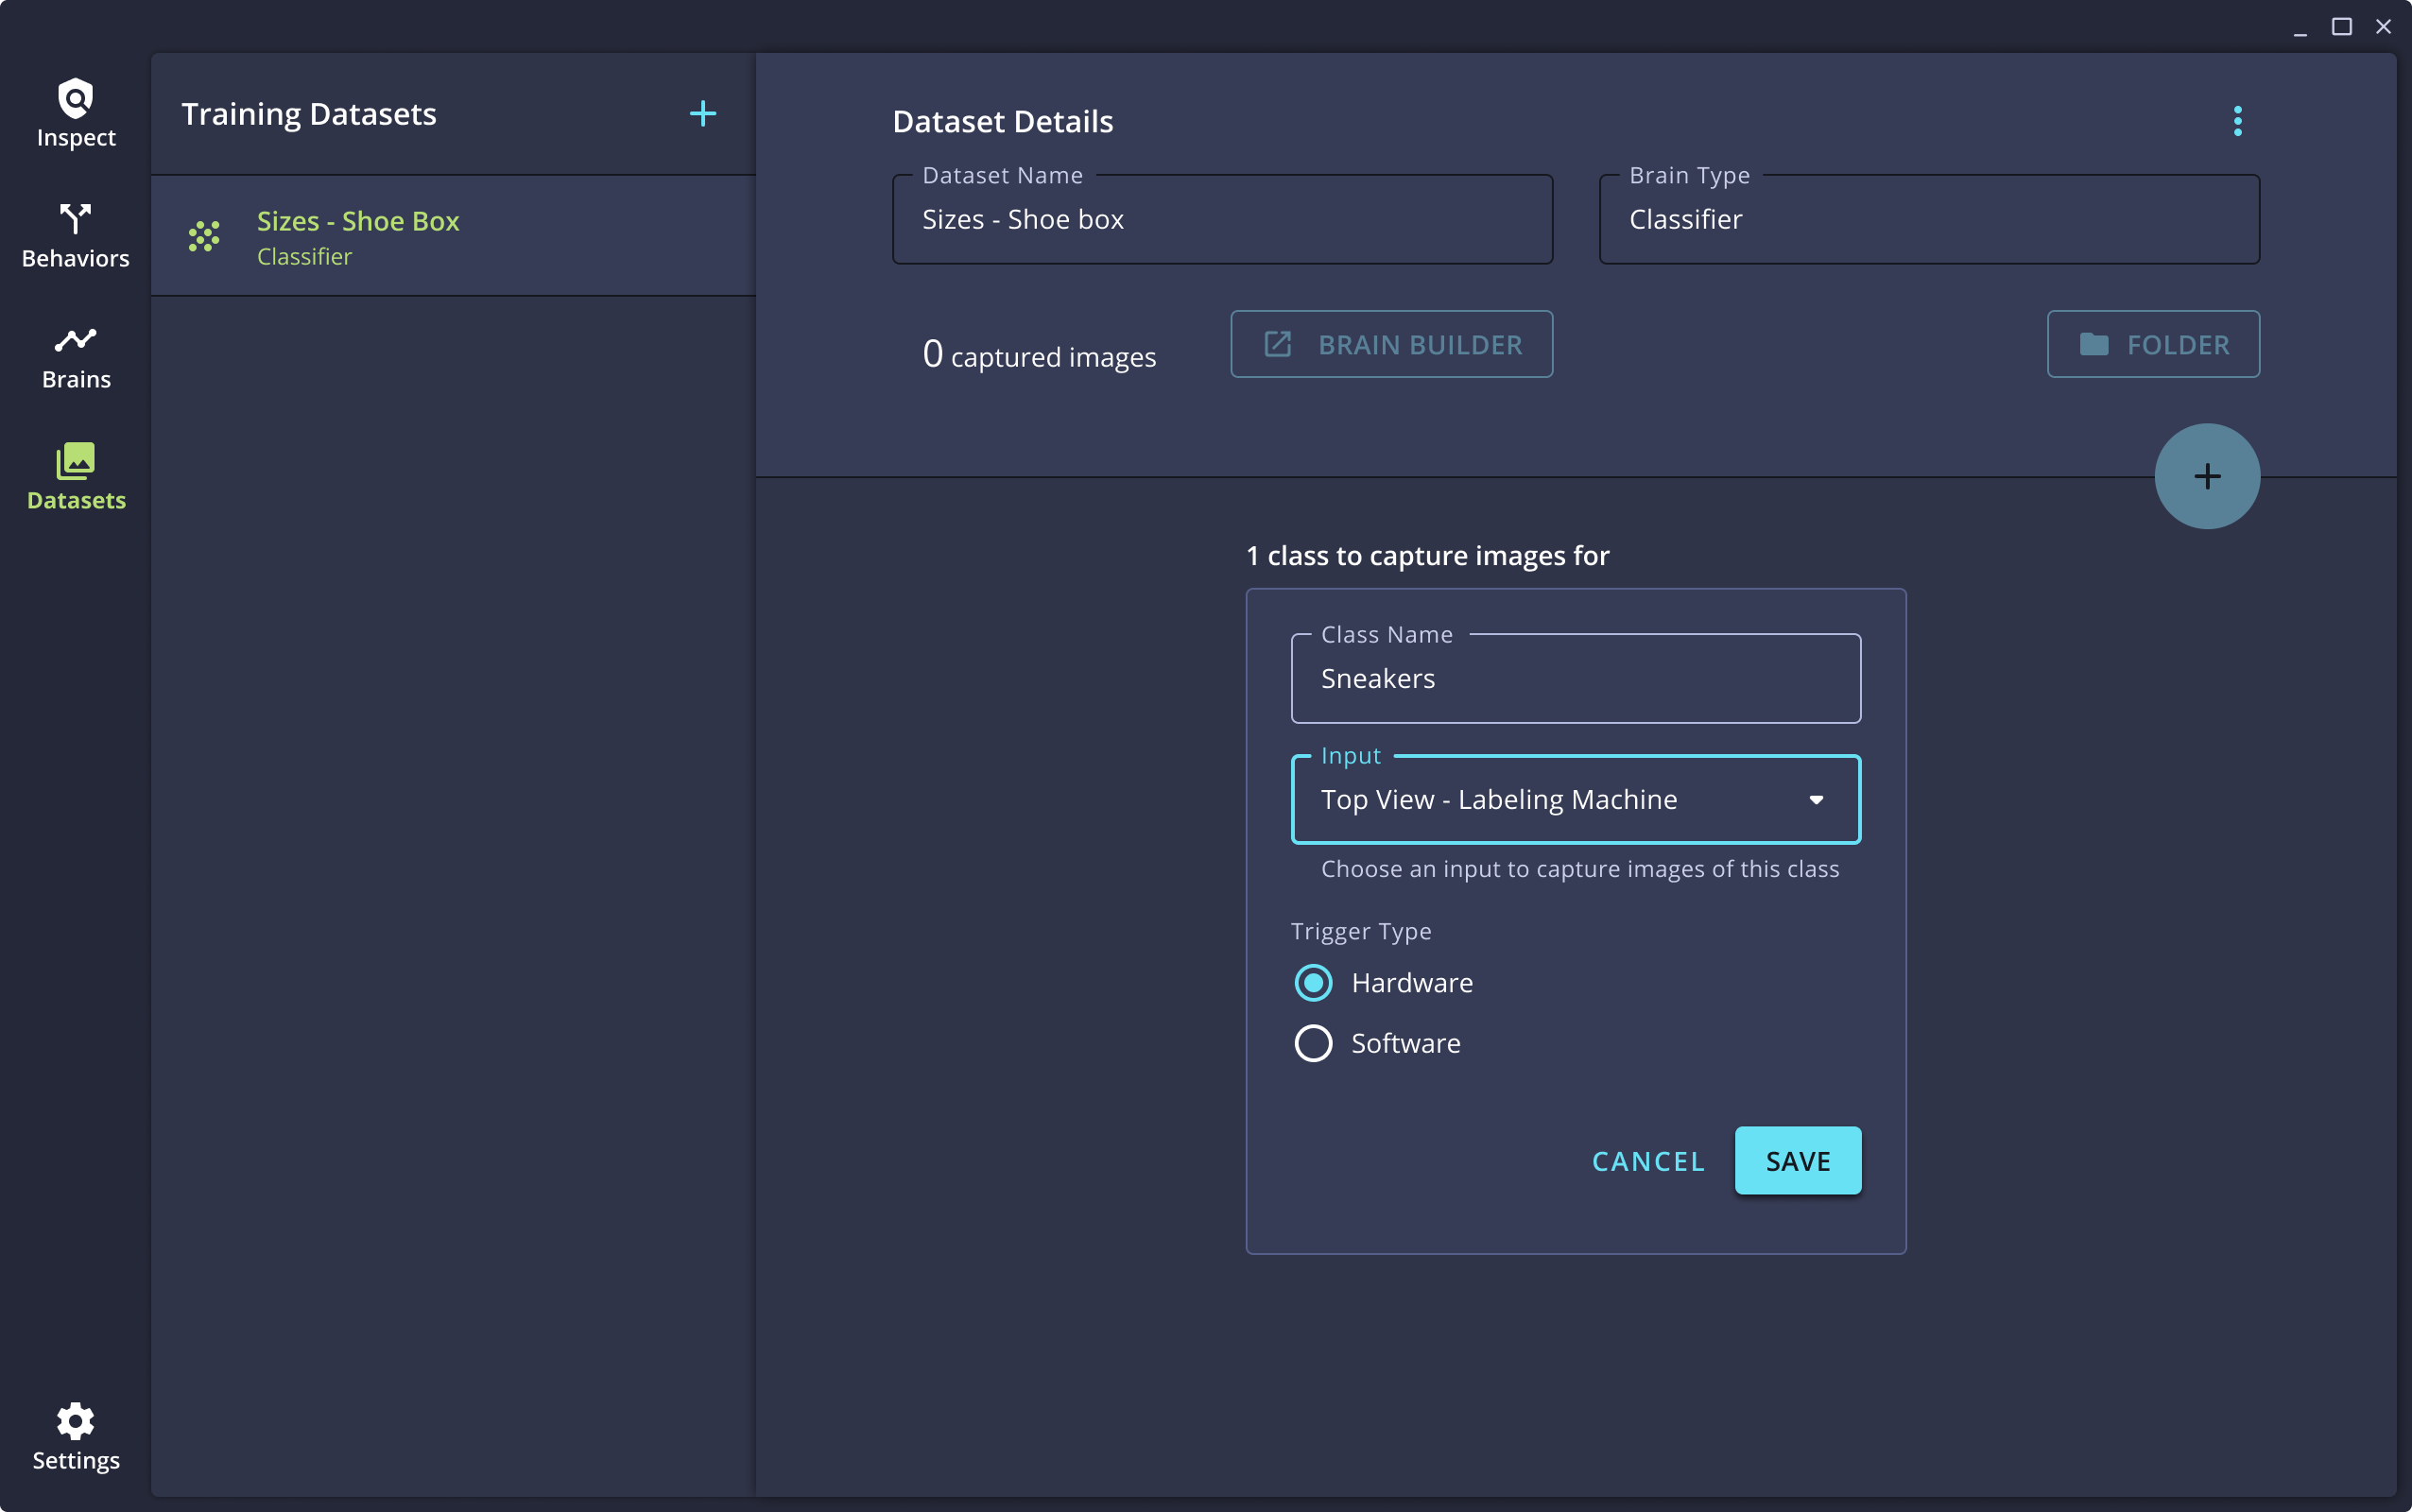
- Dataset Name - the name of the dataset. Choose a name that will be distinct and help you and other users understand what this dataset contains.
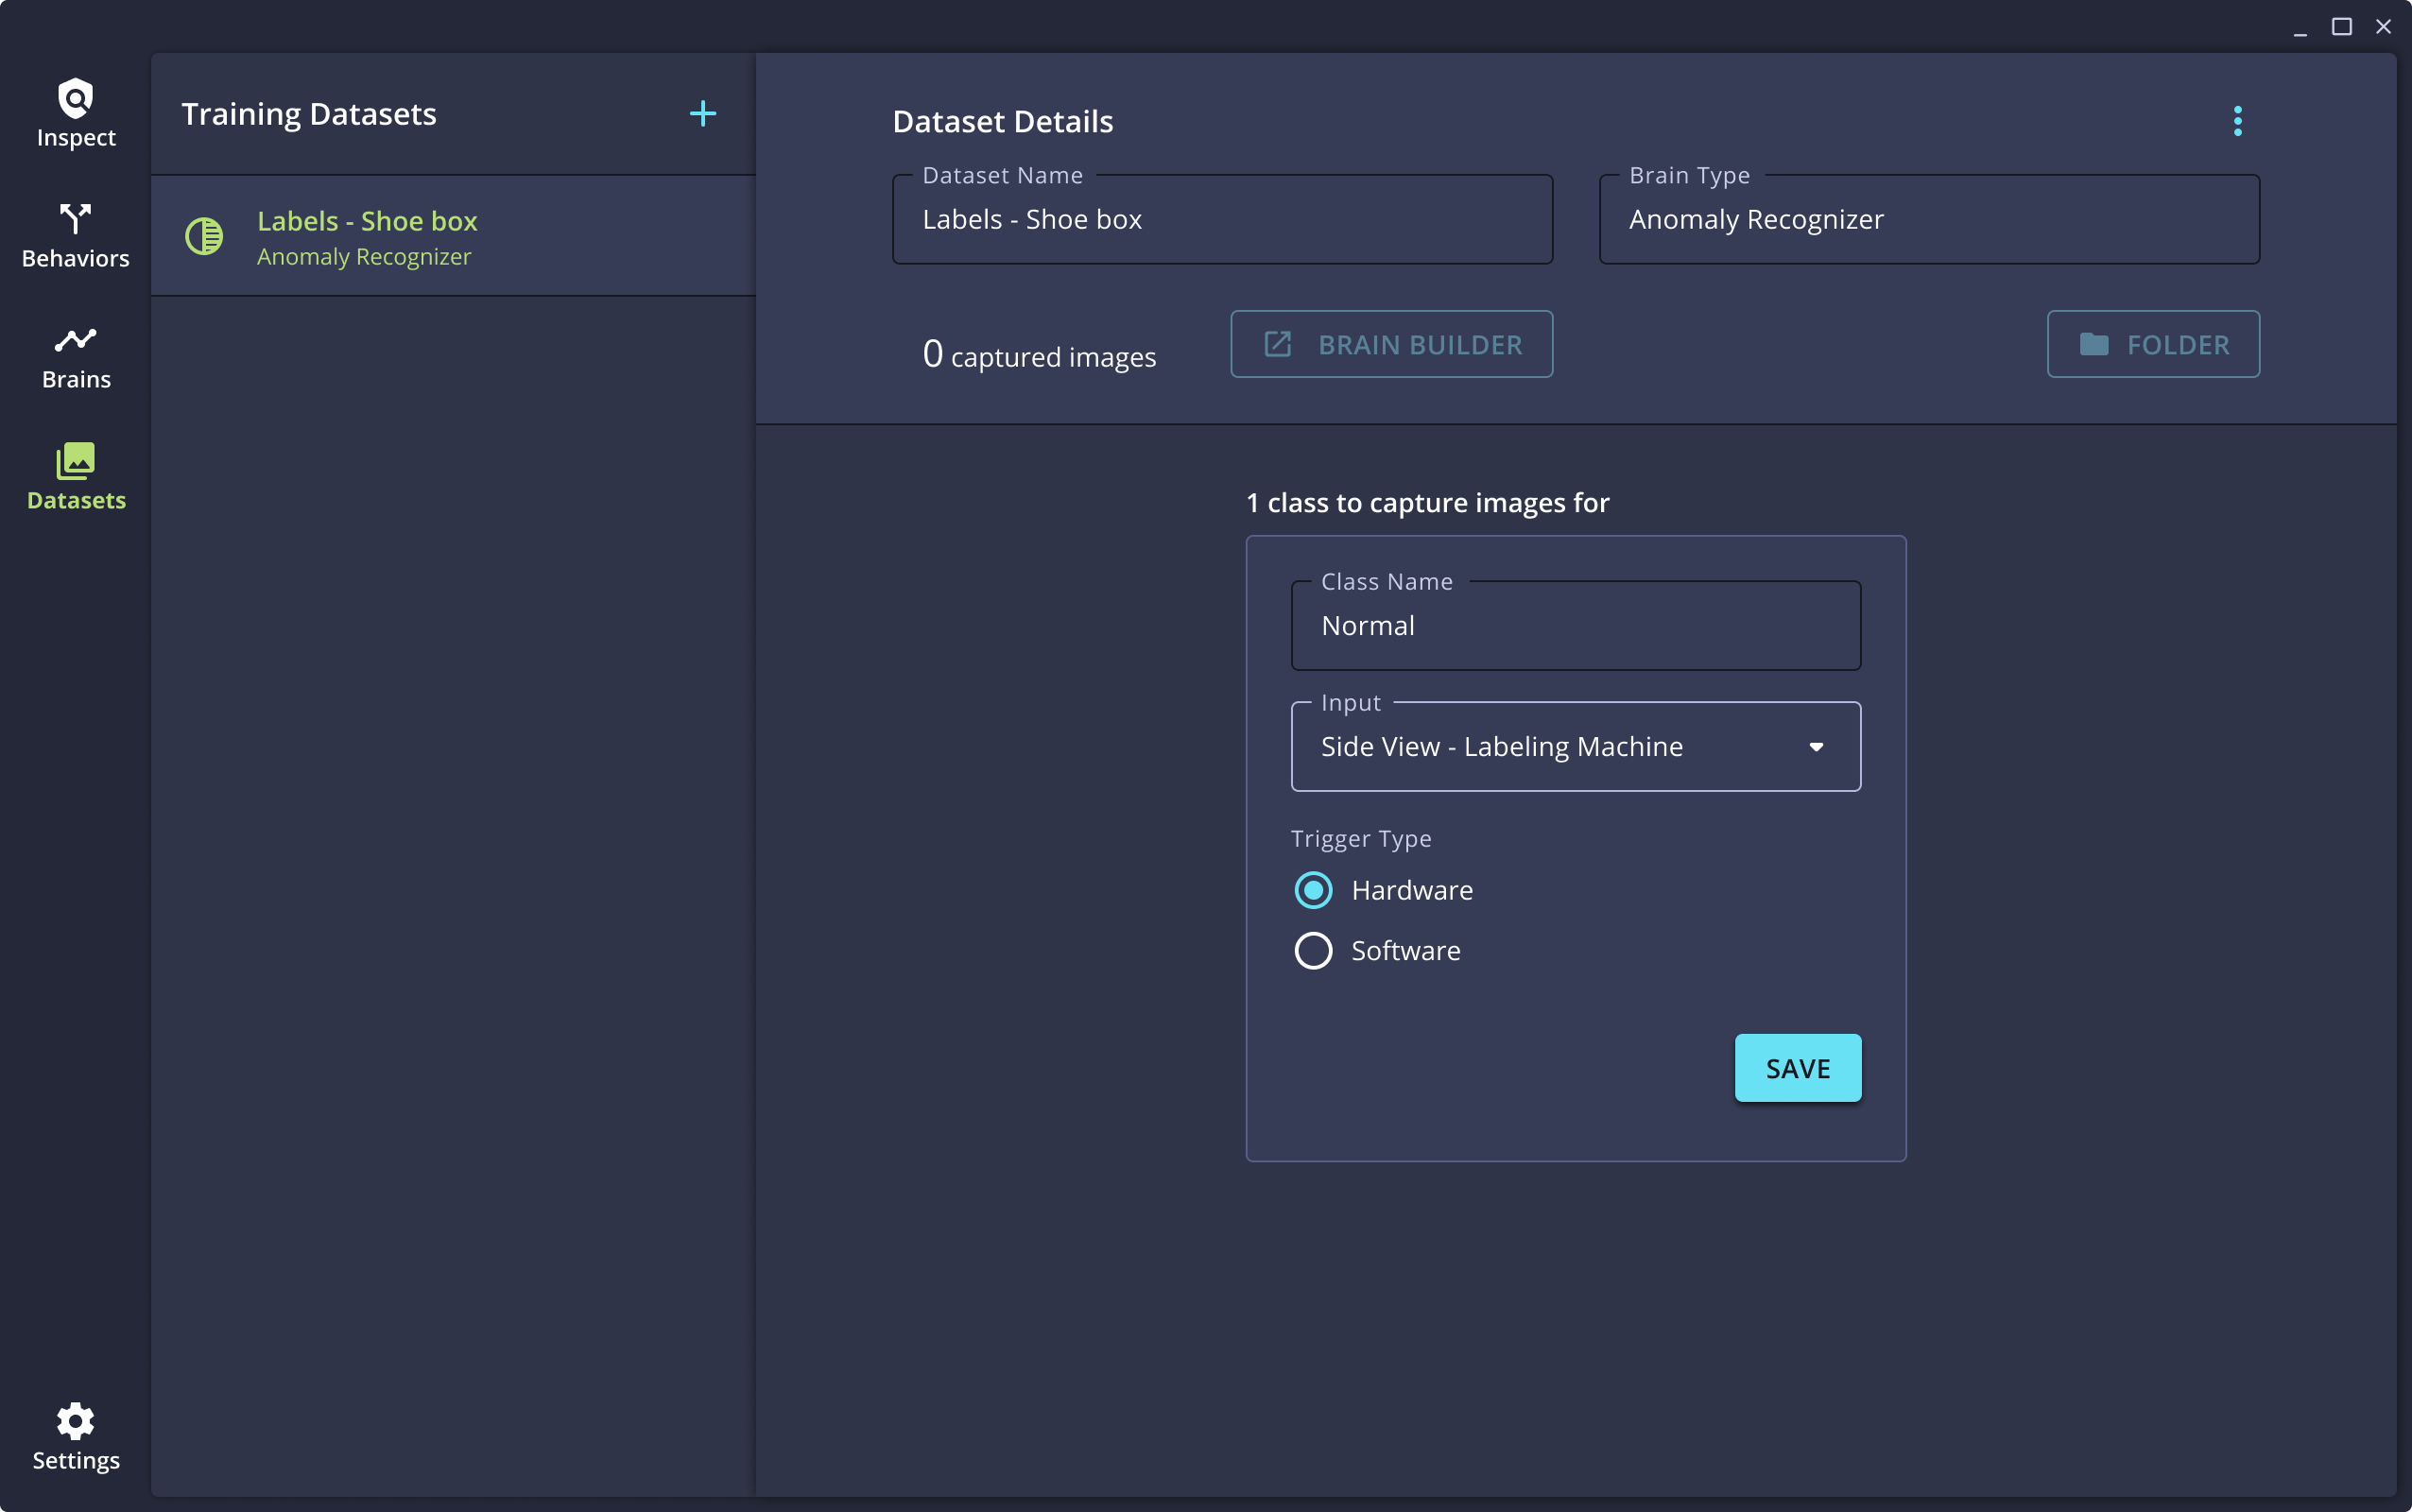
- Brain Type - choose either Anomaly Recognizer or Classifier. This setting can help you organize the images you capture for the selected model type. It does not force you to train that type of Brain. If you are training a Detector, you can capture images using either of these options.
- Click Save to move to the next step.
Capturing Images - Classifier
The types and quantity of images you capture will depend on the type of Brain you intend to train. For a Classifier, Neurala recommends starting with approximately 50 images for each class.
Inspector offers the ability to organize captured images by class into folders, which will make it more efficient to train a Brain in Brain Builder. If it is not feasible to capture images of each class individually, then you can also capture mixed class and organize them later.
-
First, click + Add Class and name the class of images you want to collect.
-
Name the class and select the Input (camera) you want to use to capture the images. You can select to capture images from the camera using either a Hardware Trigger or Software Trigger.
- A Hardware Trigger assumes that the camera will be triggered by a mechanism outside of Inspector, and Inspector will capture the images as they are delivered from the camera.
- A Software Trigger will enable a button or a timer in Inspector that can be used to trigger the camera directly if no hardware trigger is in use.
After the fields have been populated, click Save.
-
Prepare the camera with the products that you wish to capture images of.
- When using a hardware trigger, click Capture Images and Inspector will capture and save images as they are received from the camera. Inspector will display a running count of the number of images that have been captured. To stop capturing, click Stop Capturing Images.
- When using a software trigger, then the user must activate the Capture Mode toggle and then use the timer settings or click the Capture Image button to record each image.
To capture images for additional classes of objects, click the + button at the top right and repeat this process for each class. The images captured for each class will be stored in a distinct folder at the destination specified during the Inspector setup process.This folder may be easily accessed with the Folder button at the top of the Dataset page.
Capturing Images - Anomaly Recognizer
An Anomaly Recognizer Brain is trained using only images of Normal products. Neurala recommends starting with 50 Normal images and a handful of images of defects/anomalies (to be used to test and tune performance of the Brain in Brain Builder).
-
Create the Anomaly Recognizer Dataset. Inspector will automatically populate the fields for capturing images for the Normal class. Select the Input from which you wish capture images and specify whether a hardware or software trigger will be used to capture images from the camera. (See above for explanation of trigger options.)
-
Prepare the camera or production line with Normal, non-defective products.
-
When using a hardware trigger, click Capture Images and Inspector will capture and save images as they are received from the camera. Inspector will display a running count of the number of images that have been captured. To stop capturing, click Stop Capturing Images.
-
When using a software trigger, then the user must activate the Capture Mode toggle and then use the timer settings or click the Capture Image button to record each image.
After a sufficient number of images have been captured, open Brain Builder and use these images to train a Brain.
🗑️ Deleting datasets
Datasets and Classes within Datasets may be deleted by clicking on the menu button (represented by three vertical dots) and selecting Delete.
When a Class or Dataset is deleted, any associated images that have already been captured are not automatically deleted. They must be manually deleted from the computer via the file system.
Updated about 2 months ago