Training Detectors
The process to train a Detector is completed in two steps:
- Annotate the images with bounding boxes.
- Build the model.
If images have been uploaded with annotations (see Creating Datasets and Uploading Images), jump ahead to Building the Detector.
Bounding box annotation
After images have been uploaded into Brain Builder, they can be annotated in the Workspace. The Workspace is a feature-rich interface for drawing bounding boxes around objects of interest and labeling each one with a class.
Tagging tools
Brain Builder includes a number of tools in the Workspace to make your tagging more efficient—each of which is best suited to tag different types of objects. Tools may be selected with a mouse click or with hotkeys (noted in parentheses below).
Icon | Tool |
|---|---|
| Bounding Box (B) |
| Brightness (R) |
| Contrast (C) |
| Undo (Ctrl+Z Windows, Cmd+Z Mac) |
| Select (T) |
| Zoom (+/-) |


Tagging Images
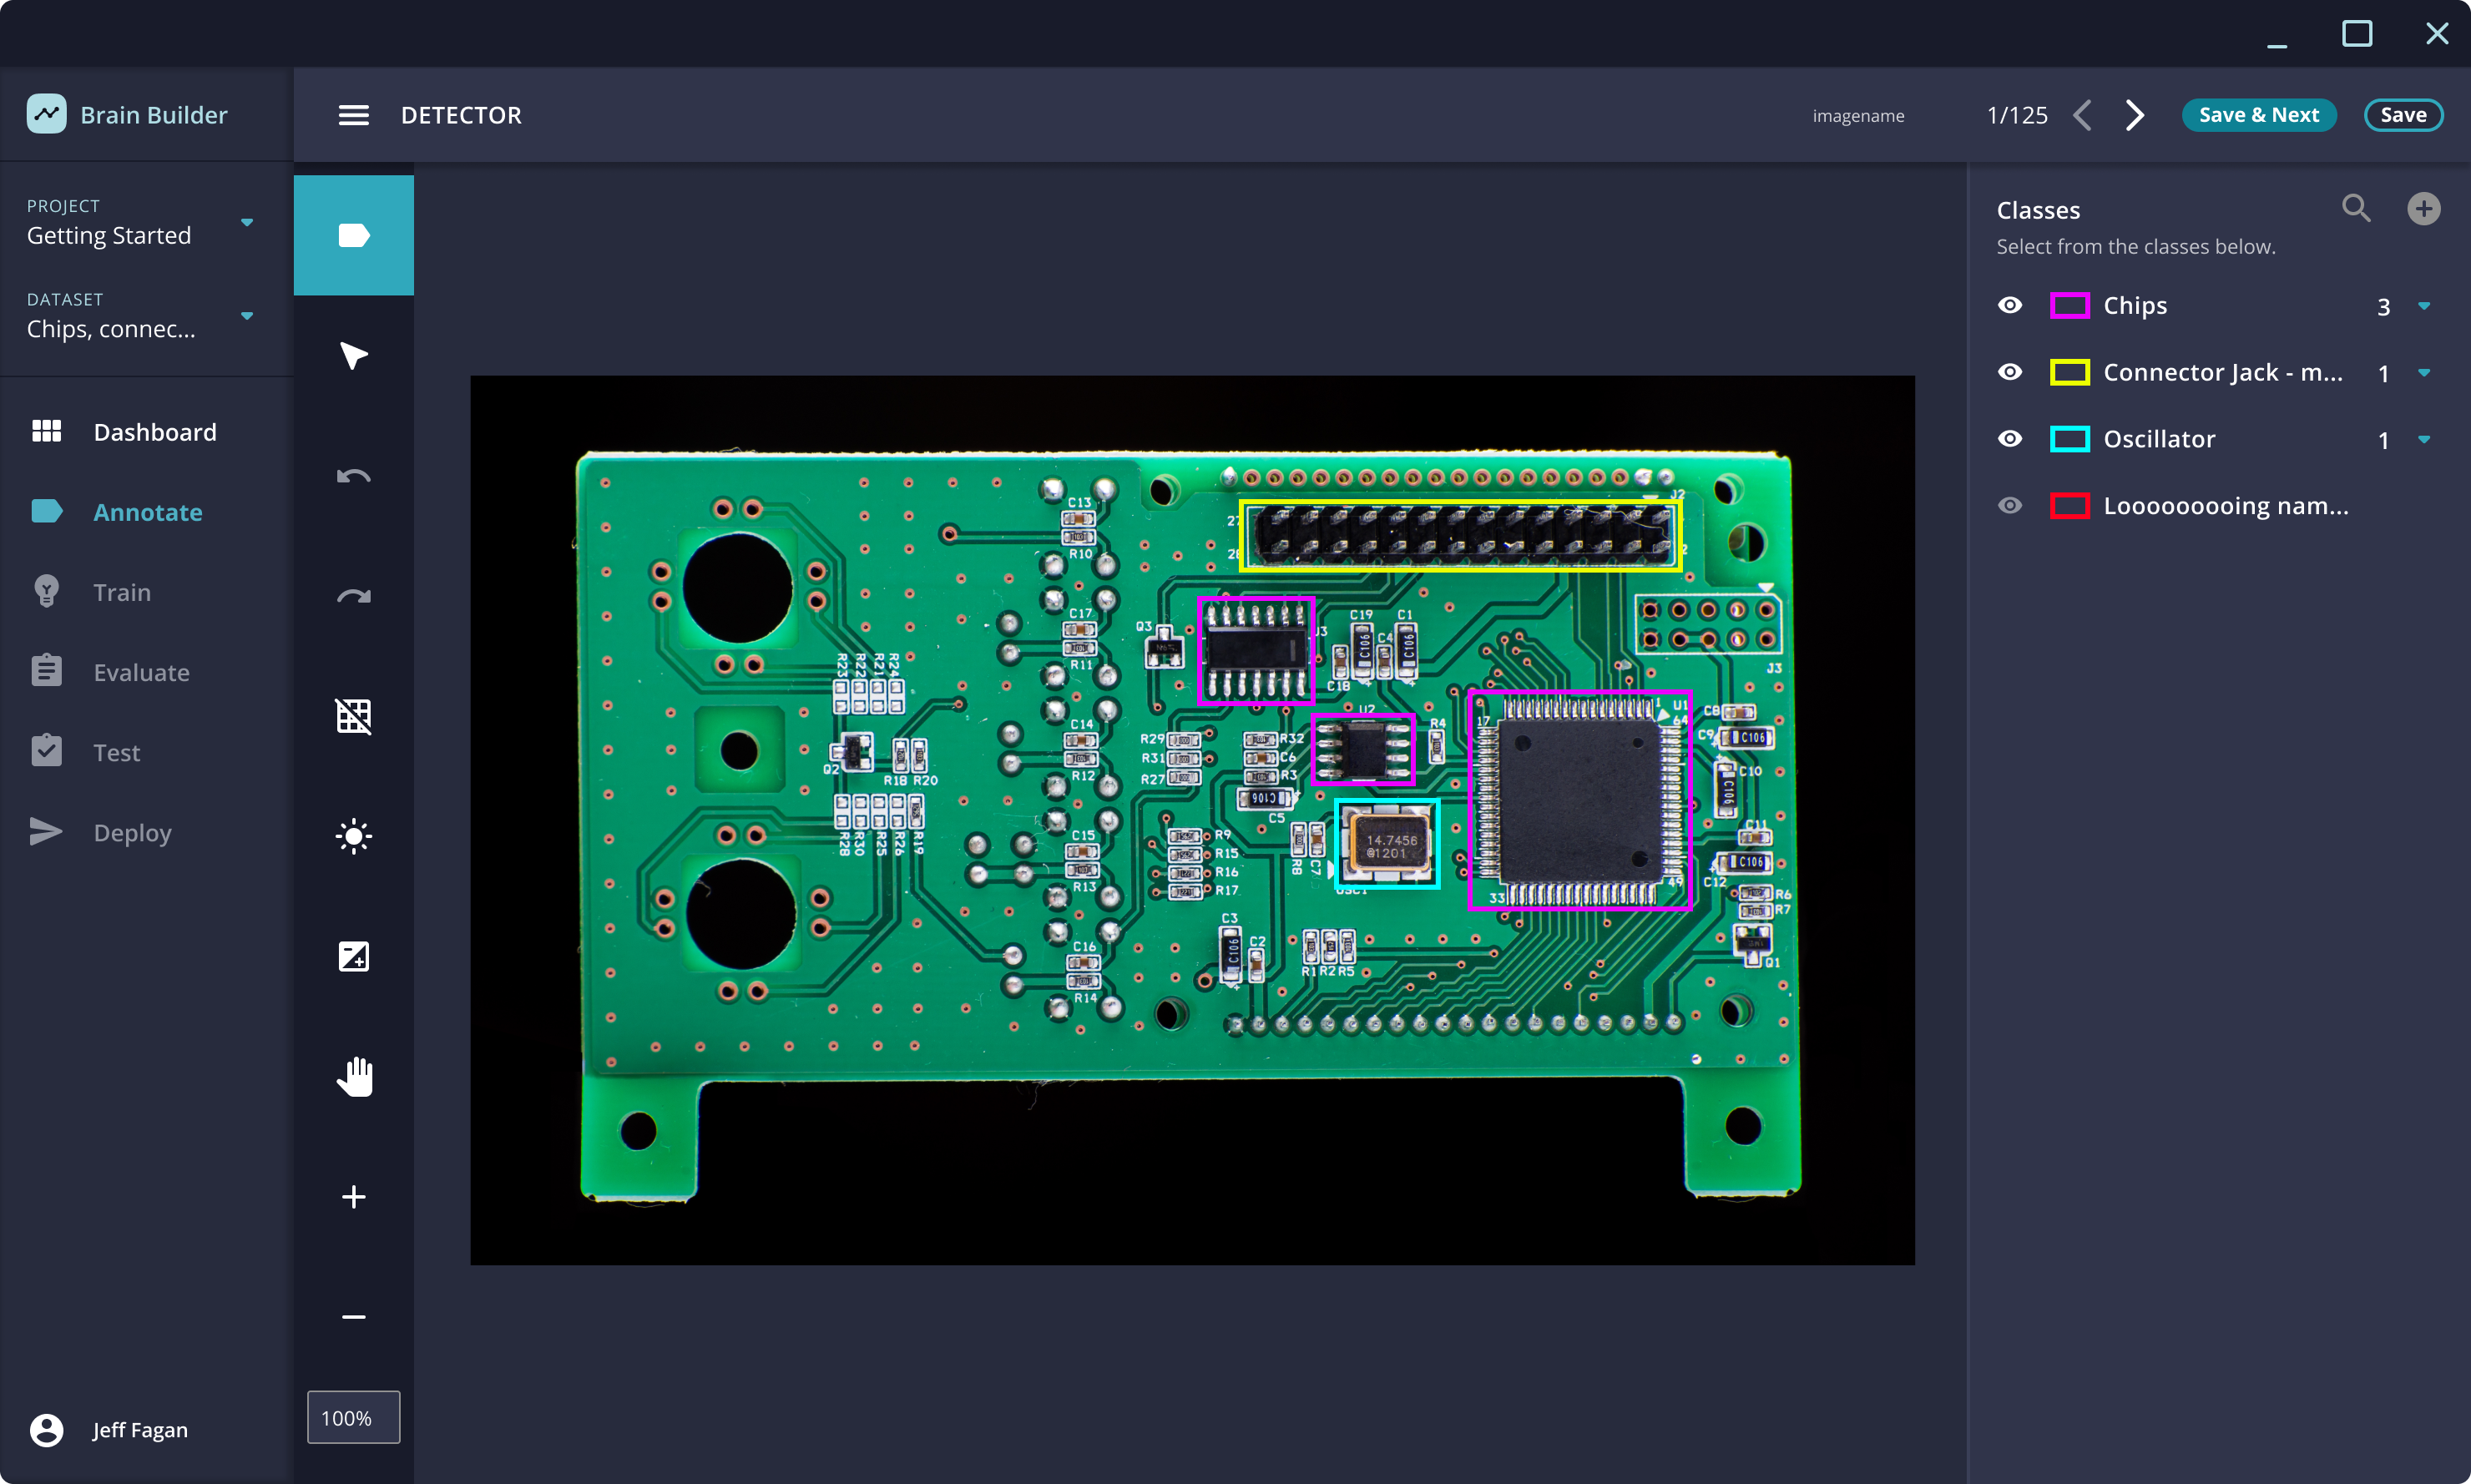
- Use the Bounding Box tool to draw rectangles around an object in the image that you want to label with a class.
- After drawing the bounding box, select a Class from the right-side list to apply it to that box. If the Class has not been set up for this dataset, click the plus icon to create a new class.
- When you have created bounding boxes for all items in this image, click the Next > arrow in the top-right corner to move to the next image. You will be prompted to either Save & Continue or Don't Save Boxes.
Building the Detector
After the images have all been annotated, it is time to build the Detector.
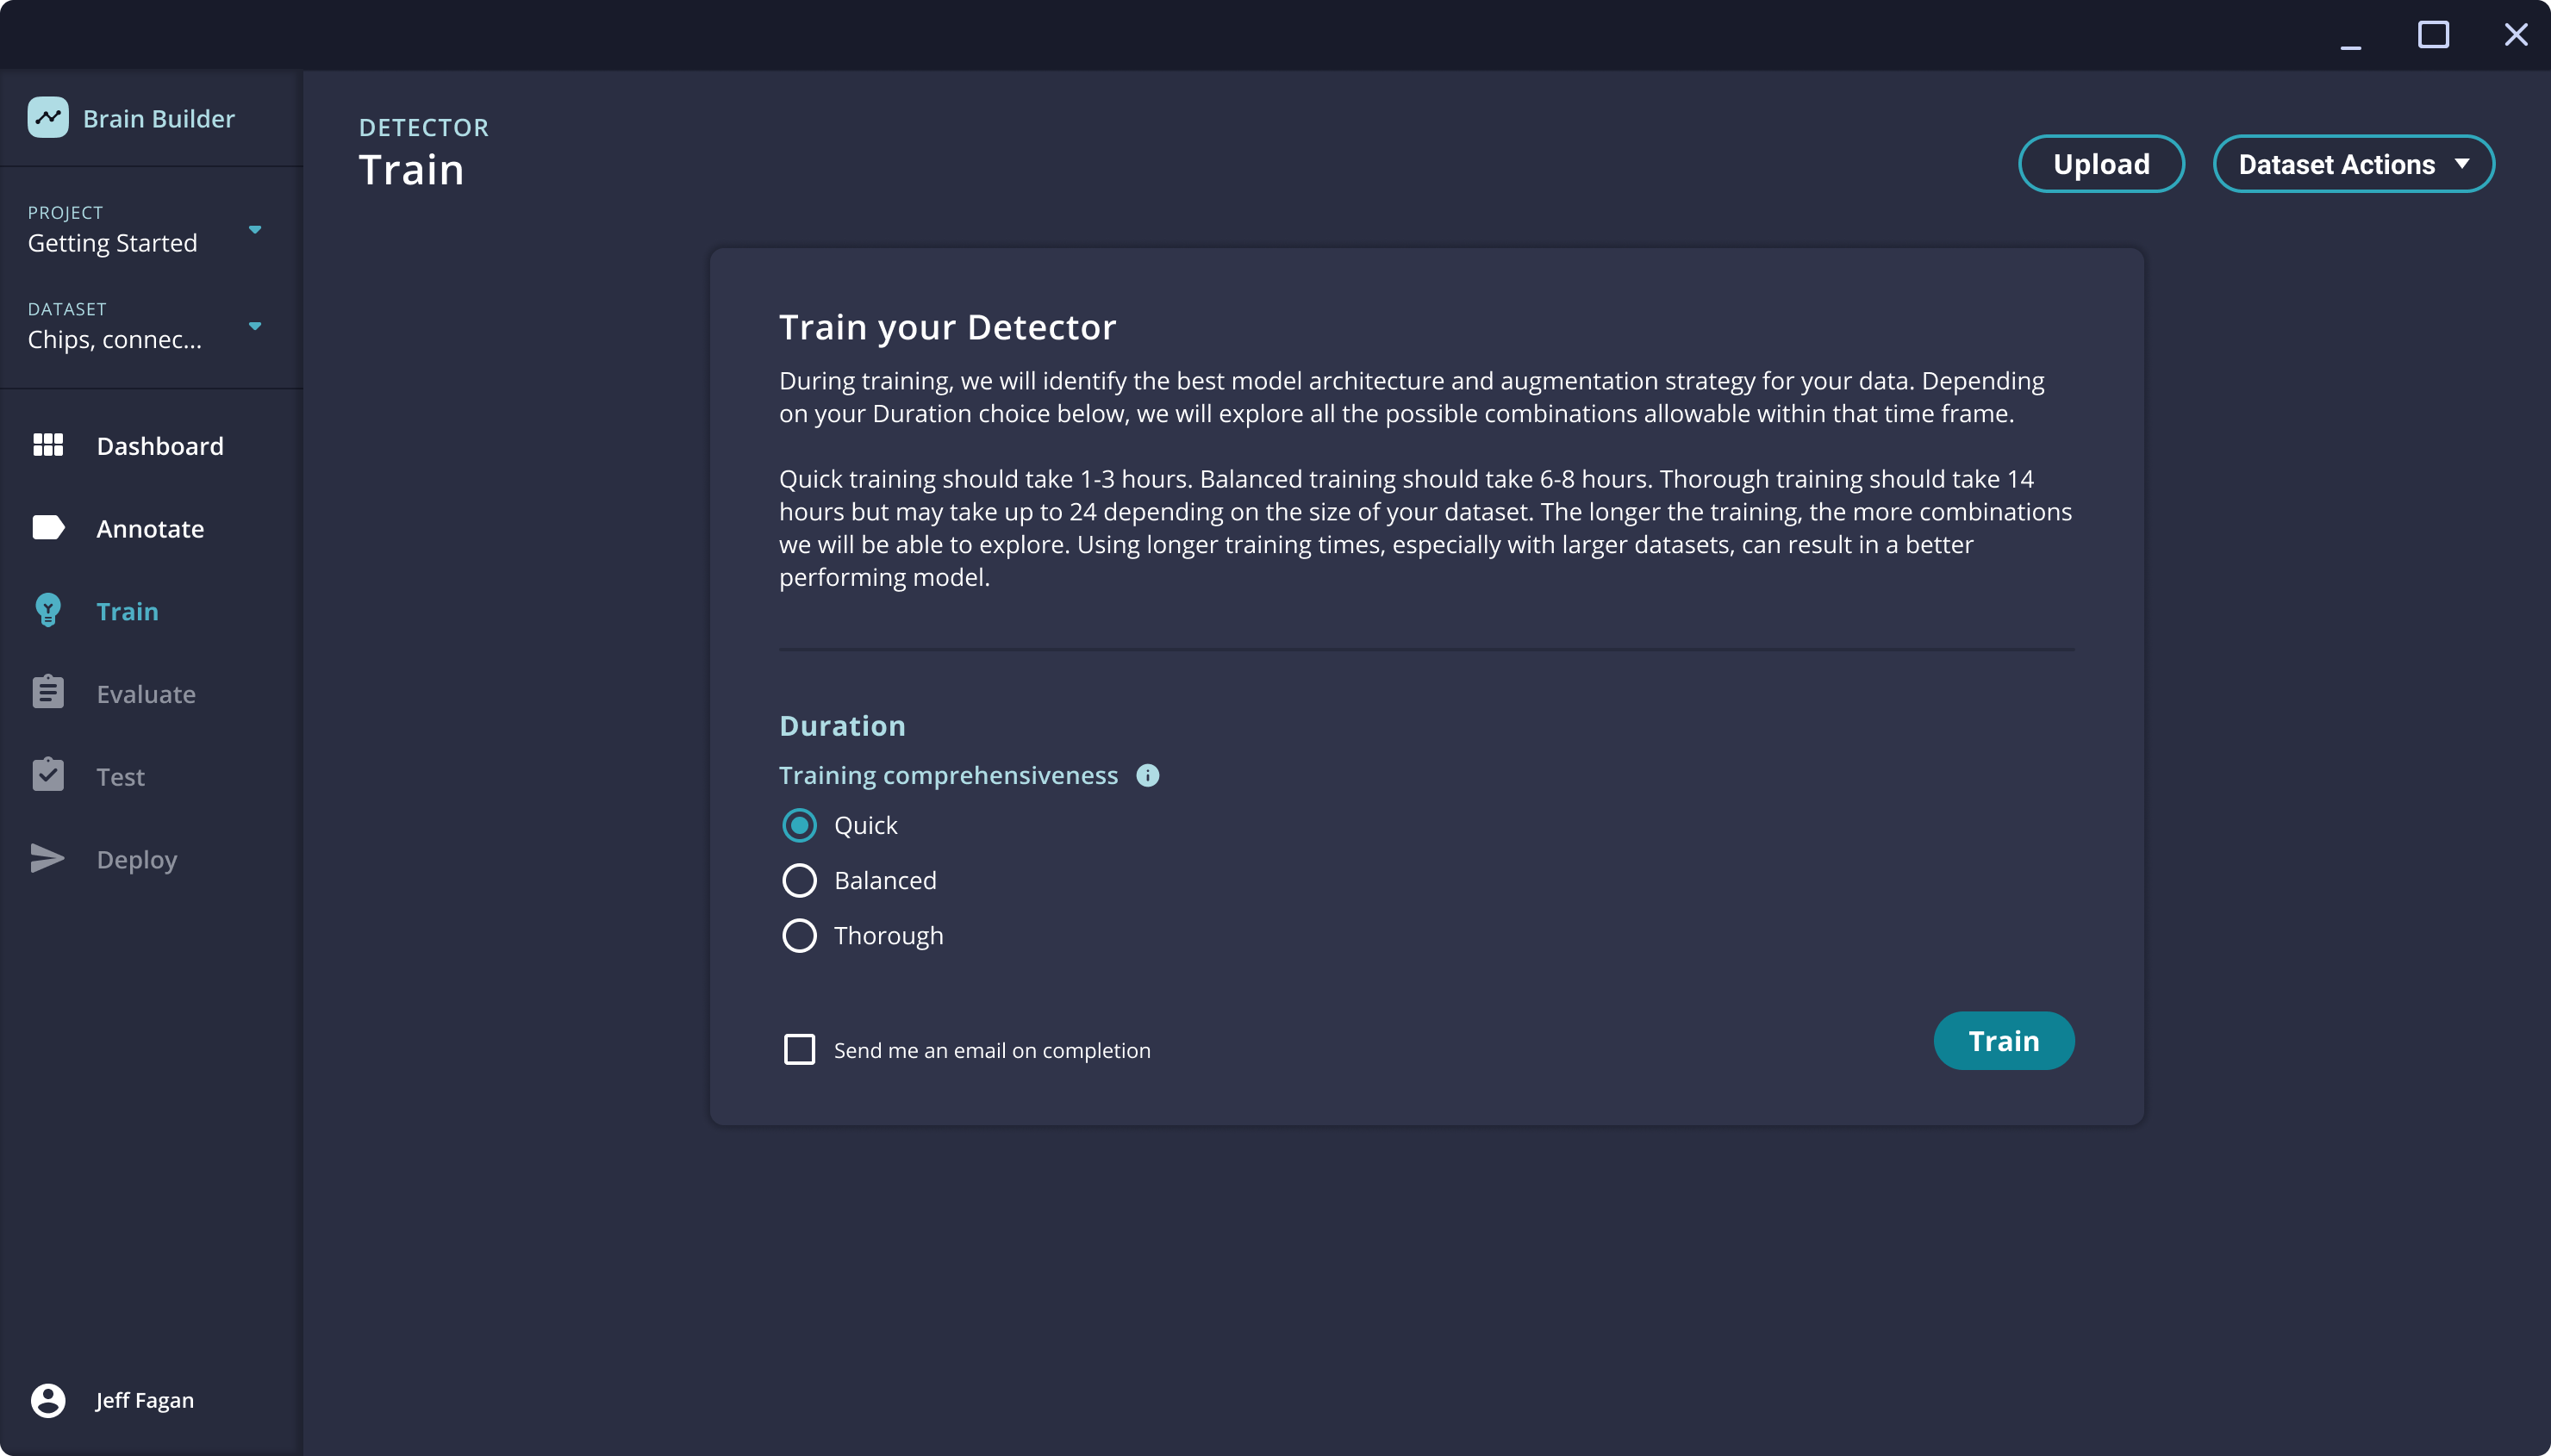
- Navigate to the Train page using the link on the left side of the screen.
- On the Train screen, select the Duration of the training that you want to use.
- Quick training will complete the fastest but may not result in the highest accuracy.
- Thorough training takes the longest time to process and ensures the best results.
- Balanced training falls between the other two options.
After the training duration has been selected, click the Train button.
- Training can take multiple hours, depending on the number of images and annotations in the dataset. If you selected the option to be emailed on completion, then Brain Builder will send an email once the training has finished.
Updated about 1 year ago