Inspector for AITRIOS
Neurala has developed Inspector for AITRIOS to work with the Lucid Labs Triton501 camera, featuring Sony's IMX501 image sensor with AI processing capabilities.
Inspector for AITRIOS is similar to Neurala's standard Inspector application. The following documentation will be helpful in understanding how to use Inspector for AITRIOS.
There are some key differences in Inspector for AITRIOS, so please read this page carefully to understand how to use the application.
⚙️ Environment configuration
To enable Inspector to work properly with the Triton501 camera, some configuration steps are required.
Set Windows Environment Variable
- Open the Start menu and type "environment". Select Edit the system environment variables.
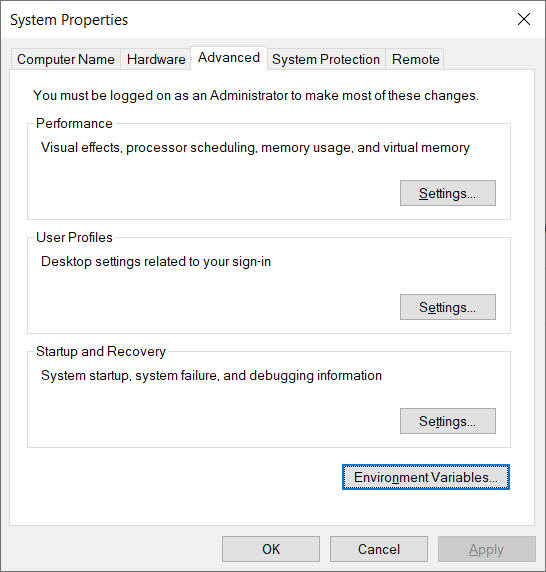
- In the System Properties window that appears, click the Environment Variables button.
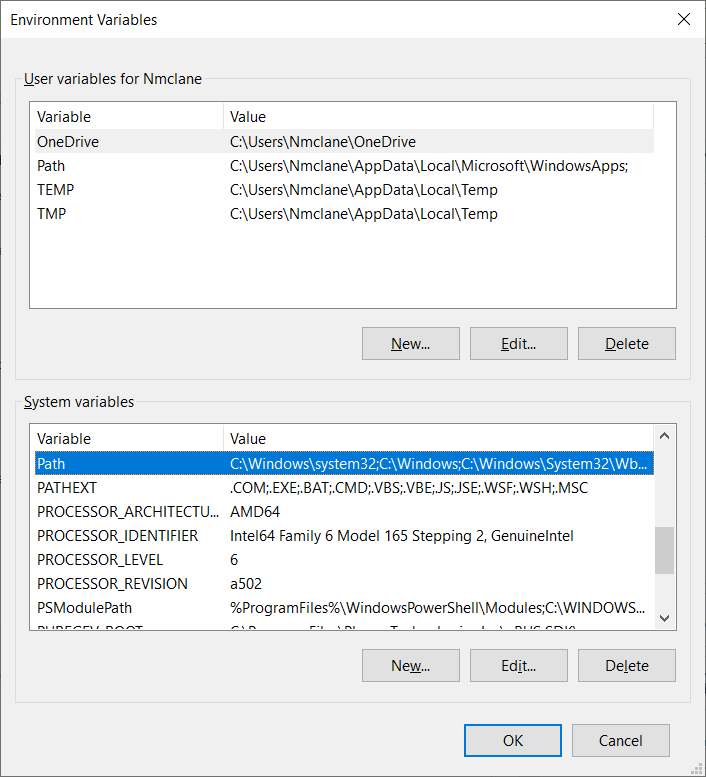
- Under the section labeled System variables click the New... button
- Enter the following in the Variable name field:
NEURALA_GAV_FORCE_LIVE_STREAMING
Enter the following in the Variable value field:TRUE
Click OK. - In the Environment Variables window, click OK. In the System Properties window, click OK.
Set Linux variable
- Open the Config.xml file that should be located at
/opt/Neurala/SDKService/share/Config.xml. - In the
<Configuration>group, add the following:<Option name="NEURALA_GAV_FORCE_LIVE_STREAMING" value="TRUE"/>. - Save the changes to the Config.xml file and restart the Neurala SDKService by running
sudo service neurala_sdkservice restartin a Terminal window.
📷 Connect the Triton501 camera
Before connecting the Triton501 camera to Inspector, note the following requirements:
- Make sure the Triton501 camera has the most recent firmware installed.
- The computer and camera must be on the same network.
- The camera MTU needs to be set above 9000 (above computer interface), otherwise the camera initialization will fail and the Inspection won't start. In Windows, this setting is called "Jumbo Packets."
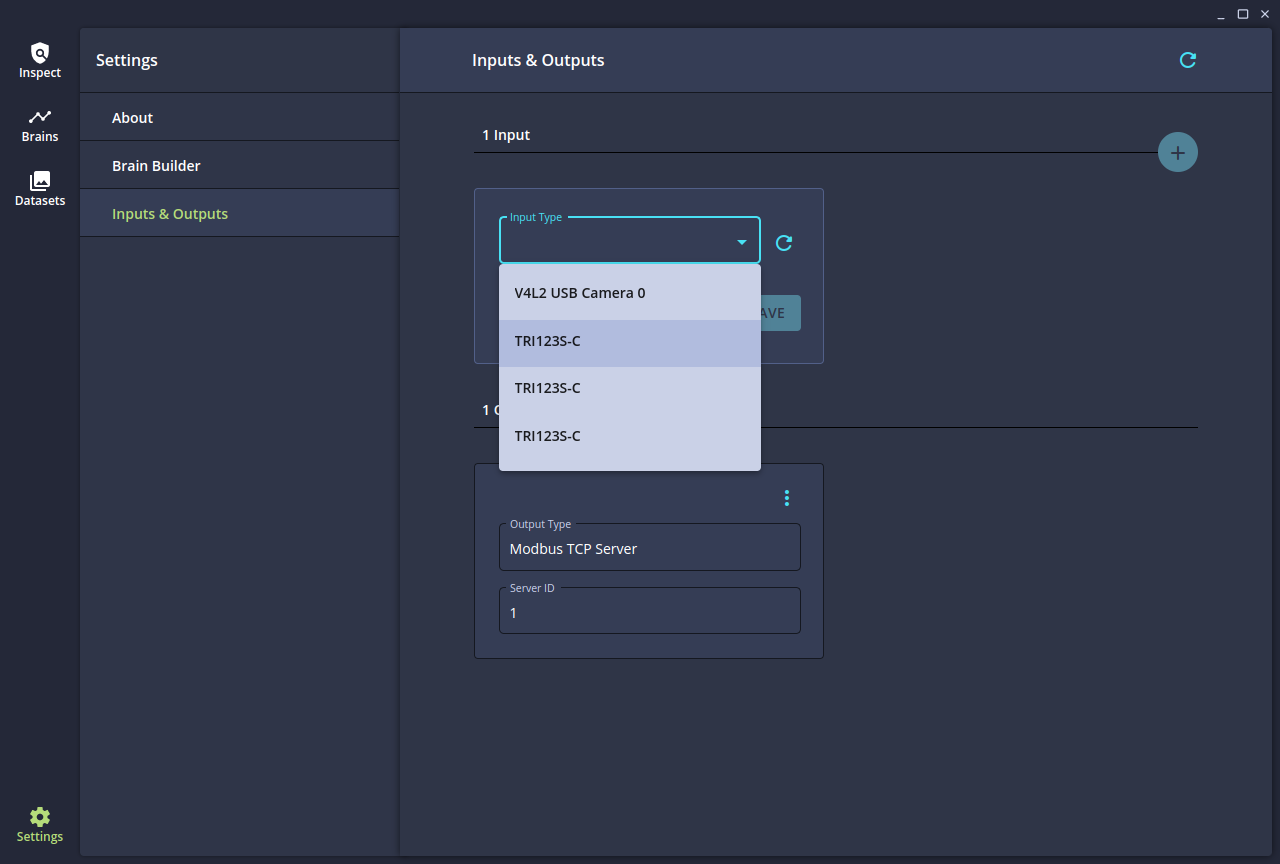
To set the camera as an Input in Inspector, follow the instructions in Using Inspector. On the Inputs screen, Inspector should recognize the connected Triton501 camera. Select it and save it as an Input.
:arrow-heading-down: Importing & loading Brains
In Neurala's standard Inspector application, images are captured from a connected camera and inspections are run using a Brain on the PC.
In Inspector for AITRIOS, the Brain is loaded directly onto the camera and most of the inspection process is completed there. Inspector receives the output from the camera and displays the inspection results for the user.
The process to load Brains onto the Triton501 camera and import them into Inspector involves a few steps:
- Export the trained Brain from Brain Builder for AITRIOS. See Brain Builder for AITRIOS.
- Load the Brain onto the Triton501 camera using the tools provided by Lucid Labs:
- Use the LucidConverterTool to convert and package the exported Brain. (This tool can be obtained from Lucid Labs.)
- Use the Lucid Labs Arena software to load the converted Brain onto the Triton501 camera. This is done using the firmware update page in ArenaView.
- Import the Brain into Inspector.
On the Brains page, click the + button to import the Brain. Use the file menu to locate the zip file that was exported from Brain Builder.
A few key notes:
Be sure to import the same Brain into Inspector that you used with the Lucid applications to convert and load onto the camera.
When a Brain has been converted with the LucidConverterTool, it will only work on the camera that was specified during the conversion process. If you want to run that same Brain on a different Triton501 camera, it will need to be converted and packaged again.
- Configure the Brain output settings according to the instructions on Importing Brains.
🔍 Running inspections
On the Inspect page, you should see the Triton501 camera as an available input.
- Use the + button to add a Brain to the camera. Use the drop-down to select the same Brain that you already loaded onto the camera using the Arena software.
- After the Brain has been added to the input, click Start Inspecting 1 Input. This will begin the inspection process.
The Triton501 camera has to "initialize" the Brain the first time you run the inspection. This process will take 30-60 seconds in most cases.
Inspections will then run, and the images and results can be viewed by clicking on the Live View link.
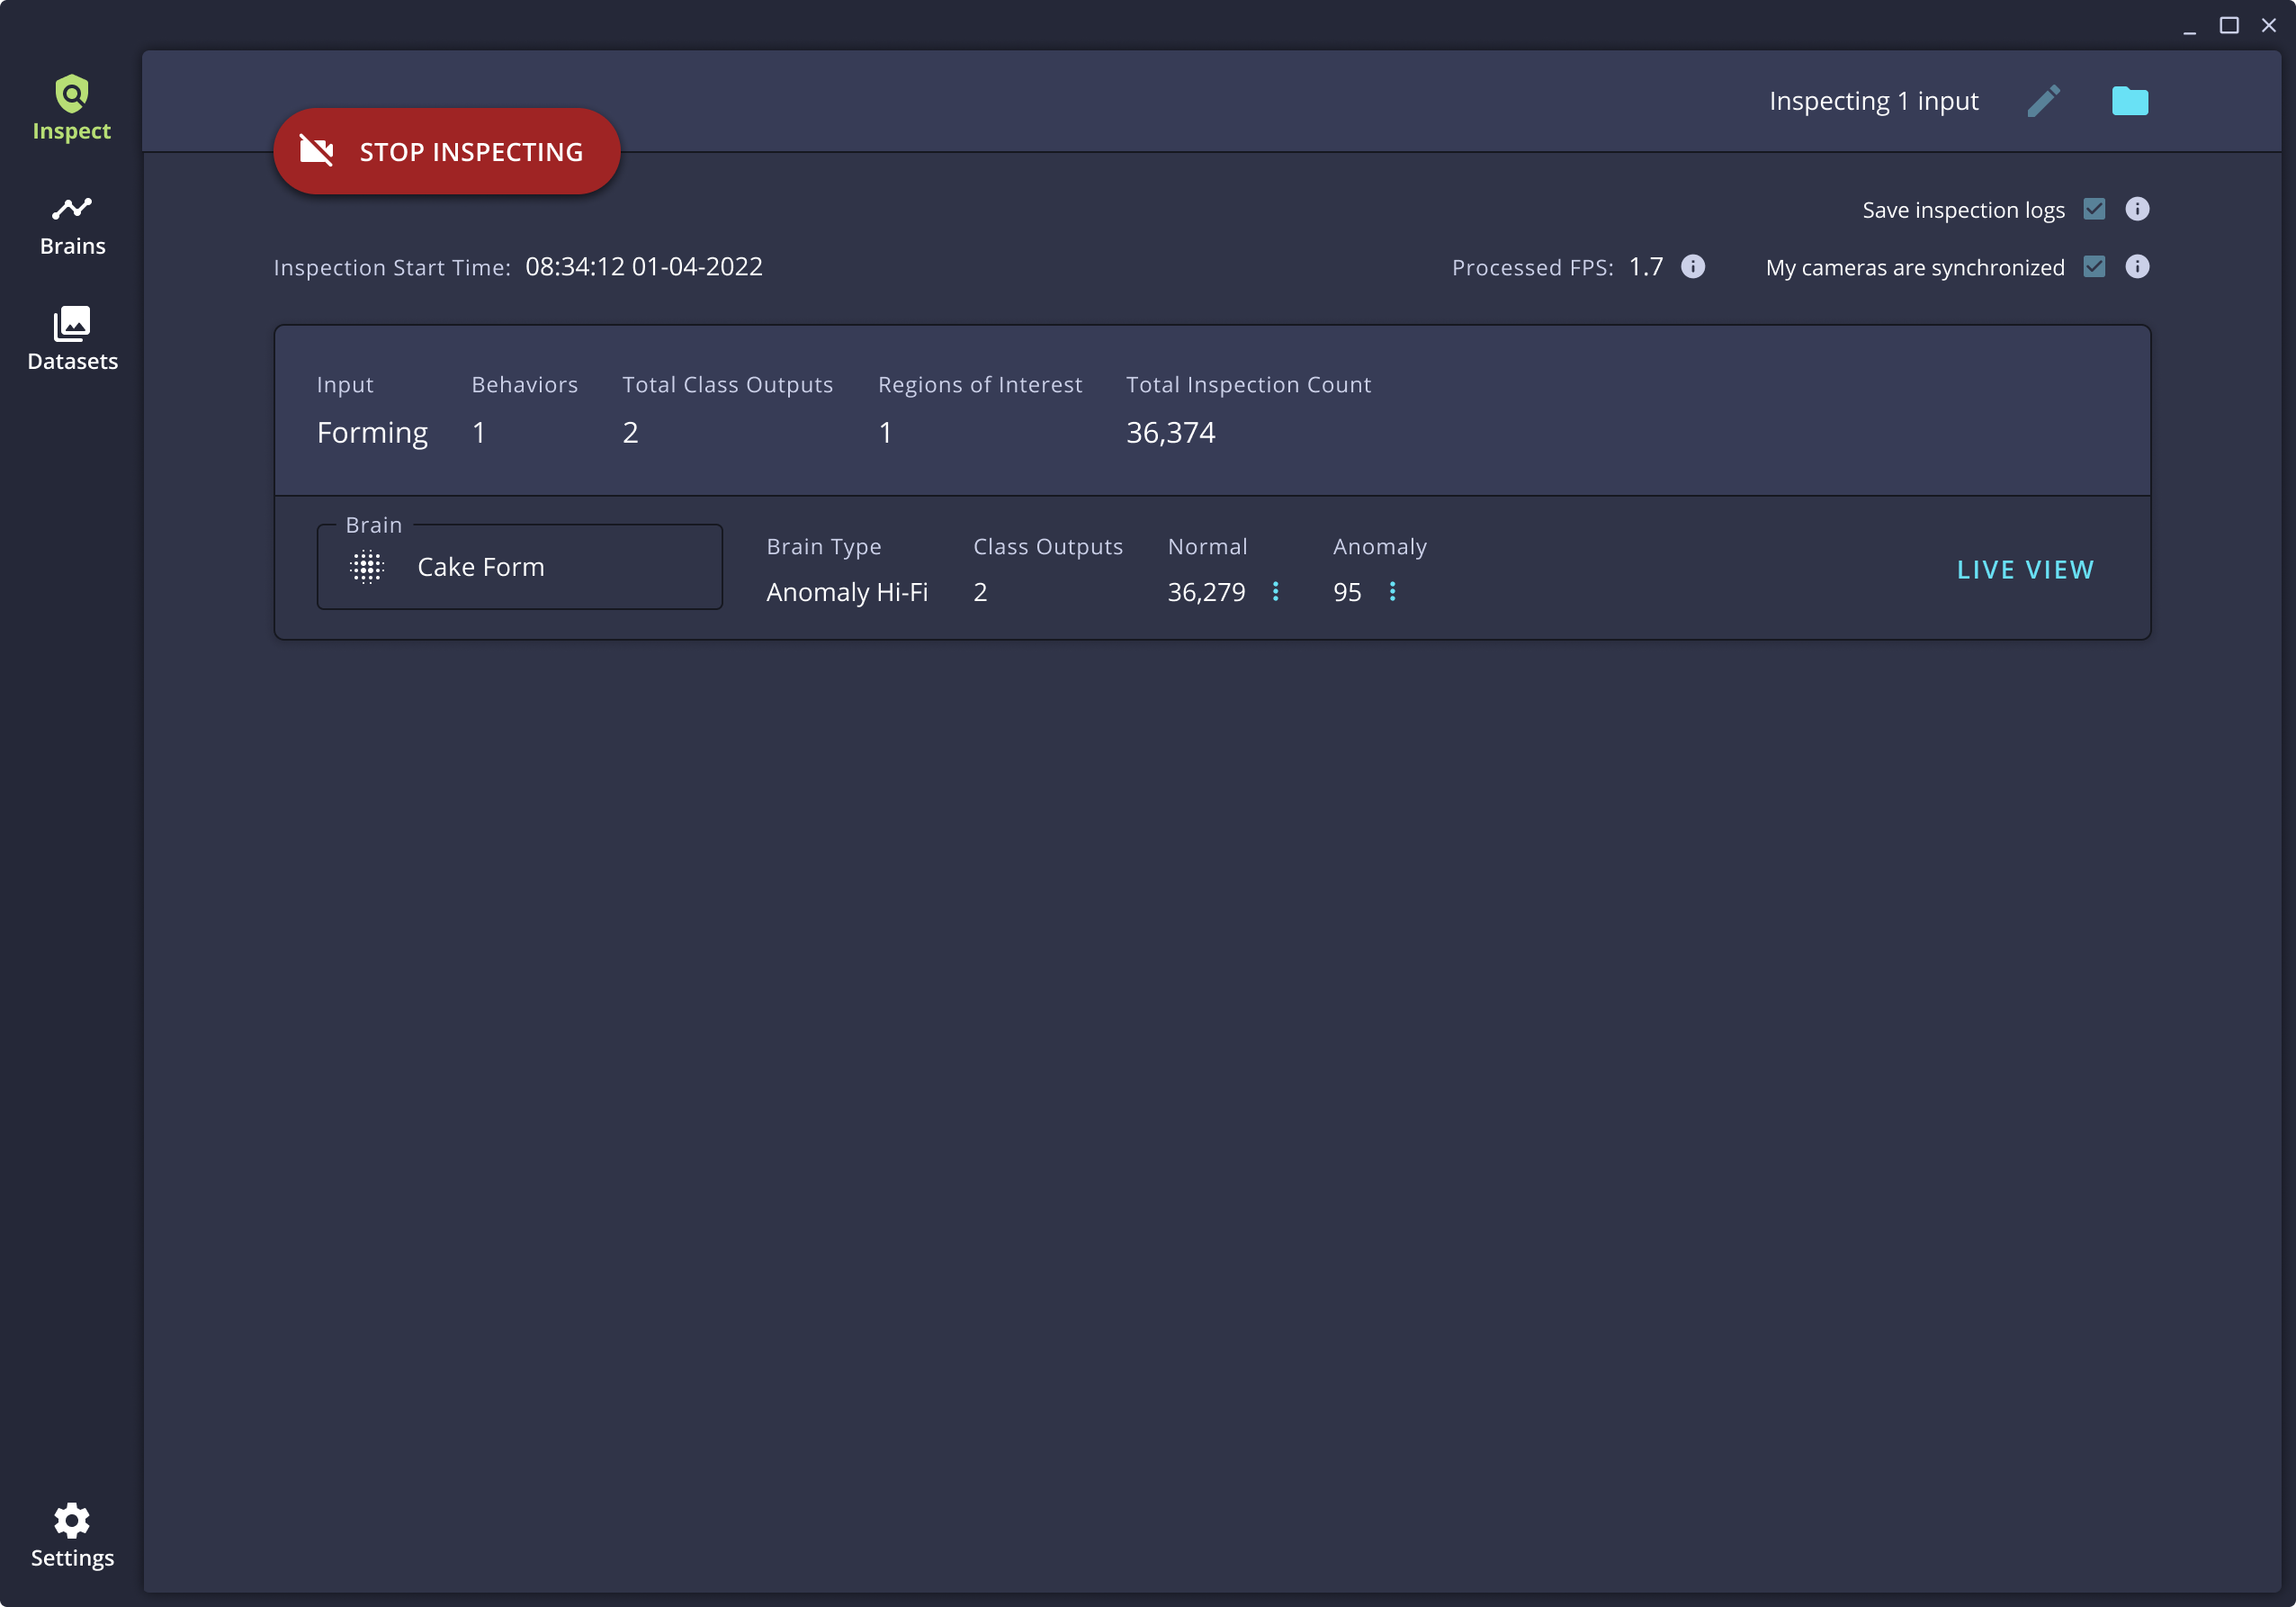
To stop inspections, click the Stop Inspecting button.
🤔 Camera connection troubleshooting
There may be scenarios in which Inspector is not able to appropriately connect to or recognize the Triton501 camera. The following steps may be helpful to resolve this problem.
Linux
Click to display Linux troubleshooting steps
-
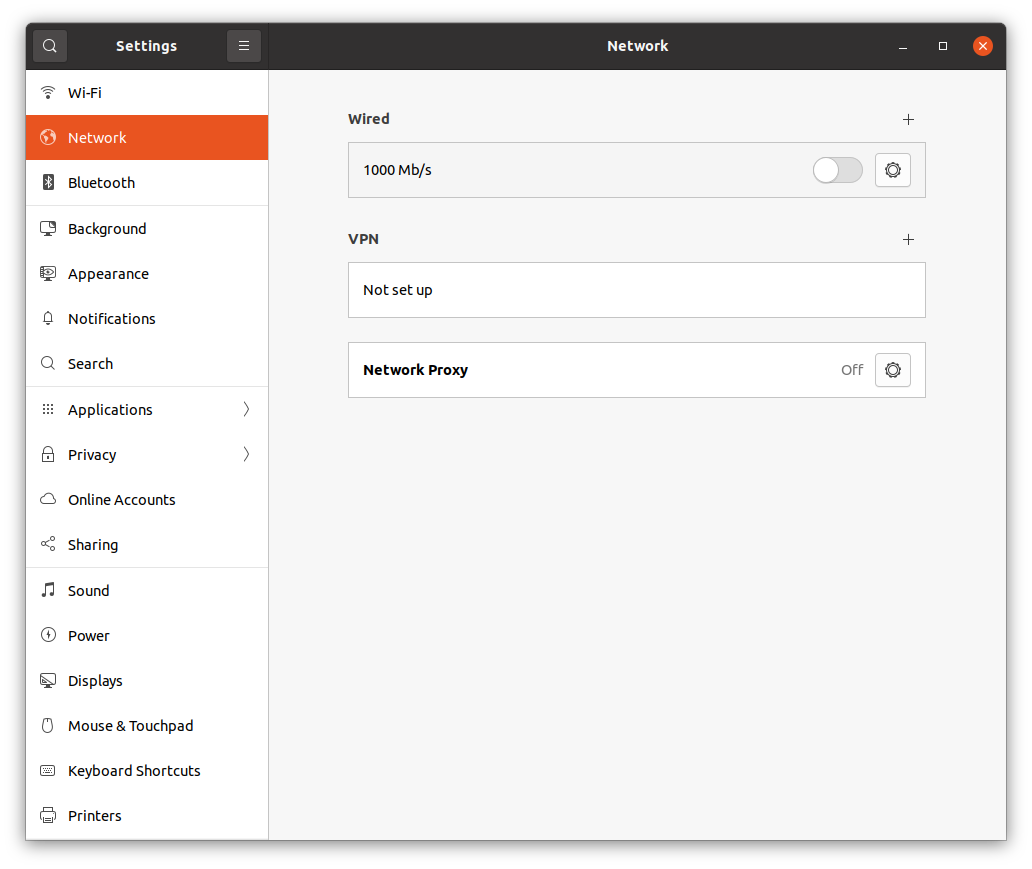
In Ubuntu Linux, click the Power/Settings menu at the top right and select Wired Connected > Wired Settings.
-
Turn off the Wired option.
-
Select the Gear button to enter the Wired settings.
-
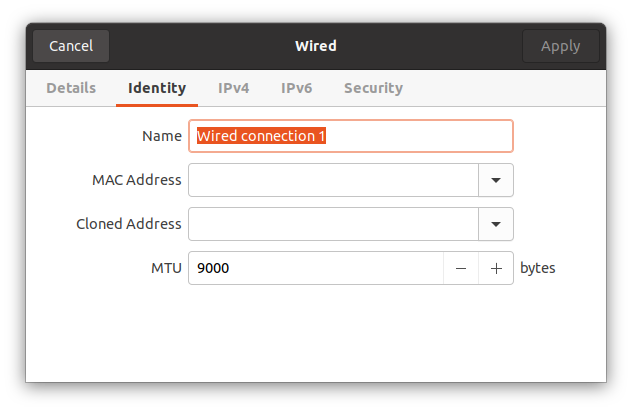
Select the Identity tab. Make sure MTU is set to 9000.
-
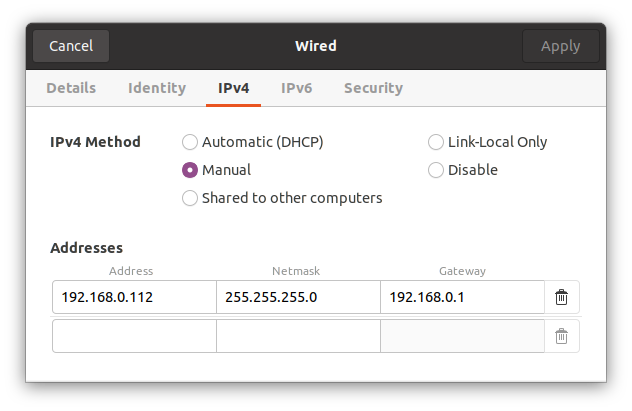
Select the IPv4 tab. Set the method to Manual and enter the appropriate network information for the connected Triton501 camera.
-
Click Apply to save your changes and close the settings menu. In the network menu, turn the slider switch below wired back on.

-
Run Inspector. The Triton501 camera should now be visible in the Inputs settings page from the Input Type dropdown.
-
Select the Triton501 camera and click the Live View button to confirm the camera connection works as expected. Save the input.
Windows
Click to display Windows troubleshooting steps
If the Triton501 camera is not visible in Inspector, first use the Arena View software to confirm the camera is connected, powered on, and working properly. Then, follow the following steps.
-
Open the Windows System Properties menu and click on Environment Variables.
-
In the System Variables listing, find the variable called Path. Double click it or click Edit to open it.
-
Look for any entries for
C:\Program Files\Neurala\SDKService\bin. Remove any duplicates so there is only one, then place it a the bottom of the list.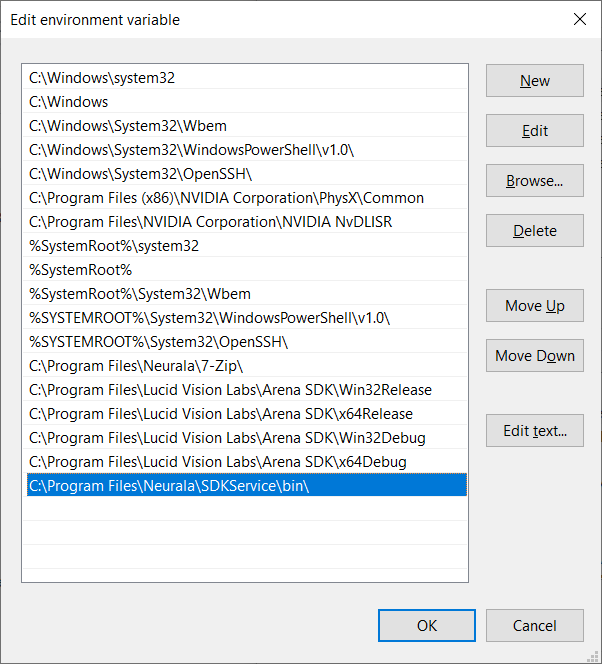
-
Click Ok on all windows to save your changes.
-
Open the Windows Services application. Find the Service called Neurala SDKService and restart it.
-
Open Inspector and go to the Settings > Inputs page to add the Triton501 camera as an input.
Updated 23 days ago