Training Classifiers and Anomaly Recognizers
Overview
There are a number of steps that may be taken to train and tune performance of a Classifier or Anomaly Recognizer in Brain Builder. Use of these steps may vary depending on the specifics of each use case and the type of Brain being trained.
Note that the process to train a Detector is slightly different and is documented here. (ADD LINK)
Brain Builder can train two different versions of Classifiers and Anomaly Recognizers.
Classifiers
- Learning Classifiers use Neurala's Lifelong-Deep Neural Network (L-DNN), which specializes in quick learning and fast model iteration. This model is best suited for use cases that require frequent, iterative training sessions.
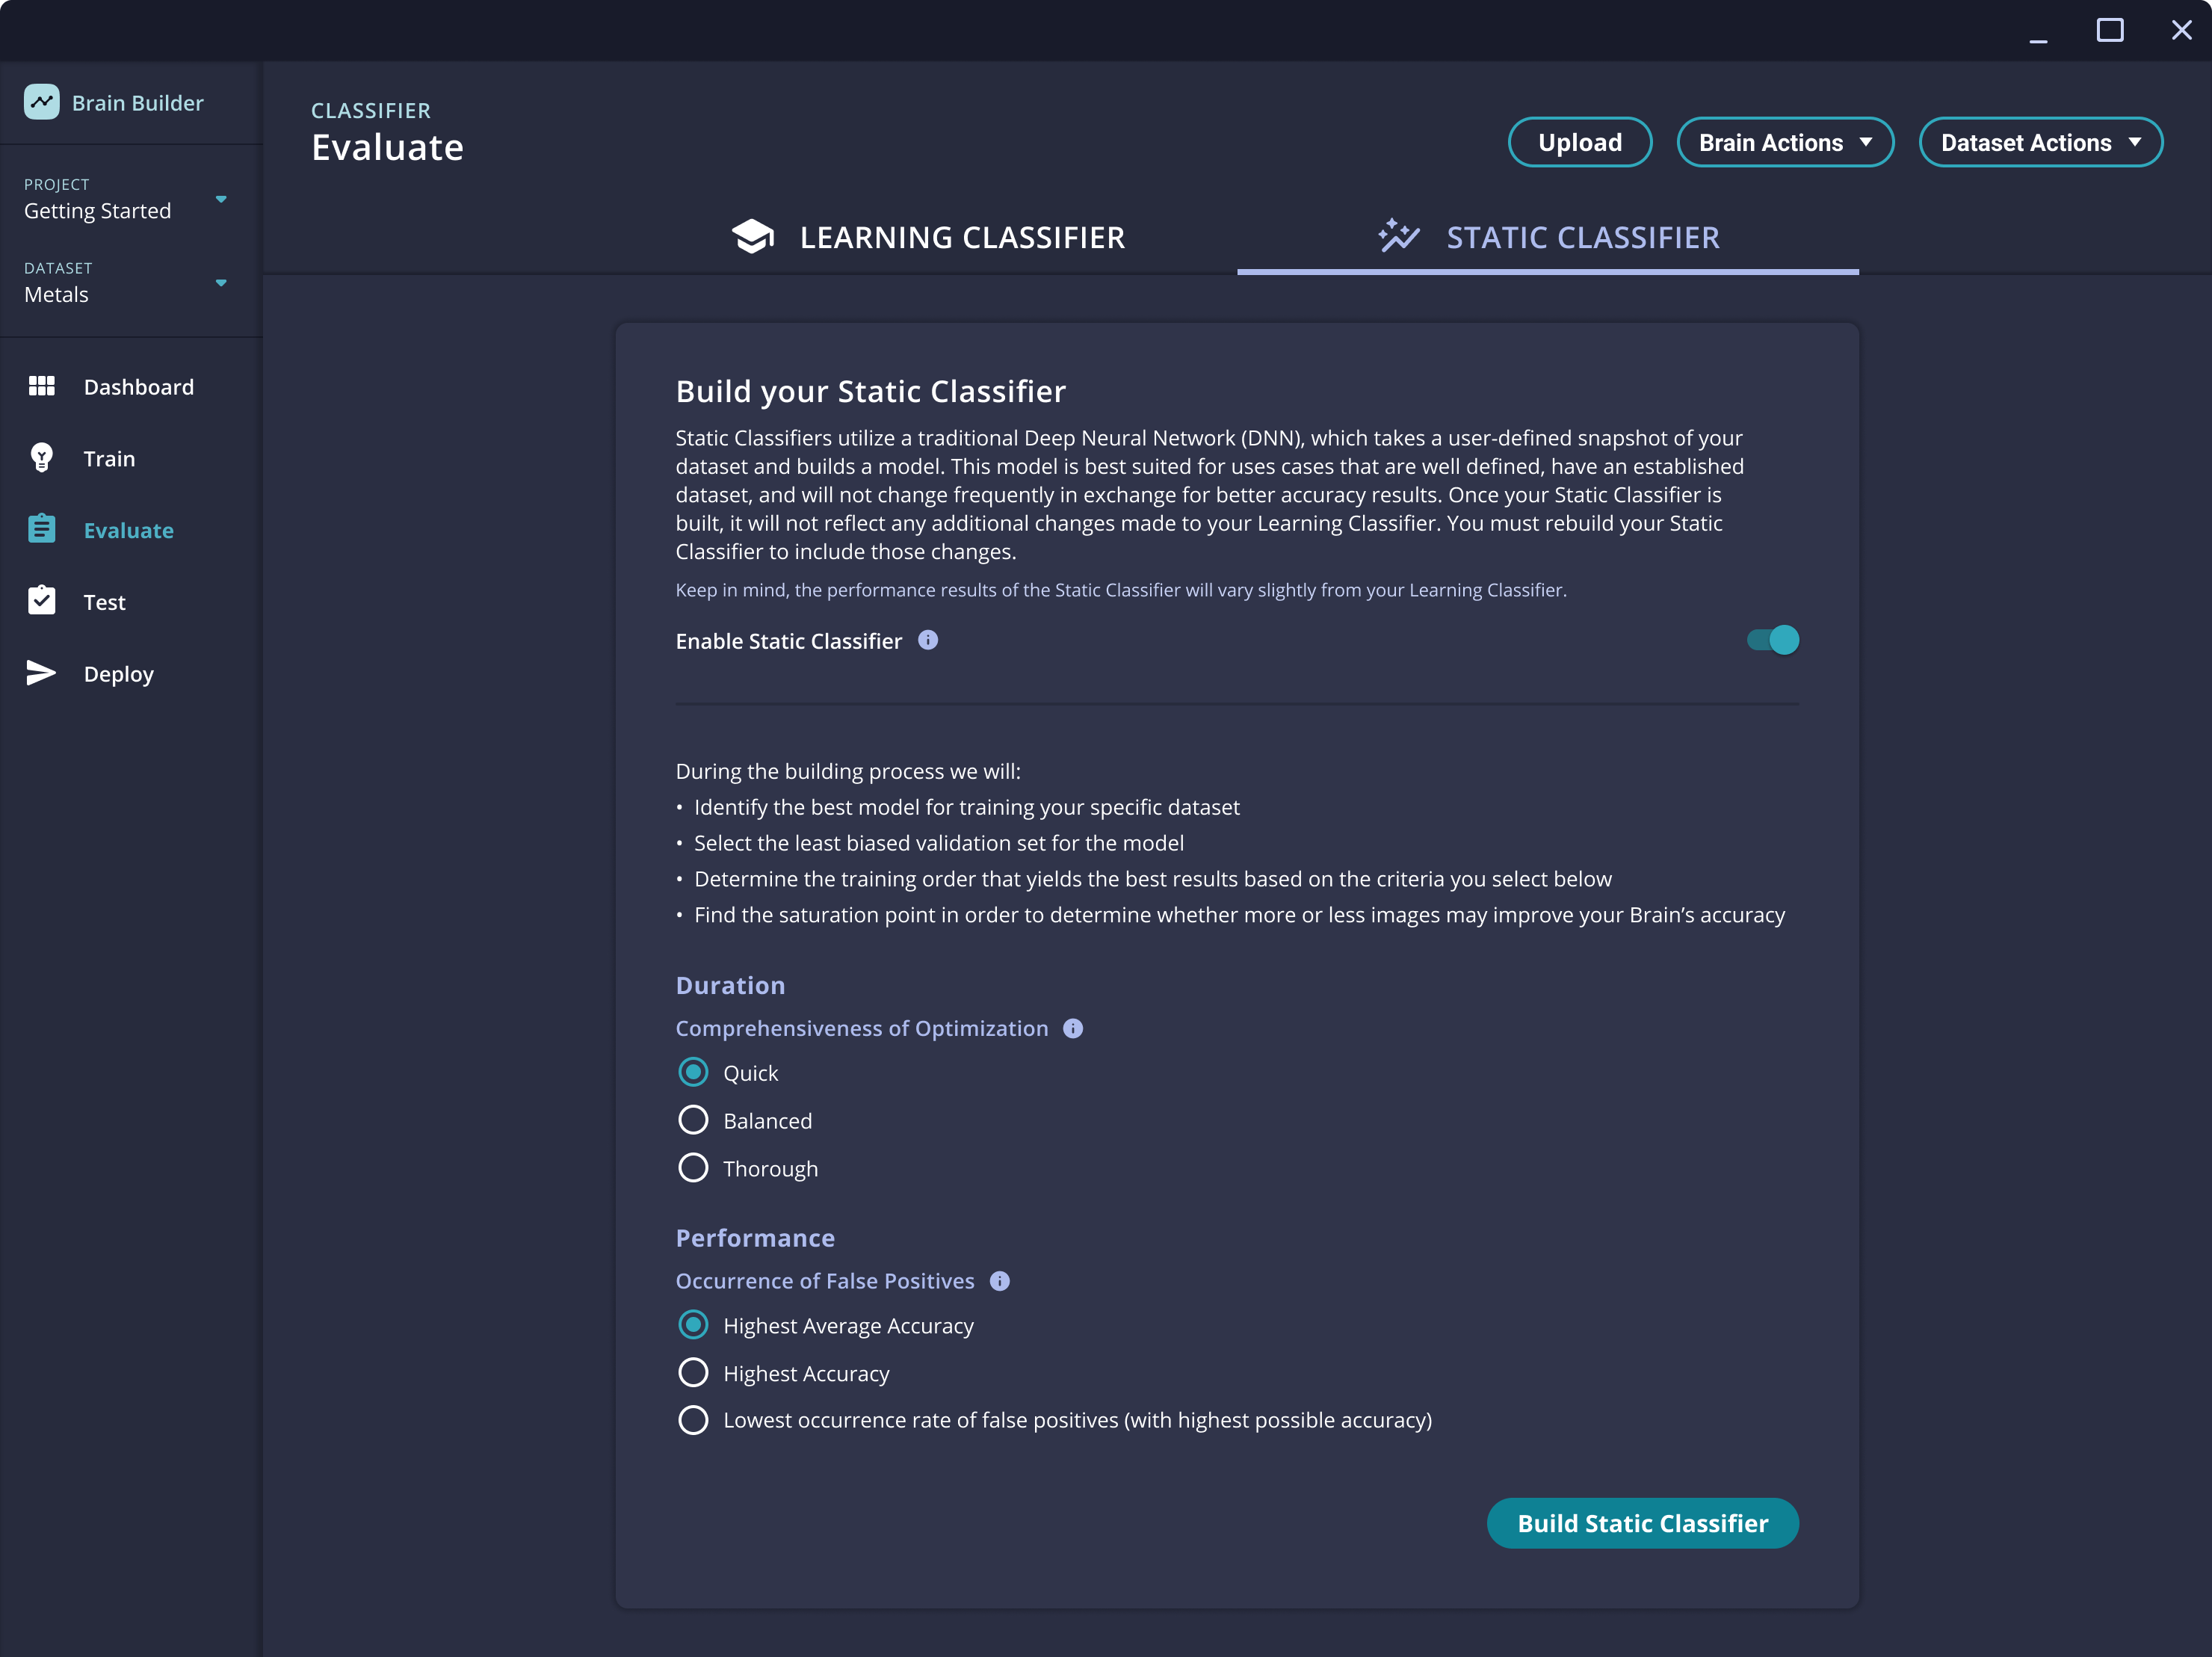
- Static Classifiers use a traditional Deep Neural Network (DNN), which takes a user defined snapshot of your dataset and builds a model. Static Classifiers are best suited for use cases that will not require training often, already have a complete and balanced dataset, do not need the speed of rapid training, and may benefit from increased accuracy.
Anomaly Recognizers
- Anomaly Recognizers use Neurala's Lifelong-Deep Neural Network (L-DNN), which specializes in quick learning and fast model iteration. This model is best suited for use cases that require frequent, iterative training sessions. This model type will also have faster inference speeds at runtime.
- Anomaly Hi-Fi is a variant of the Anomaly Recognizer model. This model uses multiple L-DNNs, resulting in higher accuracy for some use cases and enabling the explainability heatmap. Anomaly Hi-Fi models are best suited for use cases that will not require training often, that will benefit from the explainability heatmap, and that run at slower line speeds.
Tagging = Training
Brain Builder begins training the Learning Classifier or Anomaly Recognizer as each image is labeled, so the tagging and training process is one and the same. If images are uploaded with labels during the upload process, then additional labeling may not be necessary.
Image Labeling
Labels can be applied to images either during the upload process or through the Brain Builder user interface.
For detail on how to apply labels during the upload process, see Creating Datasets and Uploading Images.
If images are uploaded without labels, then manual labeling is required to begin training the Brain. Depending on the number of images in the dataset, it may be more efficient to delete and re-upload the images with labels rather than label them manually. For smaller datasets, the manual labeling process can be completed quickly.
First, set up the Classes in the Dataset. This step is not necessary for Anomaly Recognition Brains.
- On the Dataset dashboard, click Manage Classes.
- Enter the name of each Class that this Brain will be trained to classify. Classes can also be added from the Workspace if they are not entered here.
After setting up the classes, begin labeling the images.
-
From the dataset dashboard, click Train. This will take you to the training workspace.
-
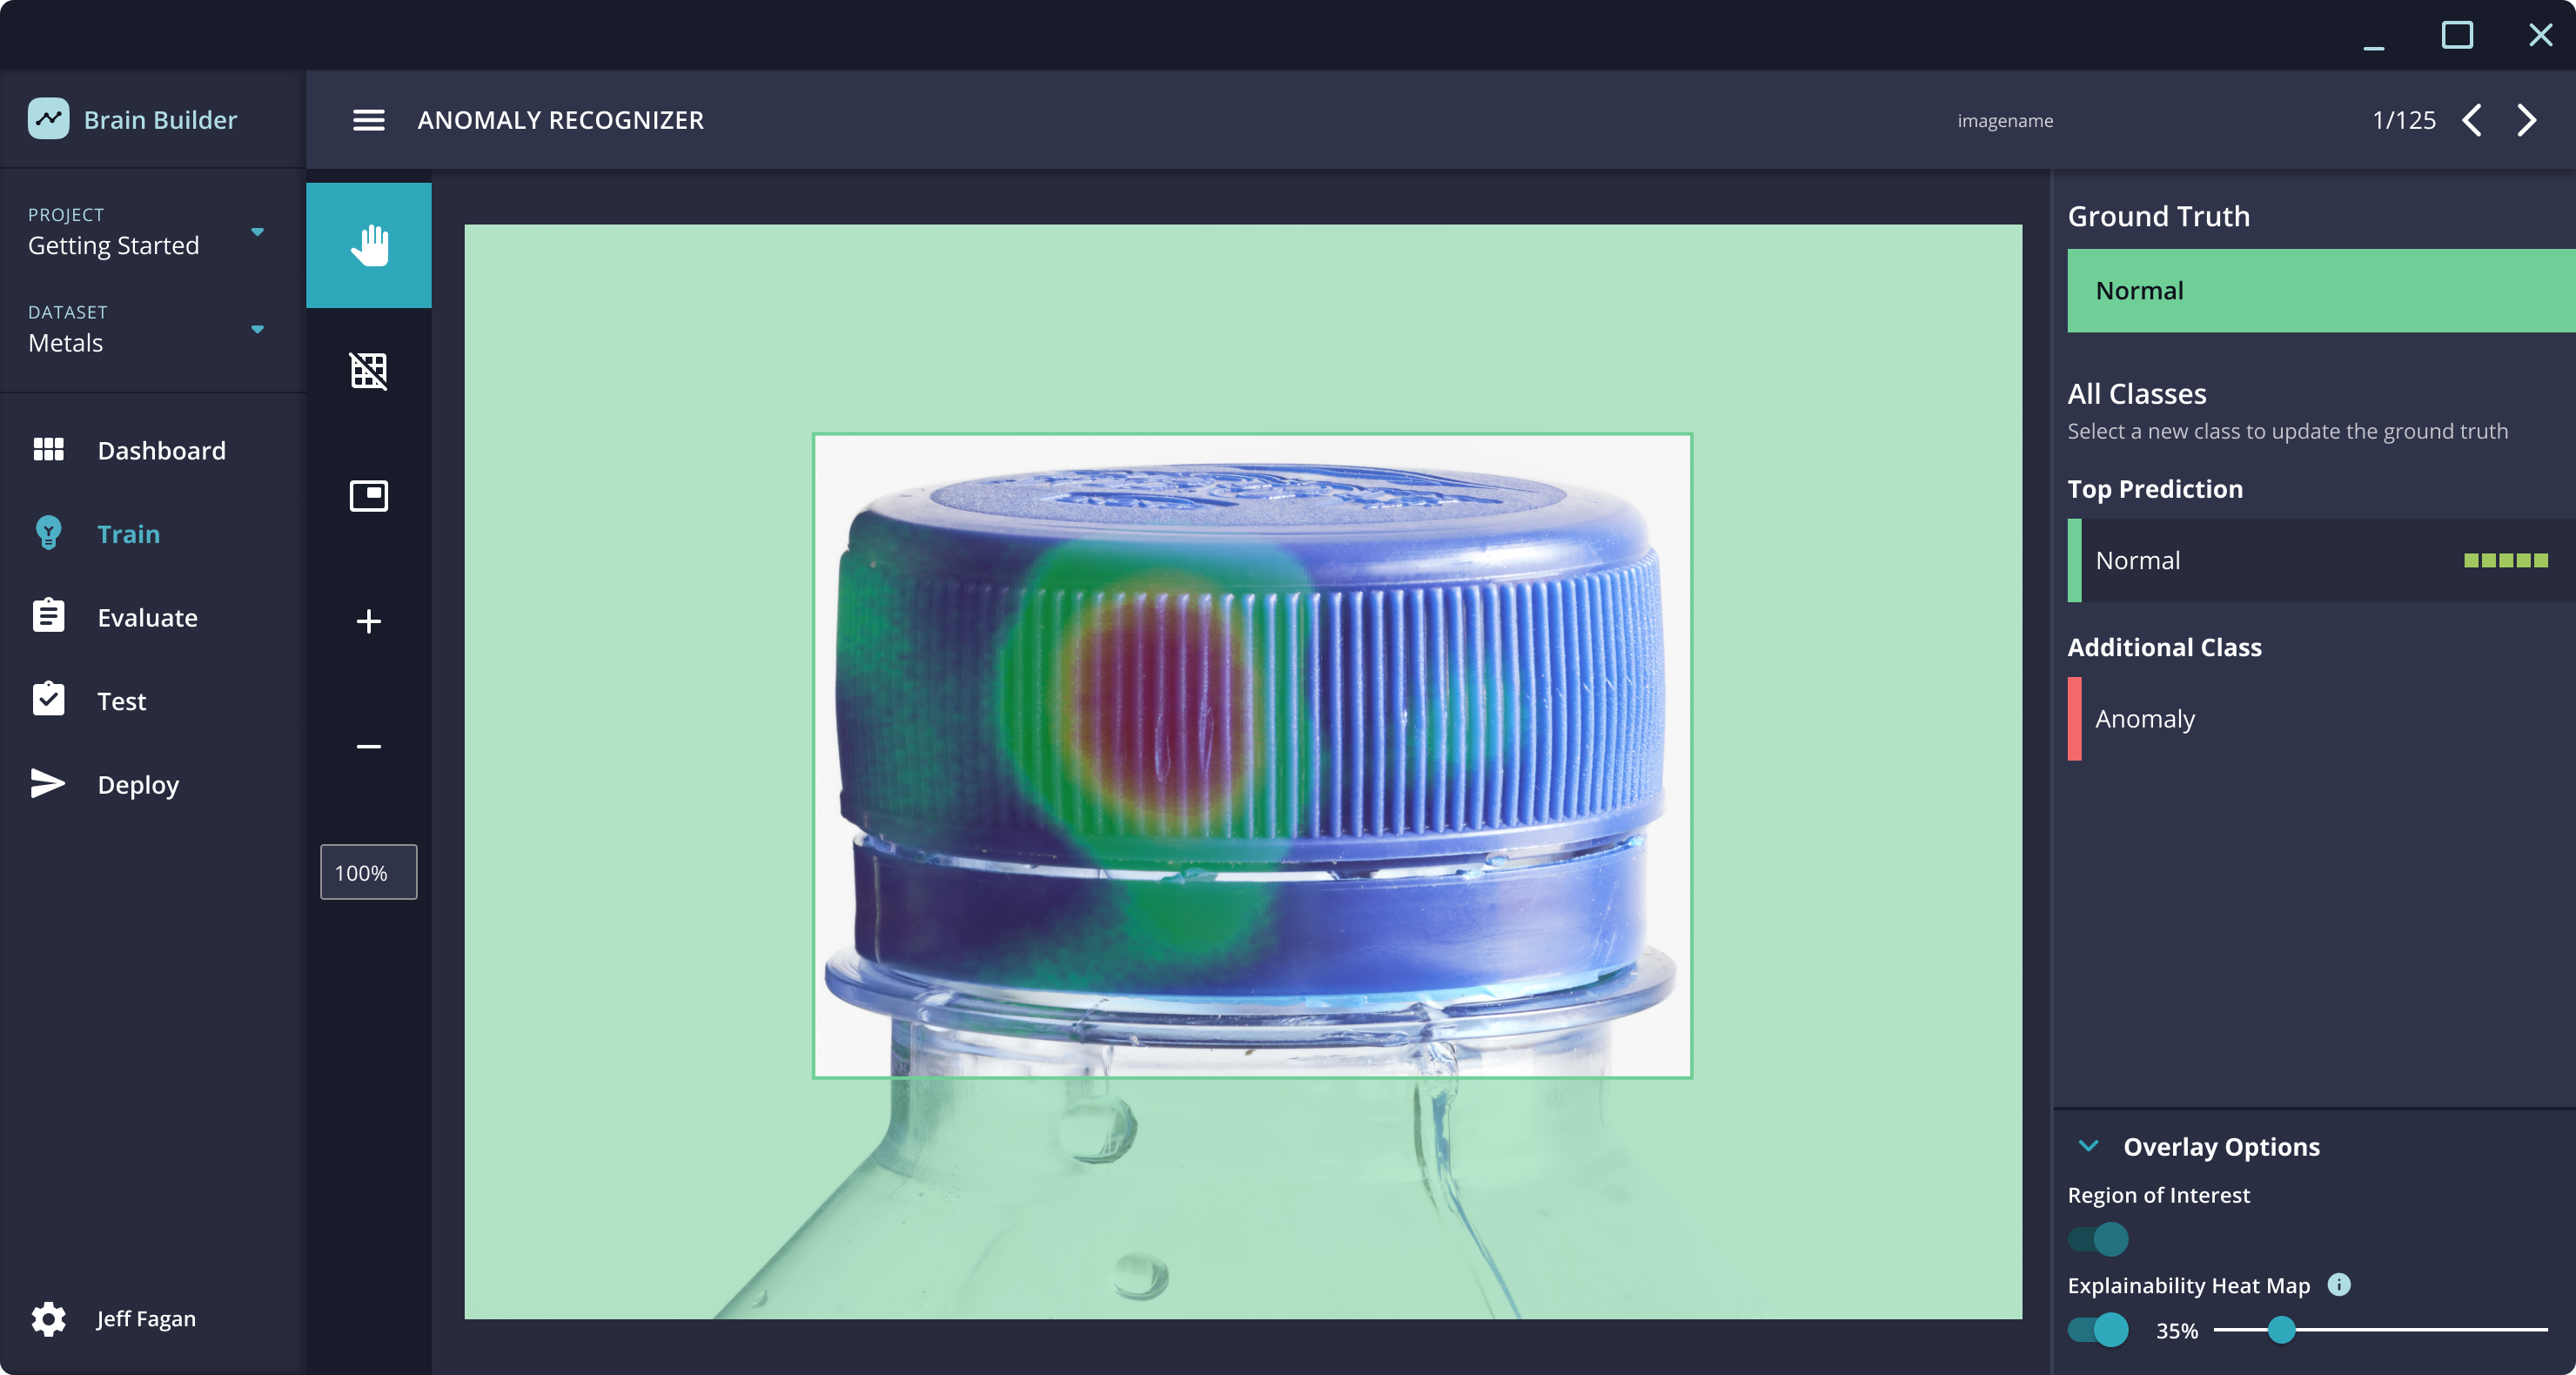
The first image in the dataset will be shown, and the list of classes will be displayed on the right-hand side of the screen. In a Classifier, this will be the list of classes you have set up. In an Anomaly Recognizer, the classes will be Normal and Anomaly.
-
Select the class that is appropriate for the image and click Save and Continue. The image will be labeled with that class, the Brain will learn the image class, and Brain Builder will progress to the next image in the dataset.
-
Repeat this process for each image in the dataset. As more images are labeled, Brain Builder will start making predictions as to the correct class for each image. These predictions will be displayed above the list of classes on the right side of the screen.
As Brain Builder learns, these predictions will become more accurate, accelerating the labeling process.
-
When all of the images have been labeled, you can evaluate the performance of the Learning Brain or Anomaly Recognizer.
Region of Interest (ROI)
Classifier and Anomaly Recognizer Brains work by analyzing the entire image. Brains are able to generate the best accuracy when the image only contains information that is relevant to the analysis the Brain is performing. (See best practices for Capturing High Quality Images.)
There are, however, times when it is useful to focus the Brain's analysis on a specific area of the images. These use cases can be addressed using Brain Builder's Region of Interest (ROI) tool.
Note that the ROI feature is available in Neurala's standard VIA products but may not be compatible with some partner integrations.
When to use ROI
The ROI tool is best used when the area of interest to the Brain is consistently located in the same subsection of the image. Some examples might include:
- Images of a circuit board with a use case that requires analysis of the placement of one or more specific components.
- Wide angle images that show multiple steps of the manufacturing process, but the Brain should be focused on only one step.
- Images that are framed to include background that may vary from image to image, which can lead to lower accuracy as the background detail is not relevant to the Brain's predictions
How to use ROI
-
Navigate to the Workspace by clicking Train on the left side of the screen.
-
In the Workspace, select the ROI tool from the left-side menu.

-
Use the guides to apply the ROI to the image. You can refine the position of the ROI by dragging the edges and corners after you have applied it. When you are satisfied with the position of the ROI, click Save.
-
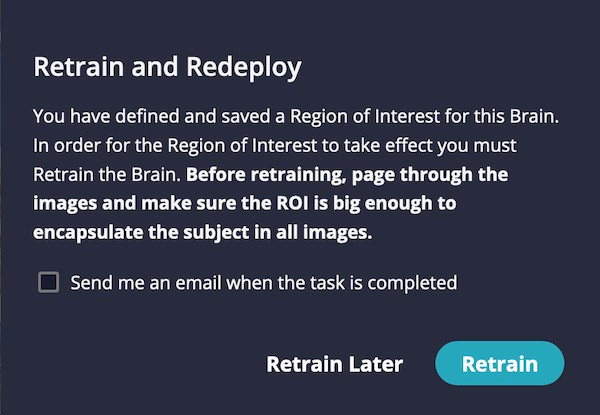
You will be prompted that the Brain needs to be retrained to apply the ROI selection. Click Retrain.
-
When retraining is complete, you can review the accuracy of the Brain on the Evaluate page.
Static Classifier and Anomaly Hi-Fi
After the Learning Classifier or Anomaly Recognizer has been trained, Brain Builder provides the ability to build a Static Classifier or Anomaly Hi-Fi Brain.
Enabling the Static Classifier or Anomaly Hi-Fi Brain
When the dataset is first created, there is a setting to include Static Classifier or Anomaly Hi-Fi training as an option. If that is not enabled at that time, it is still possible to activate it.
- Within the dataset, click on the Dataset Actions button at the top-right.
- In the drop-down menu, select "Enable Static Classifier" or "Enable Anomaly Hi-Fi".
The process to build these Brain types is straightforward.
-
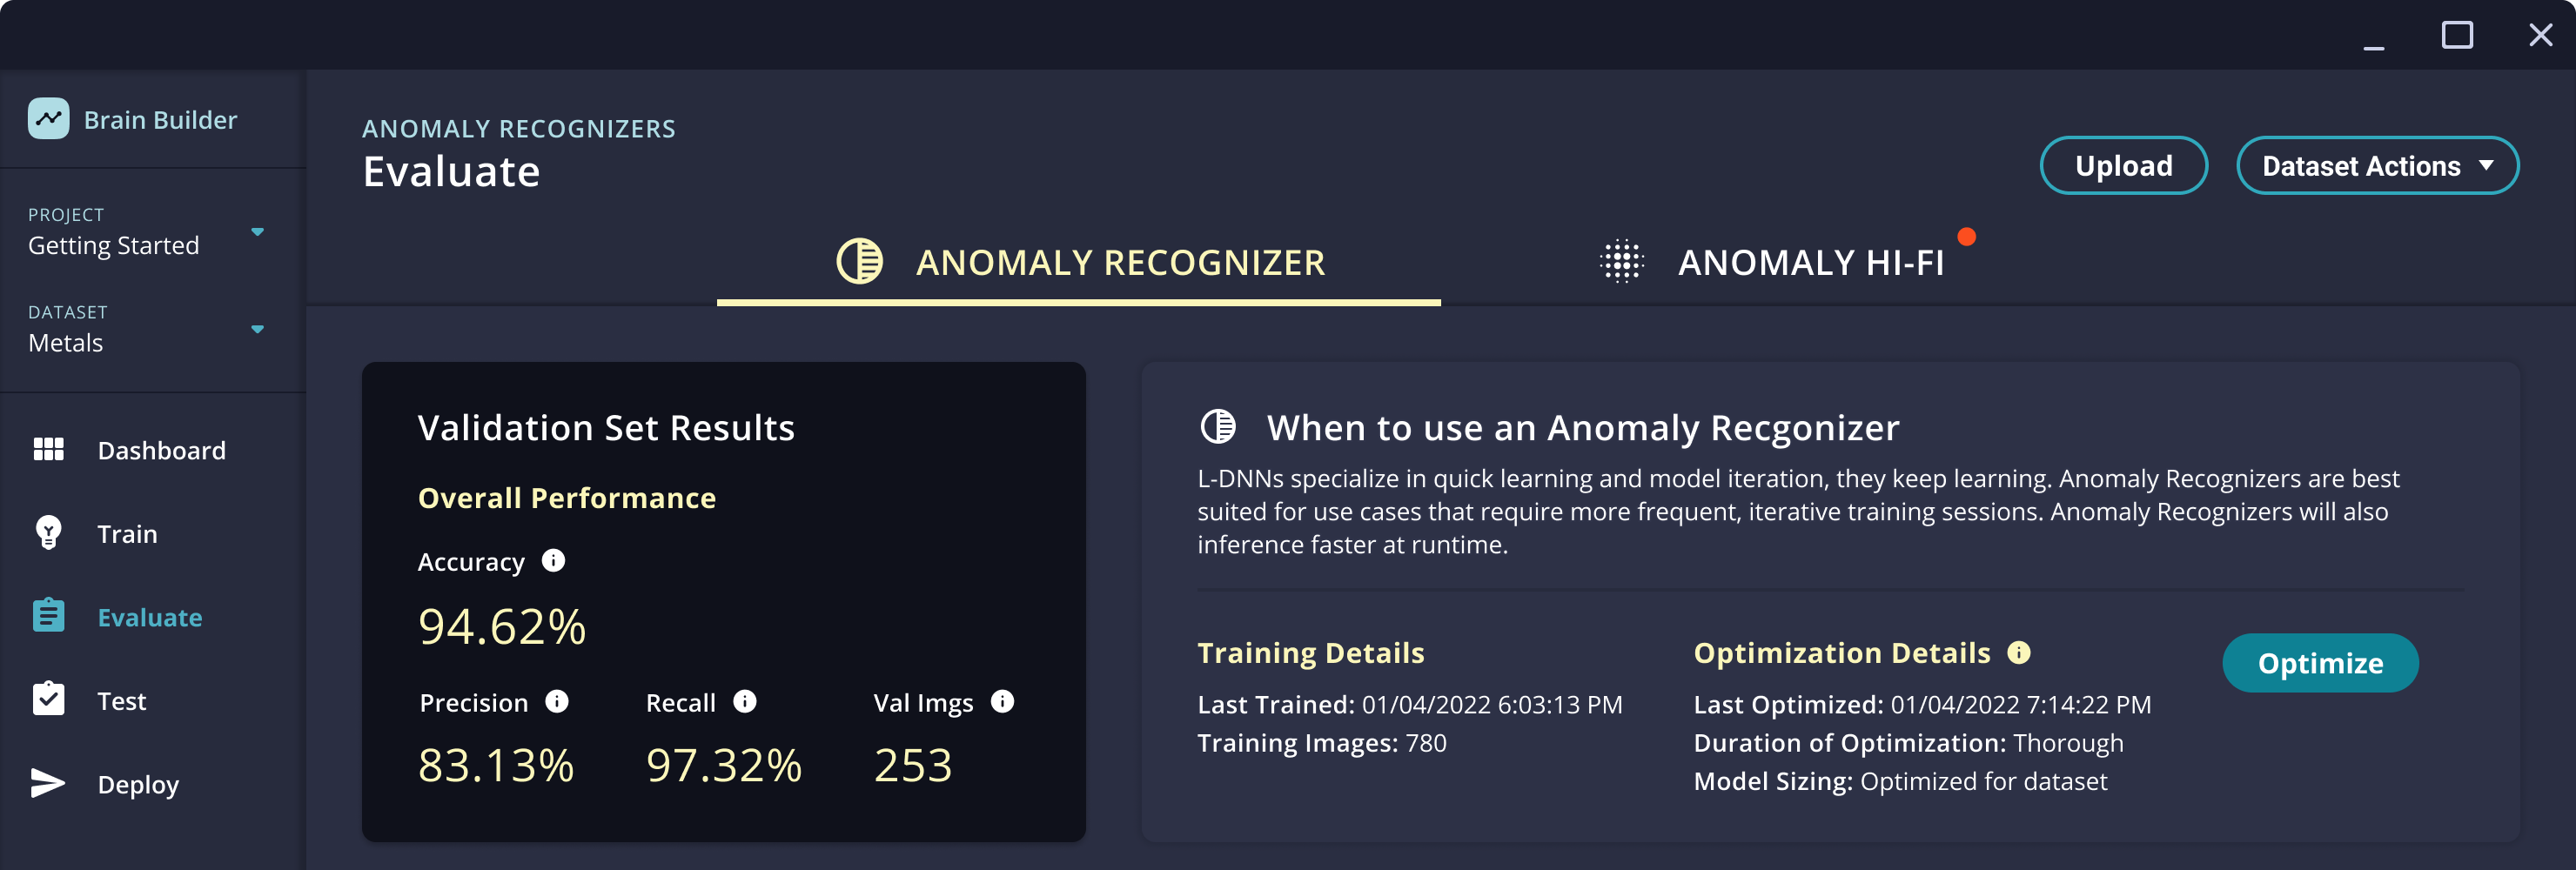
Go to the Evaluate page. The top of the page will feature two tabs, one for each type of Classifier or Anomaly model.
-
Click the tab that says Static Classifier or Anomaly Hi-Fi. If this is the first time this model type has been built, the build options will be displayed. If the model has already been built, then its accuracy metrics will be displayed.
-
Select the desired options and click the Build button. Brain Builder will show a progress bar and estimated time remaining.
-
When the build is complete, the Static Classifier or Anomaly Hi-Fi tab on the Evaluate page will show the accuracy of the Brain. The details of this page are the same as on the Evaluate page for a Learning Classifier or Anomaly Recognizer.
After the Static Classifier or Anomaly Hi-Fi model has been built, it can be rebuilt by clicking the Rebuild button on this page. Rebuilding should be done if additional images have been uploaded and labeled in the dataset or if there is a desire to see how the performance changes using different build options.
Updated about 1 month ago