InspectorWeb
InspectorWeb is a lightweight version of Inspector that is built to run directly on smart cameras or edge computing platforms without requiring a connected PC.
InspectorWeb is compatible with devices running Windows or Linux operating systems.
🕸️ Installing and Running InspectorWeb
Installation
To install InspectorWeb, run the installation package directly on the edge devices.
After InspectorWeb has been installed, it will begin running automatically.
Accessing the User Interface
The InspectorWeb user interface can be accessed using a web browser on a computer that is on the same network as the edge device where InspectorWeb is running.
To access InspectorWeb, direct the web browser to the URL http://[IP ADDRESS]:9002/web, where [IP ADDRESS] is replaced with the IP address of the device where InspectorWeb is installed.
Manually starting InspectorWeb
InspectorWeb will start after being installed, and the application should restart automatically if the system reboots. However, if InspectorWeb is not reachable, it may need to be manually started.
To start InspectorWeb, run the following command in a Terminal or Command Prompt window: sudo service neurala-inspector-api start.
⚙️ InspectorWeb Settings
Connect to Brain Builder
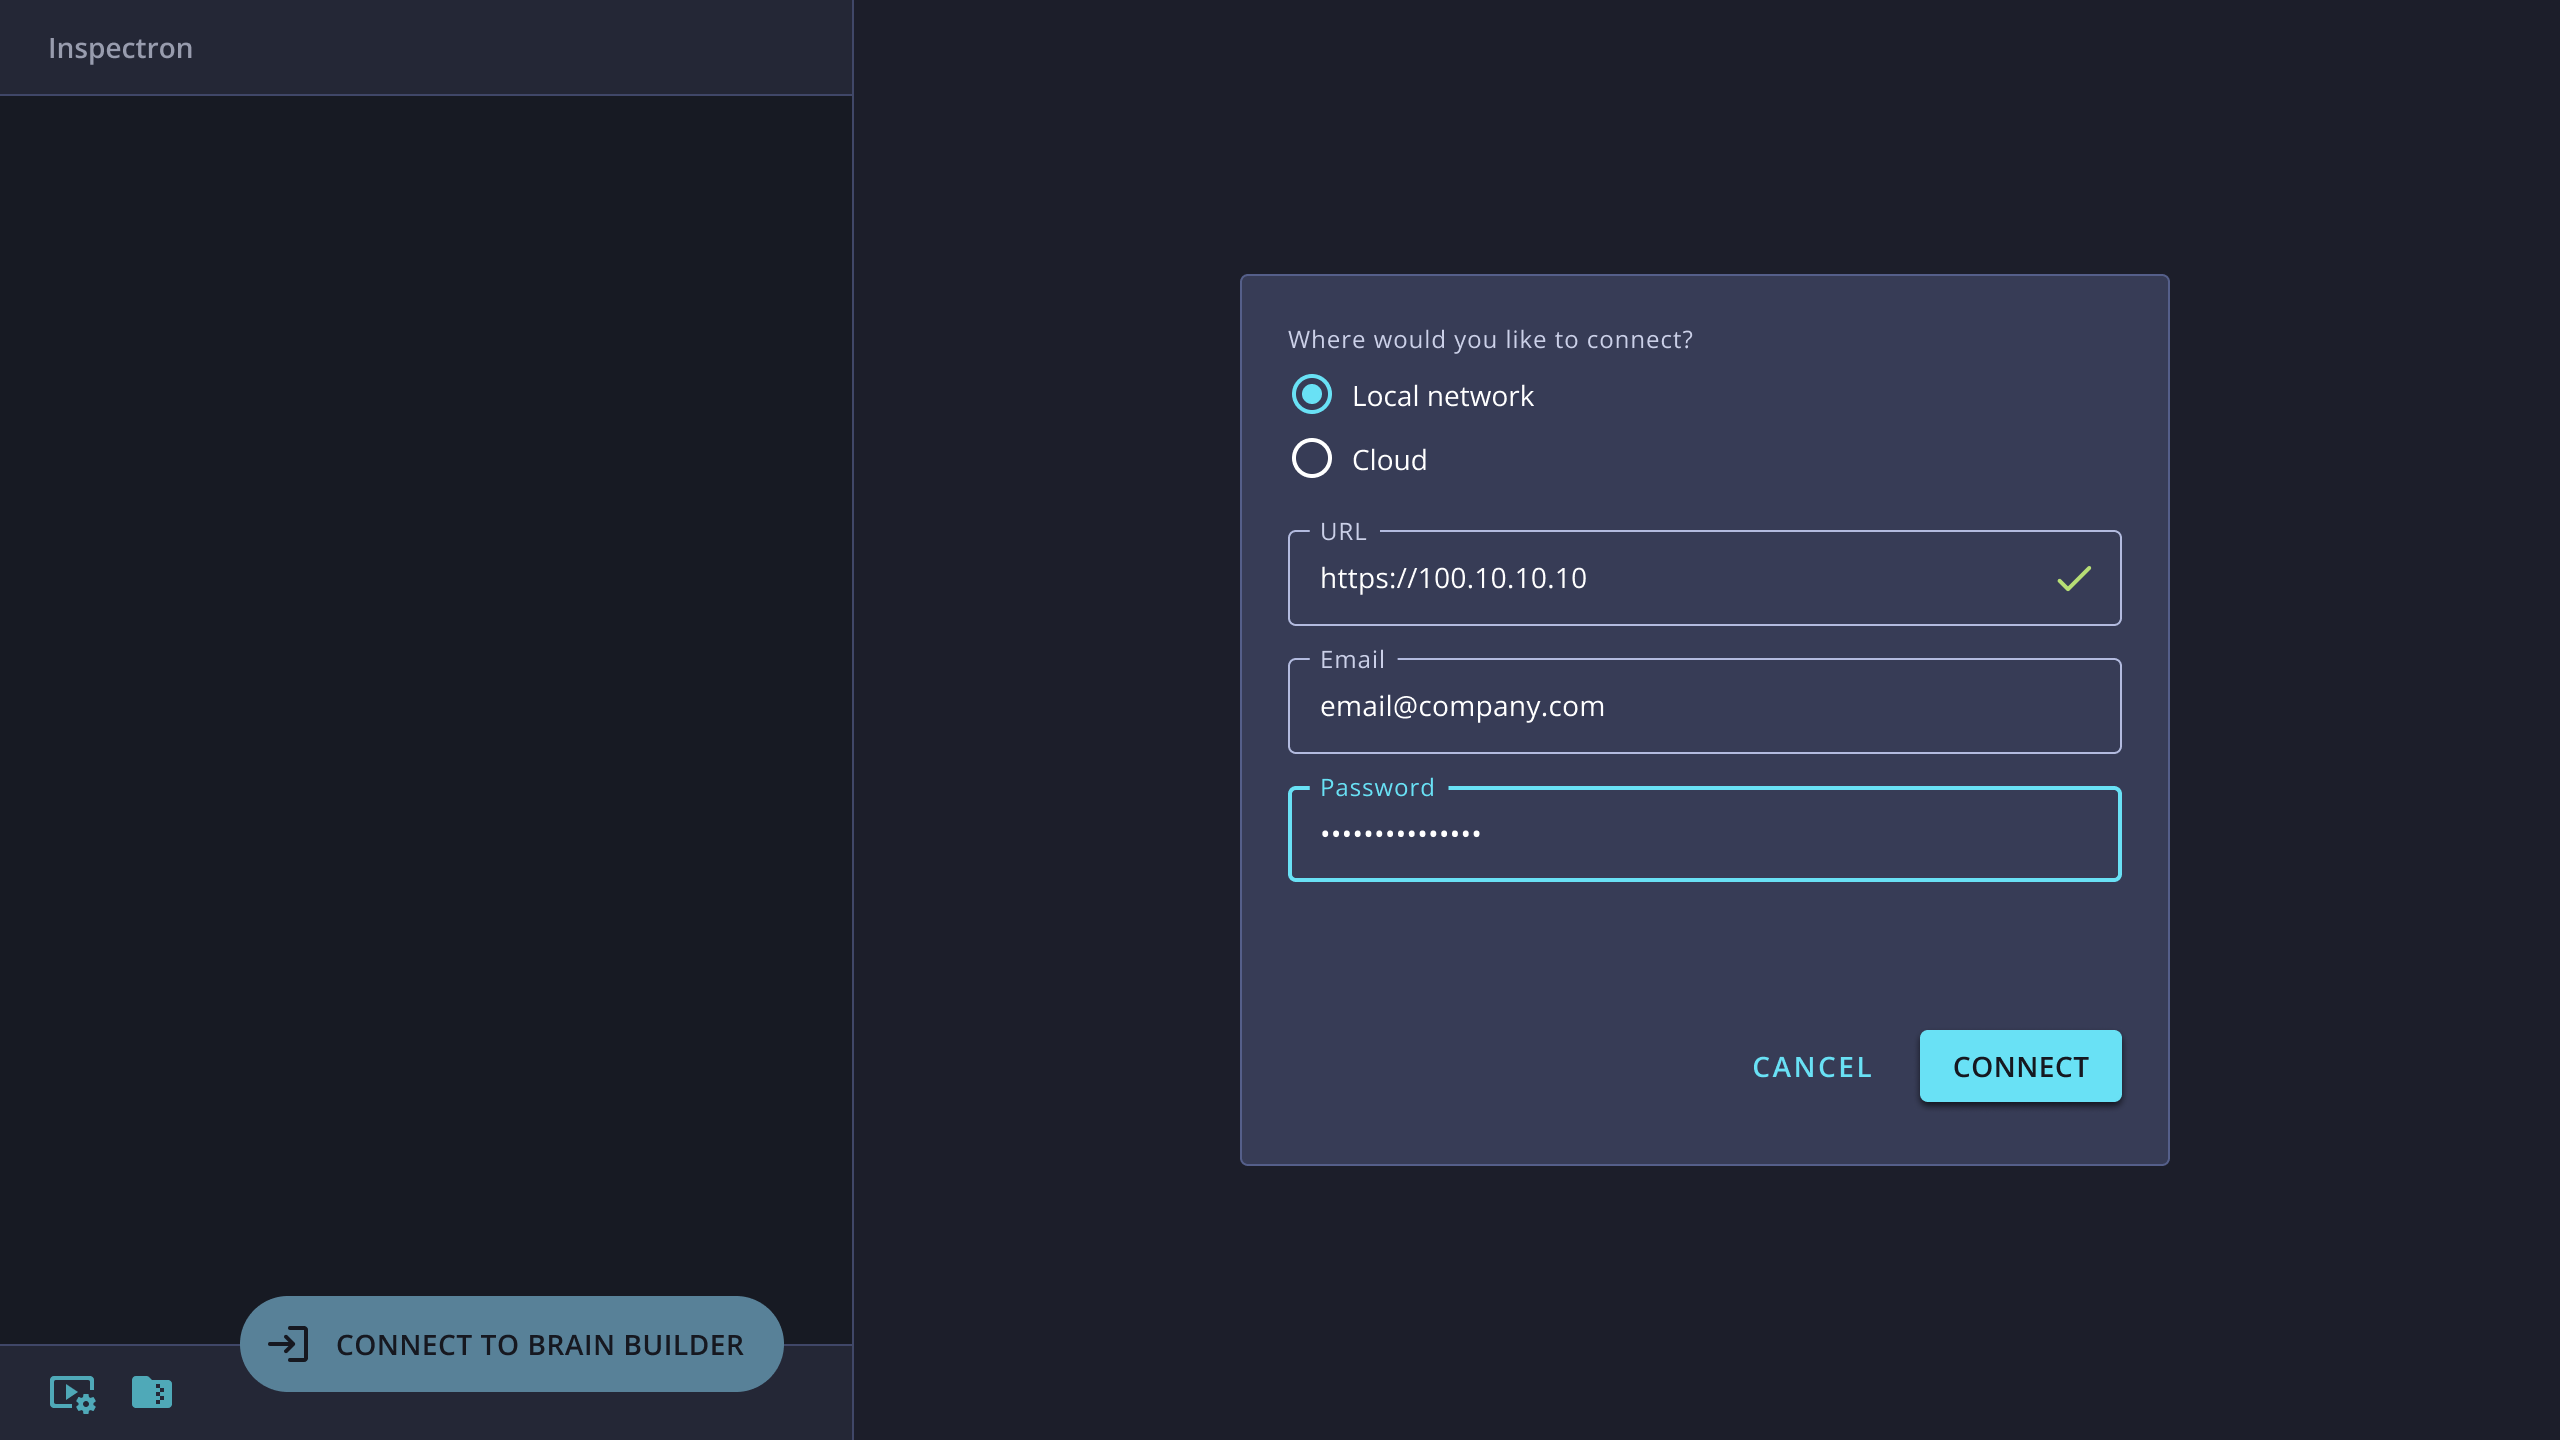
InspectorWeb can be connected to Brain Builder in one of two locations - on a computer on the local network, or in the cloud.
Depending on your selection, you will be prompted for additional information:
- Local network - enter the IP address of the networked computer where Brain Builder is running. Then enter the user credentials for that instance of Brain Builder
Connection error?
If InspectorWeb reports that it cannot connect to the IP address of the computer where Brain Builder is located, it may be due to a system firewall or other security tools that block access. Check with your IT department about allowing access.
- Cloud - enter the username and password that are associated with your cloud Brain Builder account.
InspectorWeb will connect to the selected Brain Builder environment, confirm the username and password, and return a success message when complete.
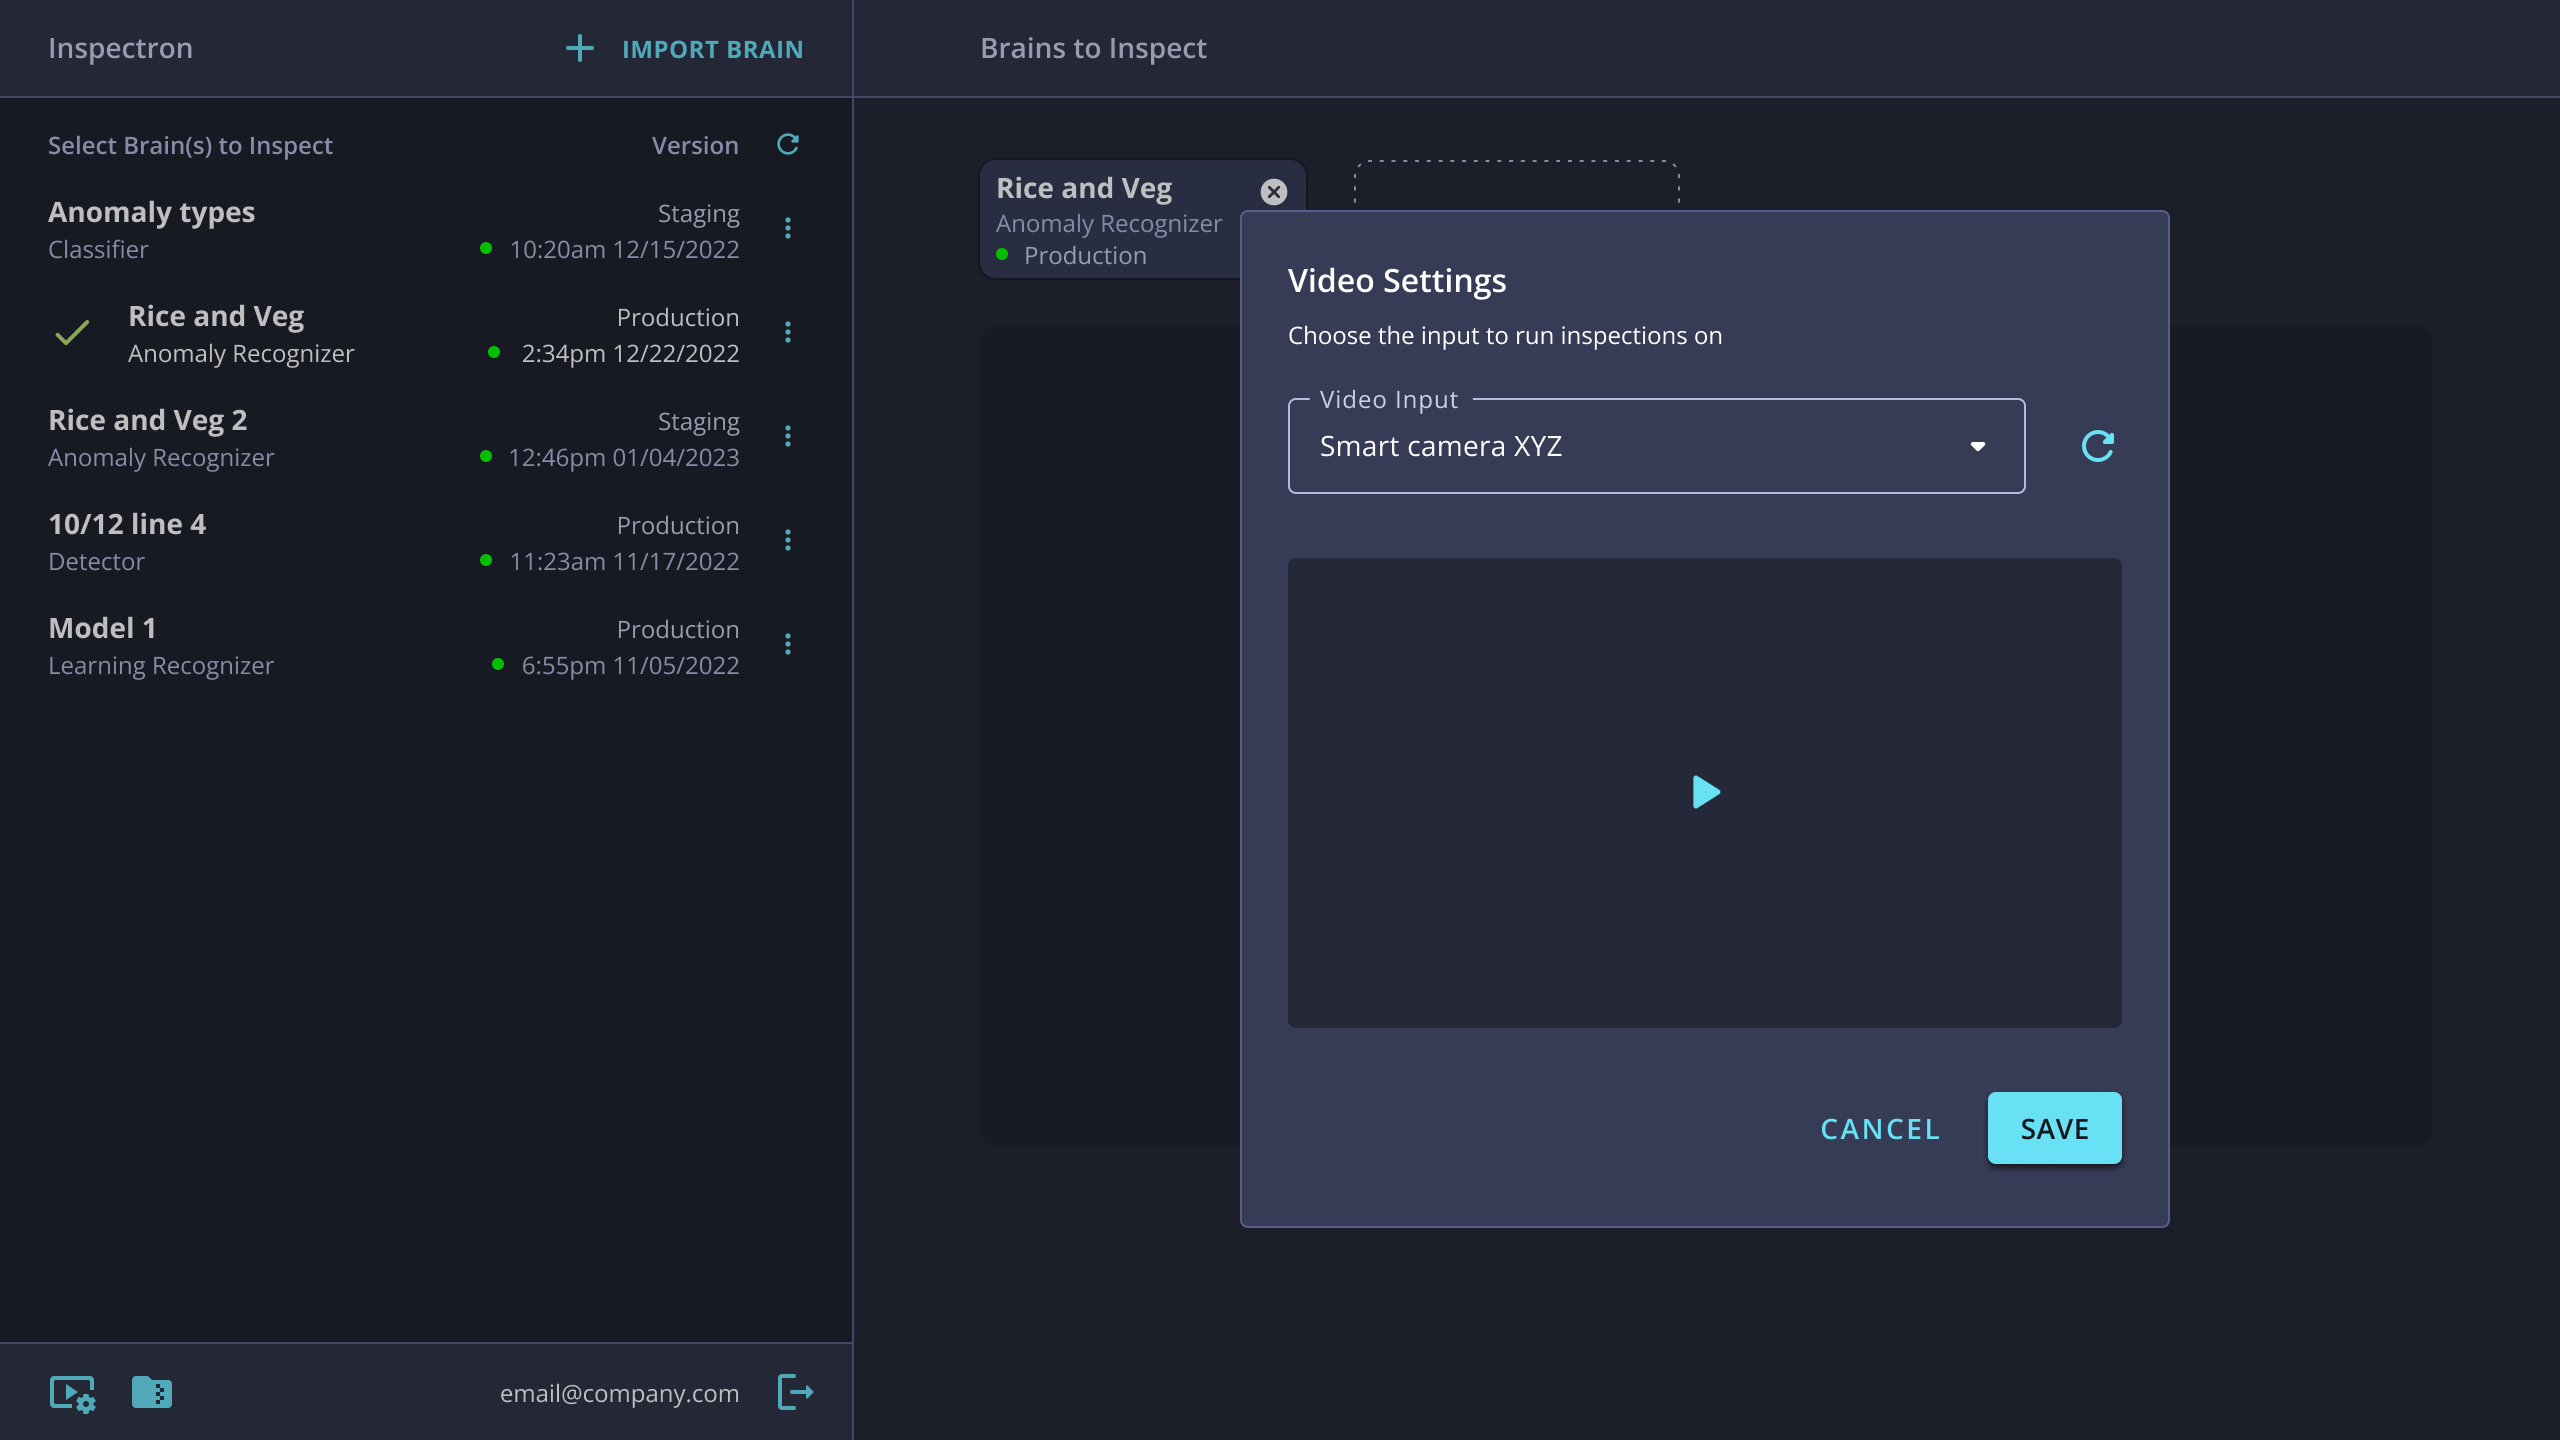
Video settings
To configure the camera that InspectorWeb will use as an input, click the video settings icon in the bottom-left corner of the screen.
-
In the screen that appears, click the Video Input drop-down to select the camera.
-
To see the images coming from that camera, click the play icon on the video field below the drop-down.
-
When finished, click Save to apply the selection.
Generate logs
It can be helpful to export log files from InspectorWeb if you need to communicate with Neurala support for assistance resolving a problem.
- At the bottom-left of the screen, next to the video settings, click the icon to Generate Logs.
- Select the destination where InspectorWeb should save the log export.
- InspectorWeb will display a progress indicator while the export is processing and will show a completion icon when it has finished.
⤵️ Importing Brains
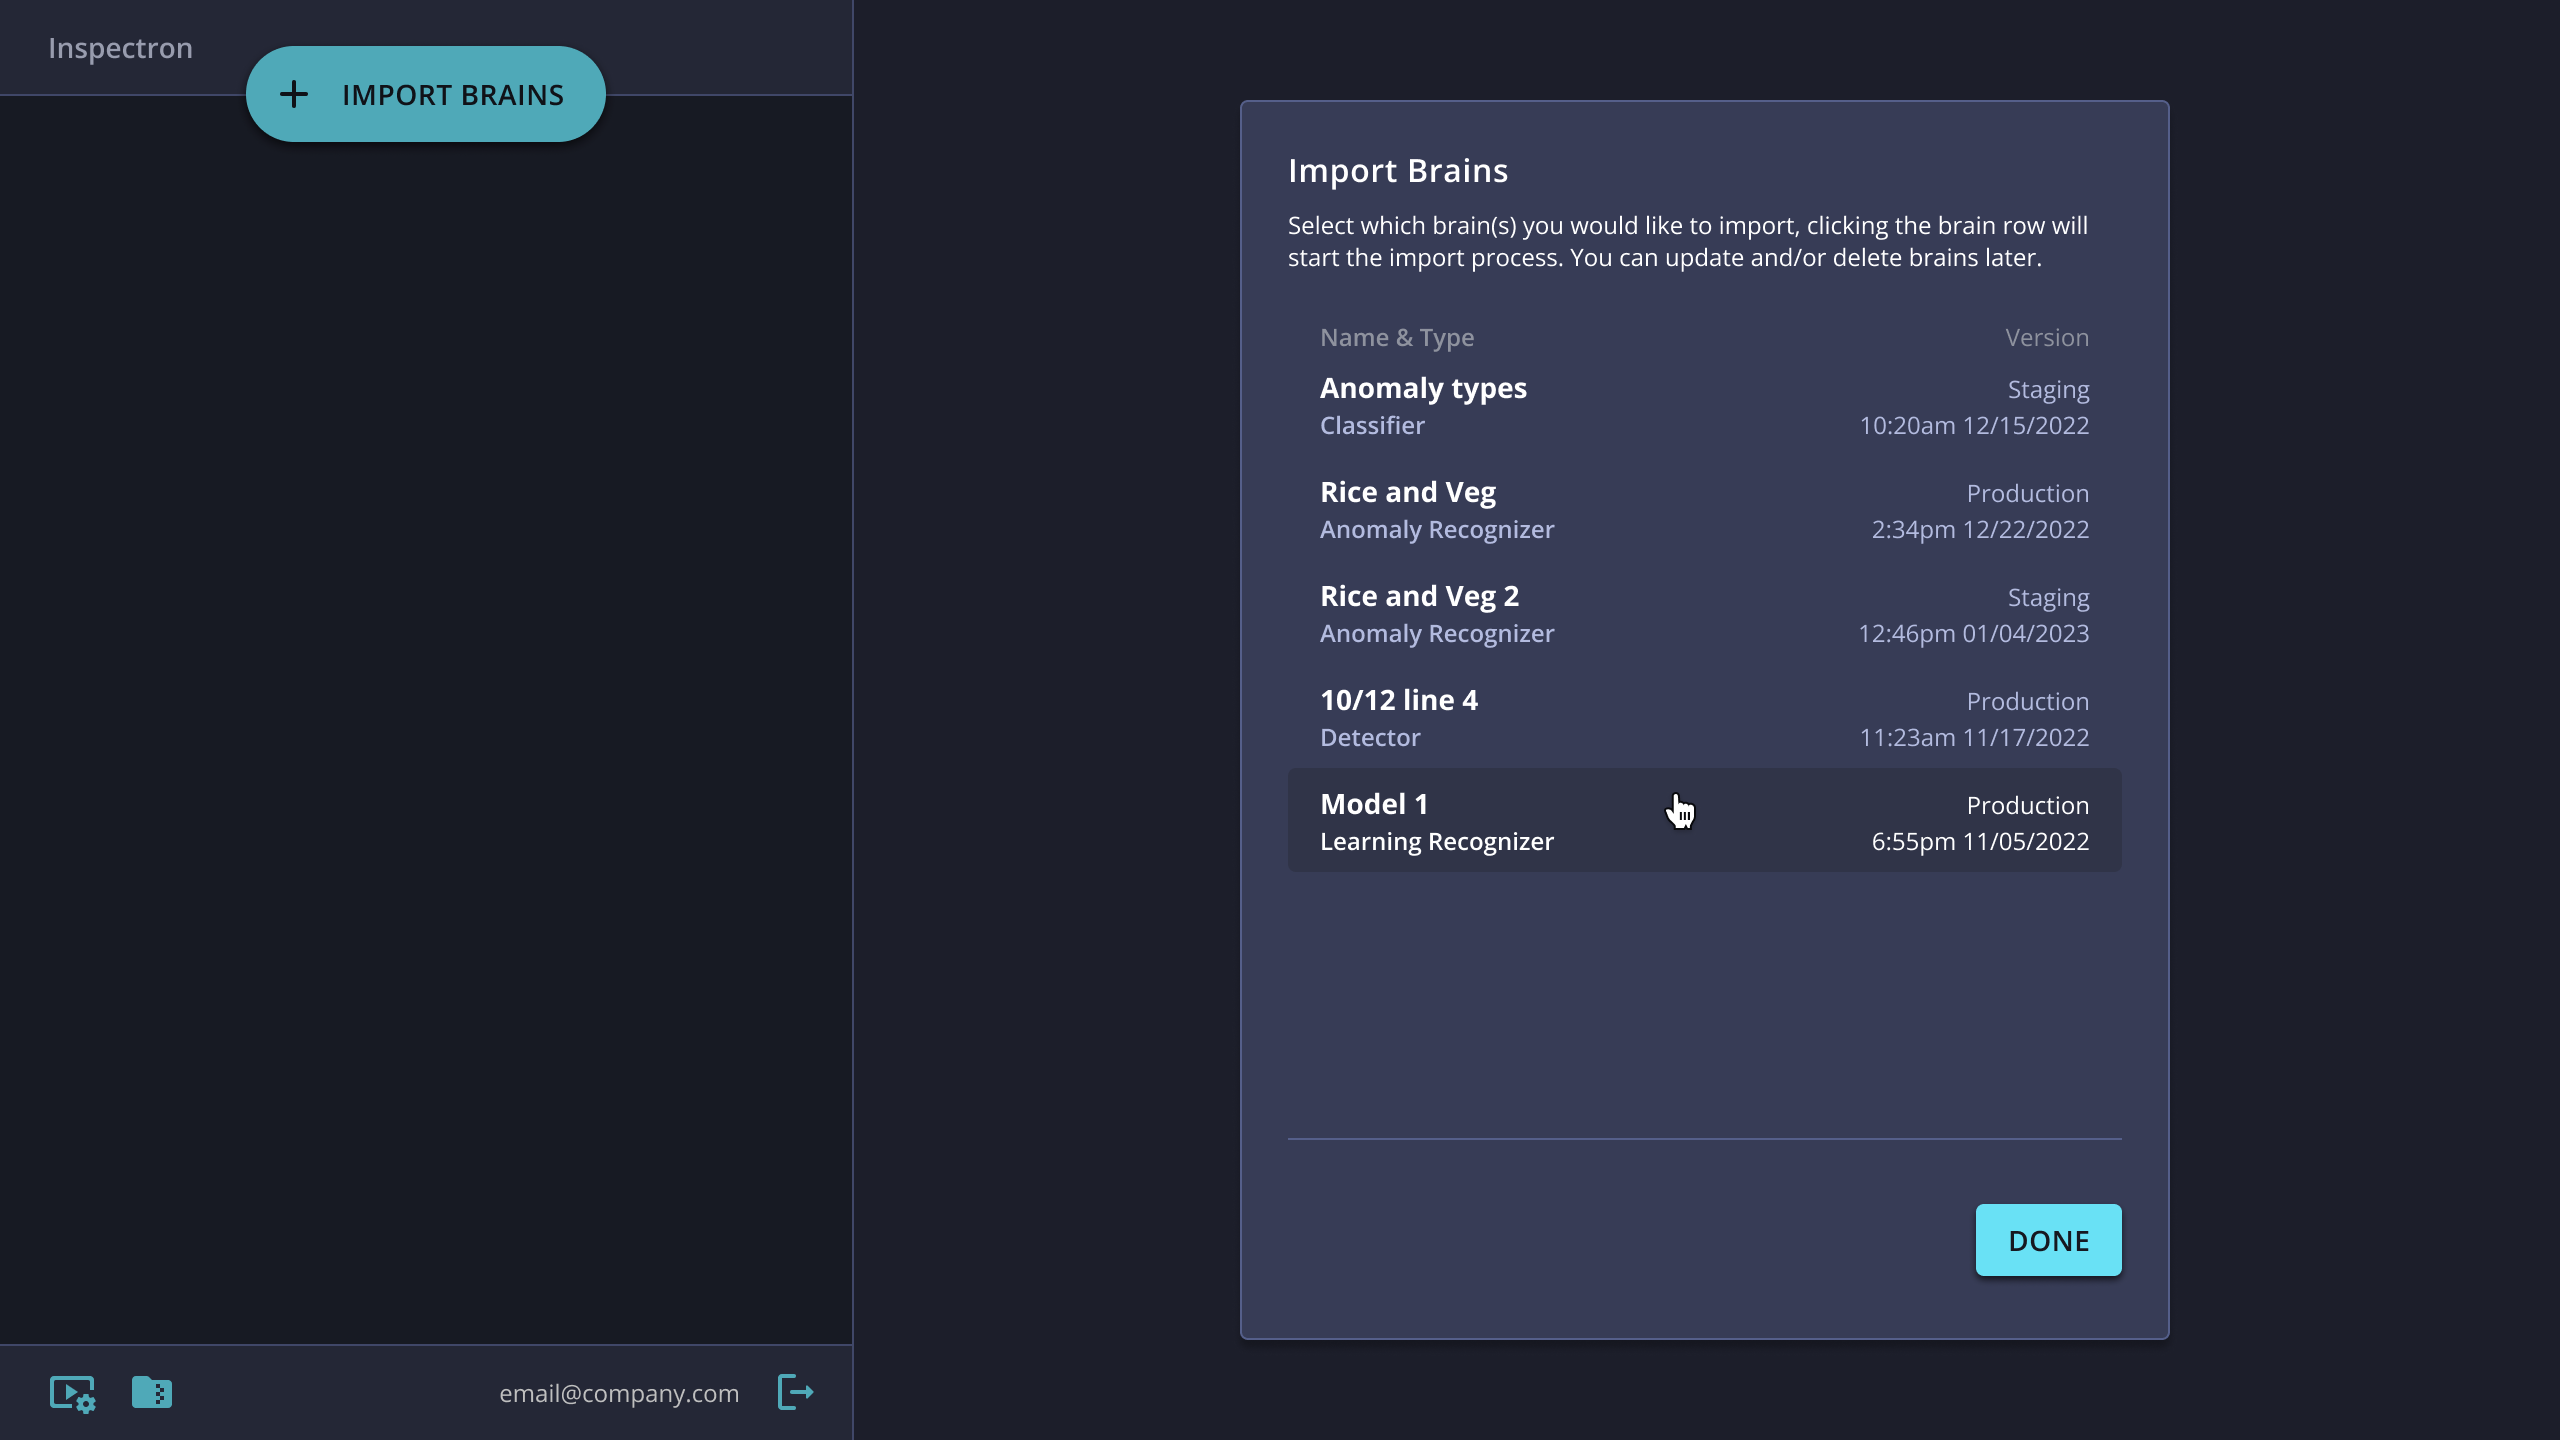
After InspectorWeb has been connected to Brain Builder, it is possible to import trained Brains.
-
Click the Import Brains button. InspectorWeb will generate a list of Brains available to import from Brain Builder.
-
Click on the Brain that you want to import.
-
InspectorWeb will import the selected Brain.
To import more than one Brain into InspectorWeb, repeat this process.
🔍 Running Inspections
-
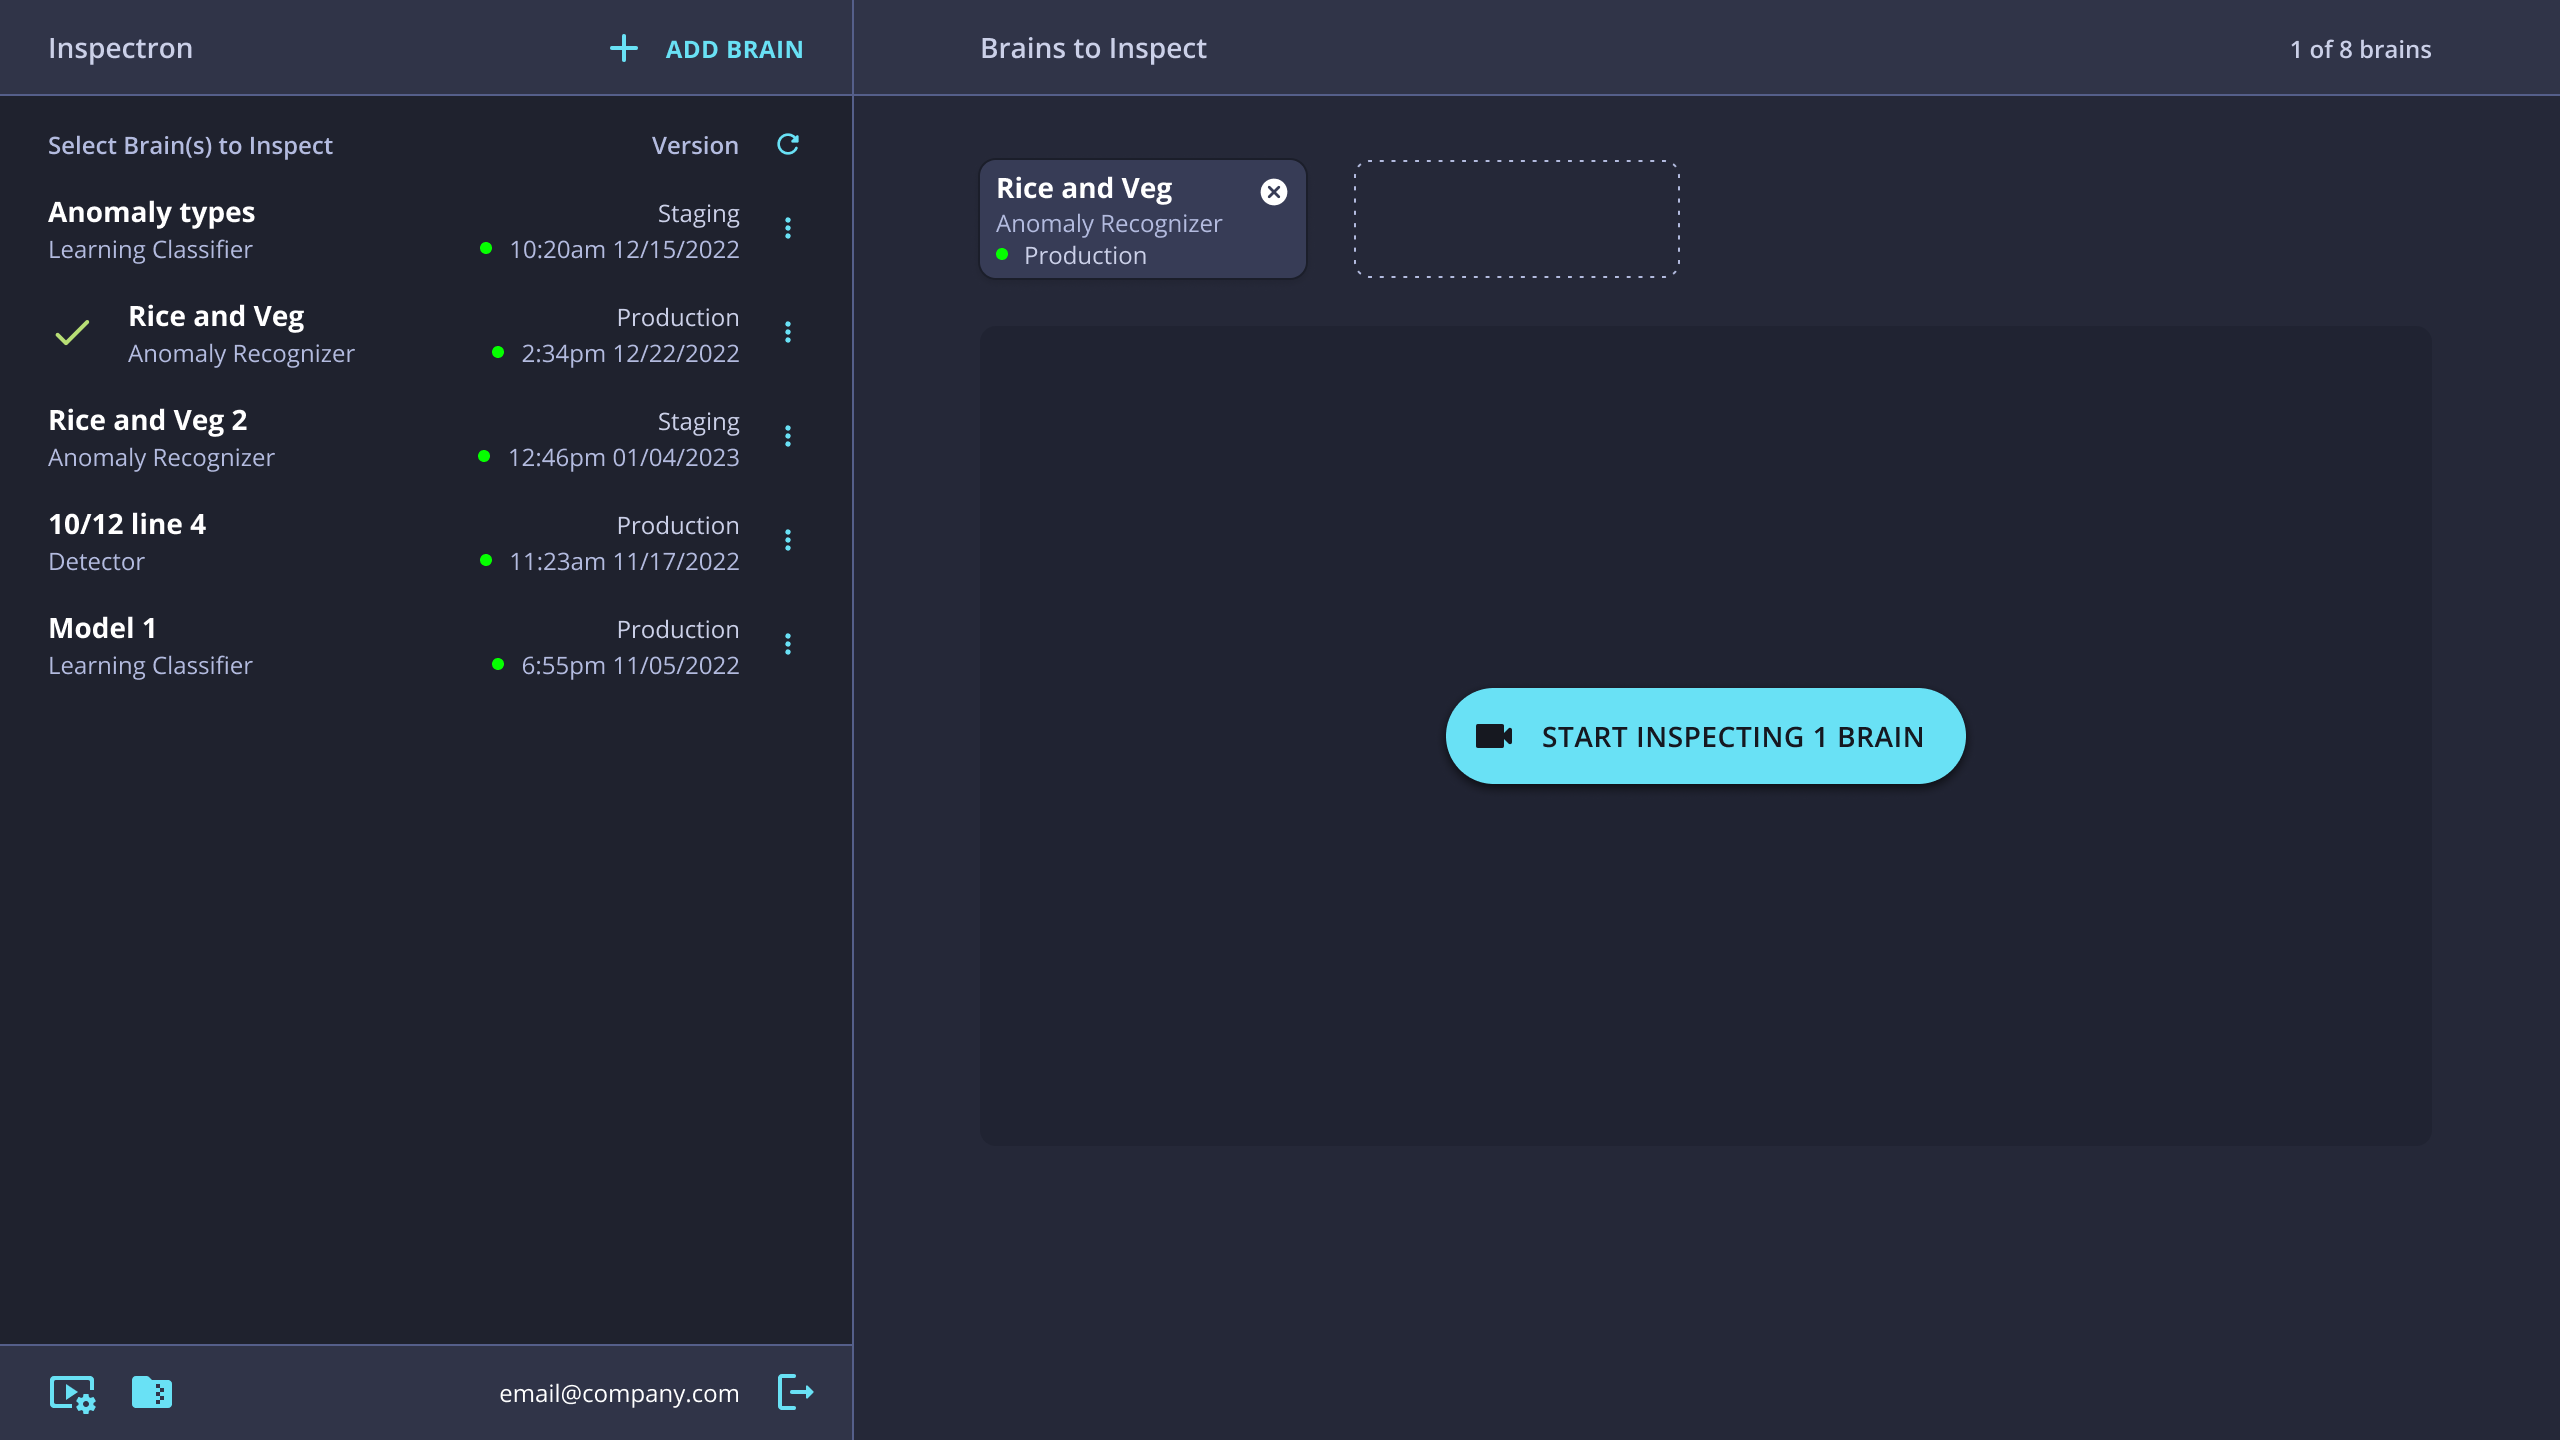
To run an inspection, click on one of the Brains that has been imported into InspectorWeb. The Brain will be loaded into the space above the video field and a check mark will be displayed next to it.
-
If desired, select additional Brains that you want to use for inspections. It is possible to run inspections with multiple Brains at the same time in InspectorWeb.
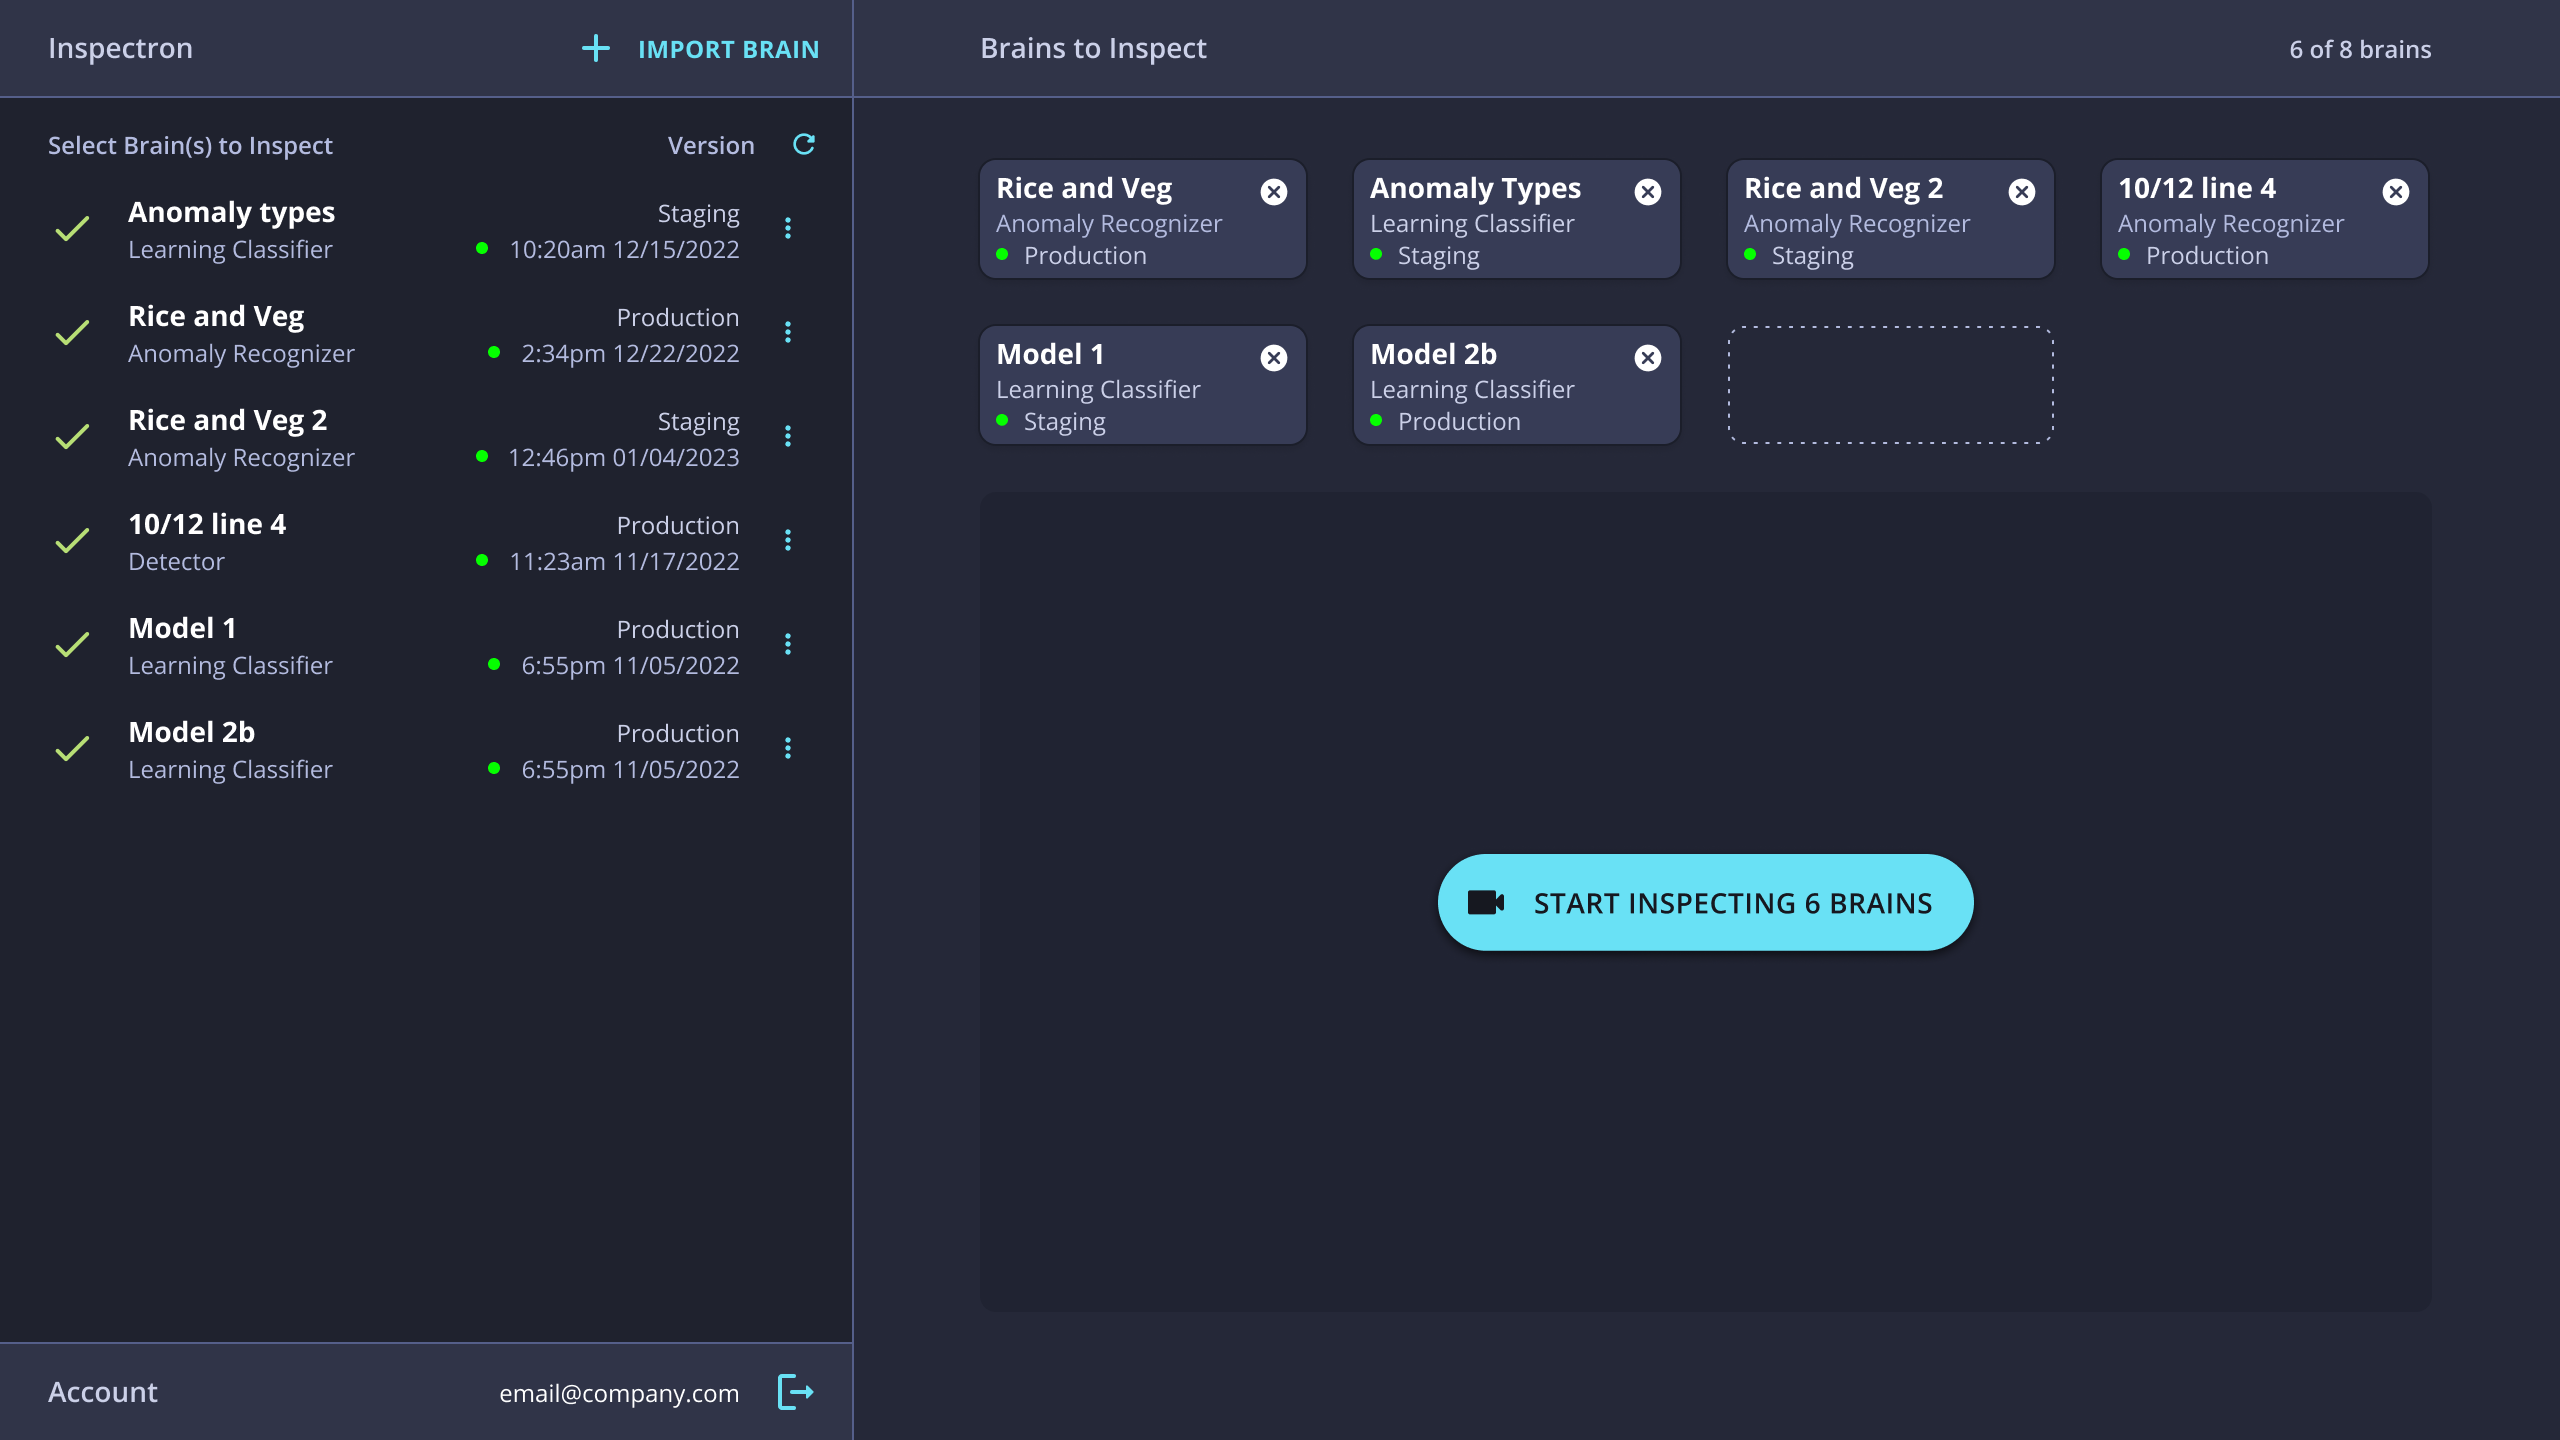
-
Click the Start Inspecting button. InspectorWeb will use the Brain(s) that have been selected to analyze images as they are received from the camera.
The video feed will be shown while inspections are running with the inference results being displayed.
To stop inspections, click Stop Inspecting.
🎓 On-Device Learning
Create a new brain
InspectorWeb features a unique ability to create new Learning Classifier Brains directly on the edge device.
-
Click on + Add Brain at the top-right of the application.
-
When prompted, select Create New Local Brain.
-
Name the Brain and indicate if the Brain should have a region of interest. InspectorWeb will then open the training workflow.
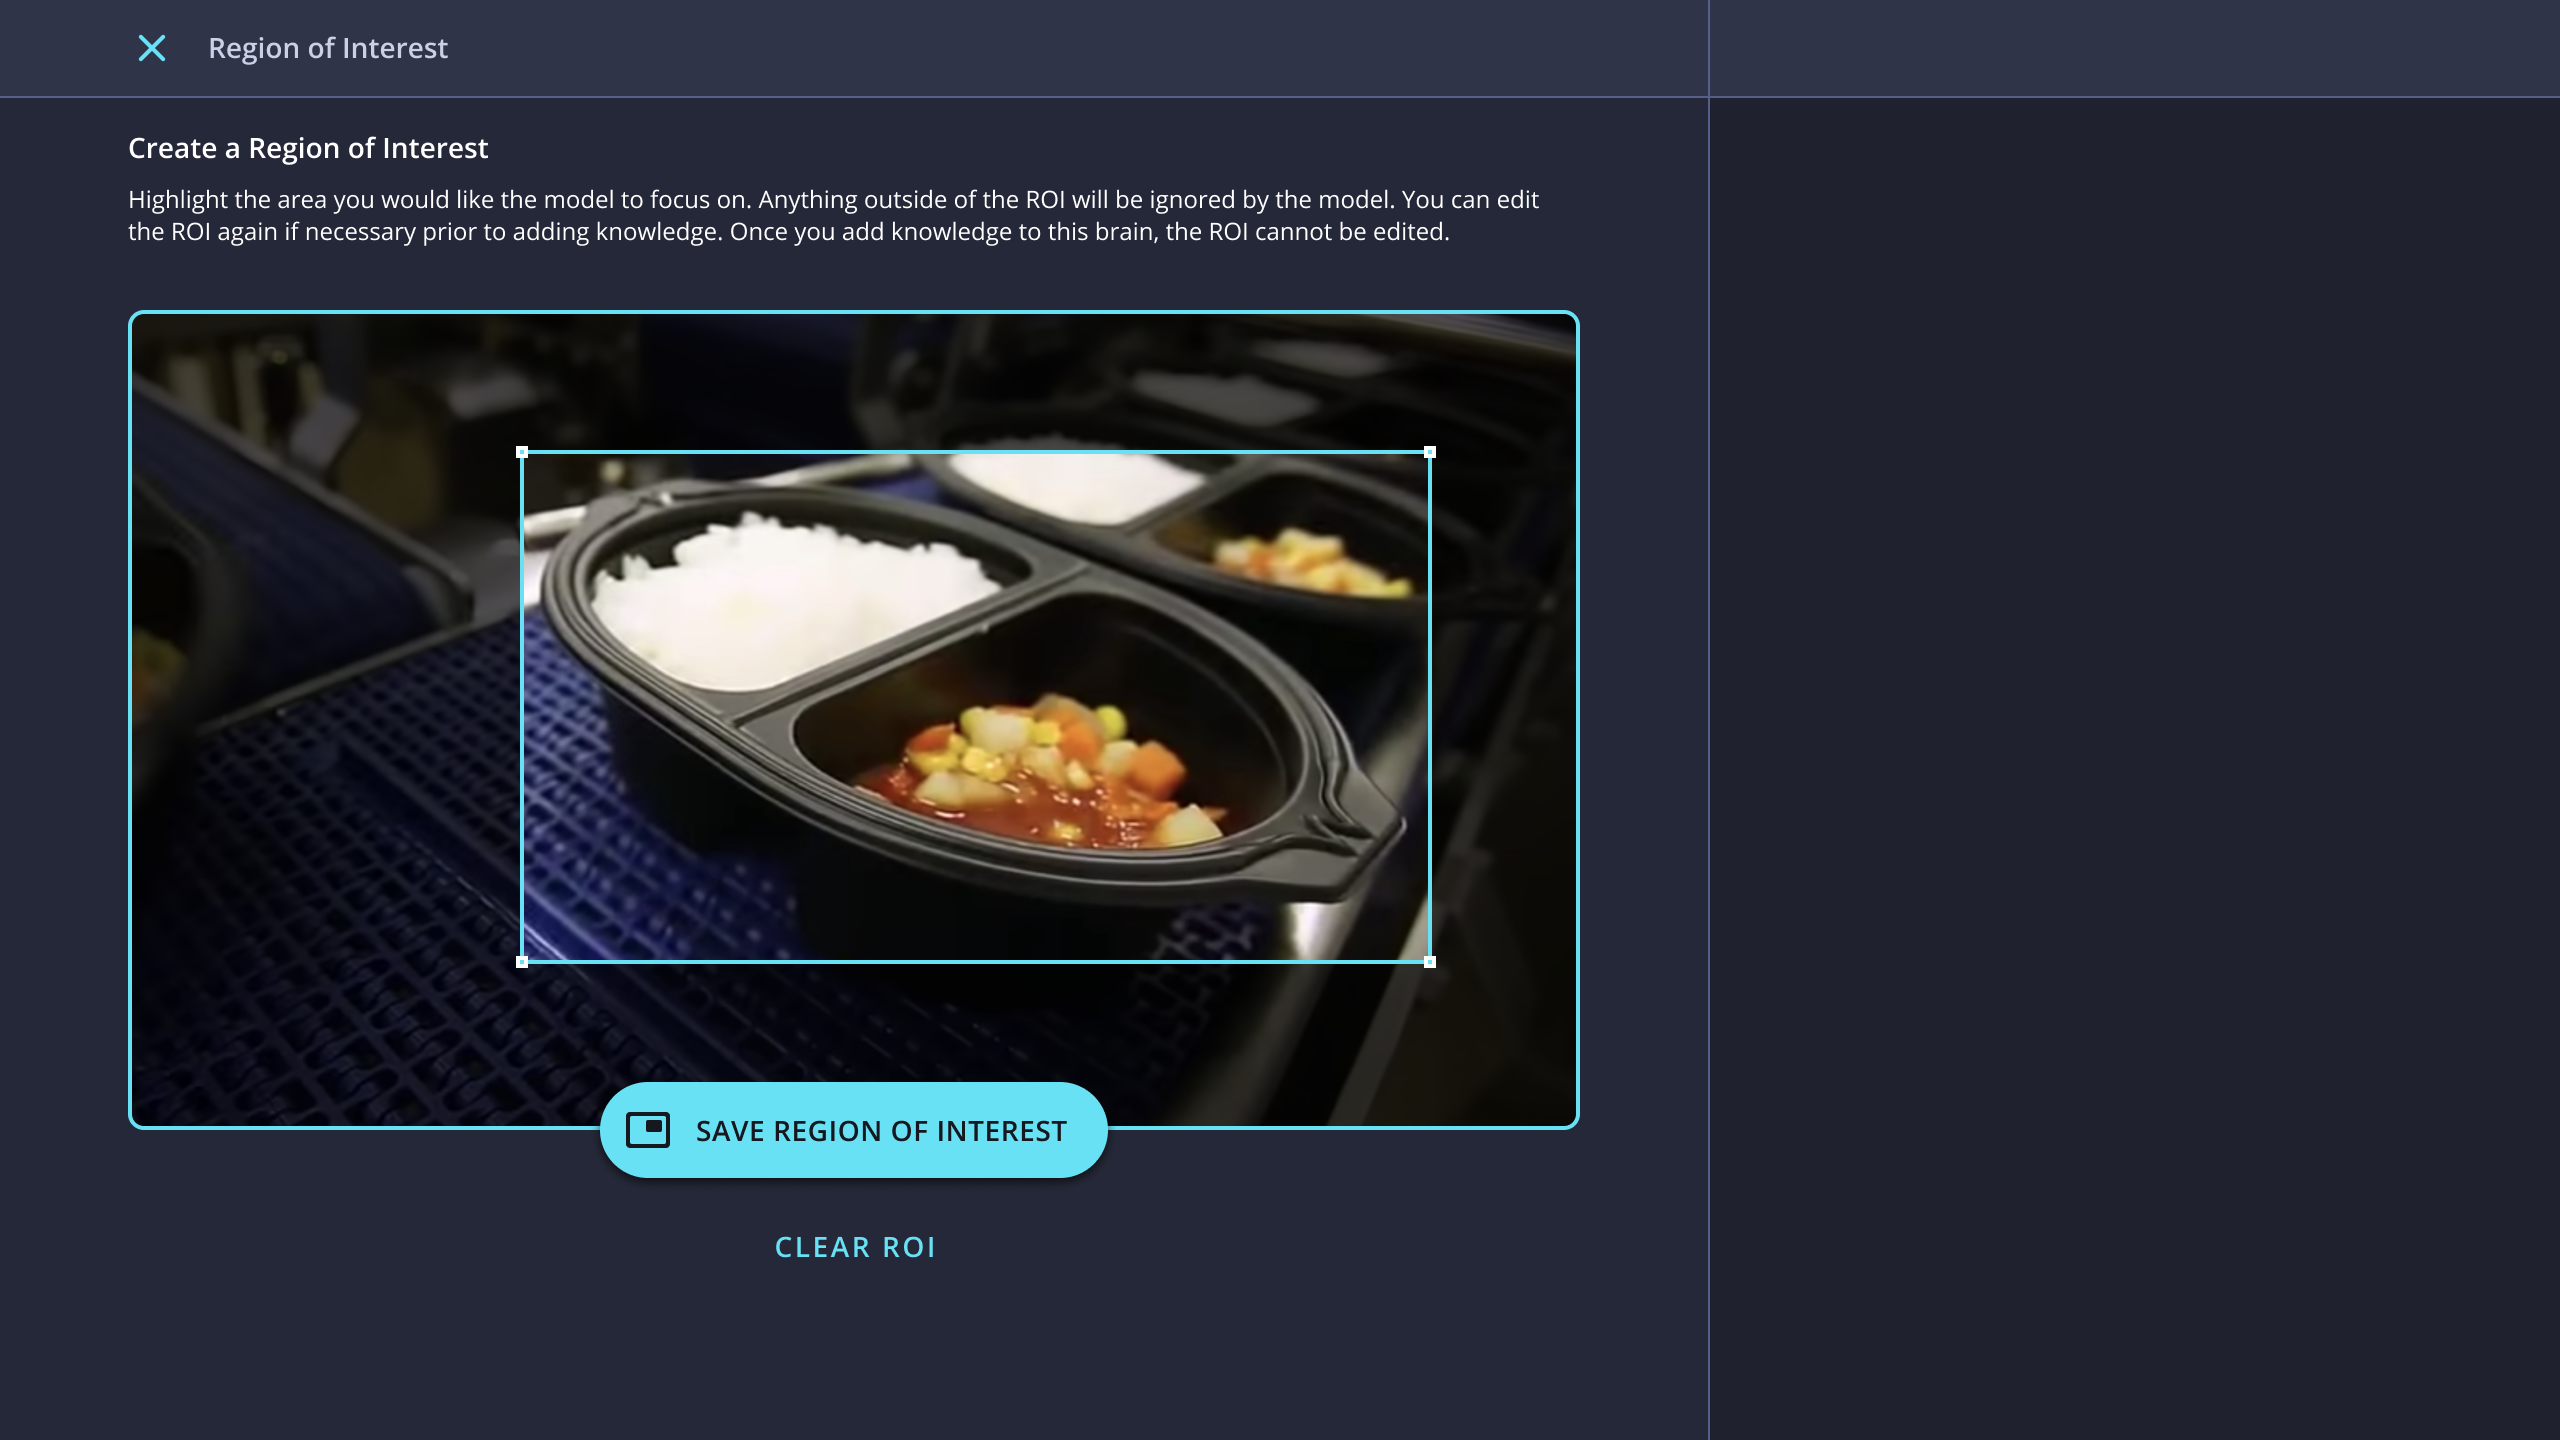
-
If using a region of interest, the ROI must be set prior to any image capture. Use the interface to create the region of interest.
-
Use the Classes drop-down to create the first Class you wish to train. Name the class. Repeat the process to create the classes that this Brain will include.
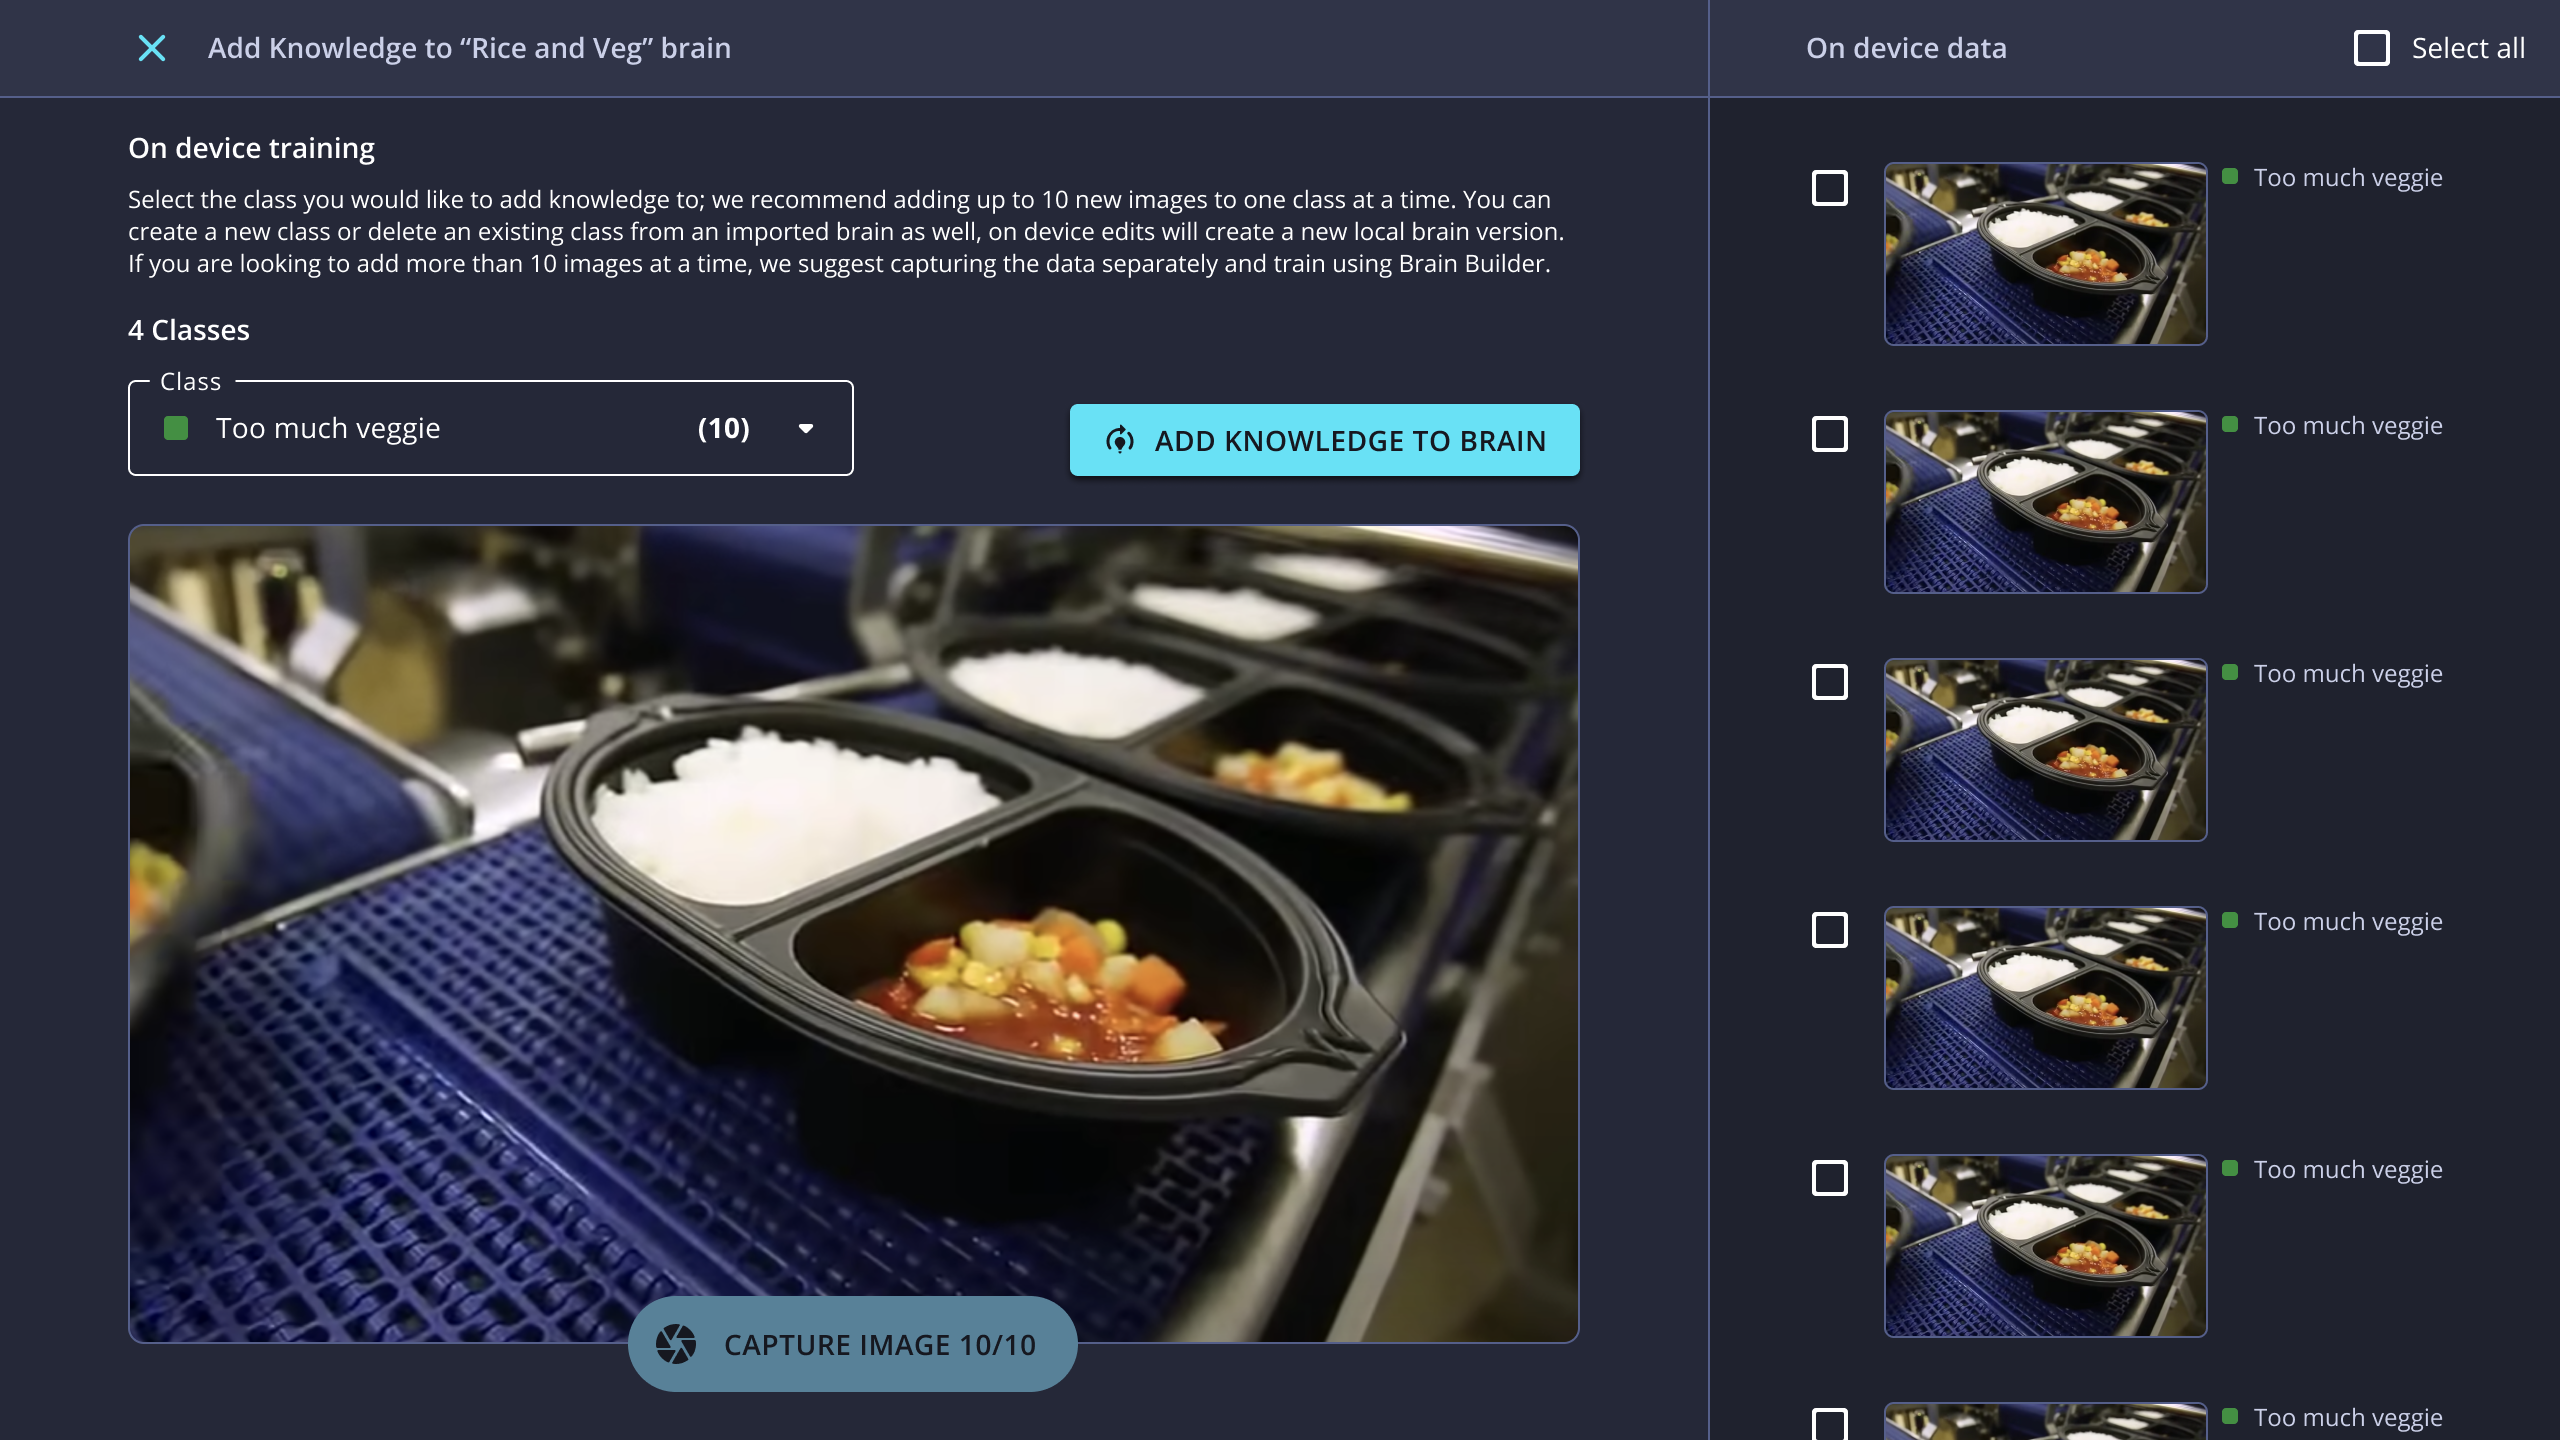
-
Select the first class to train and click Enter Capture Mode.

-
Use the Capture Image button to capture images as they are received from the camera. It is suggested that you train 10 images per class at a time.
-
When all desired images have been captured for one class, select a different class and repeat the process.
-
When all desired images have been captured for each class, click Add Knowledge to Brain.
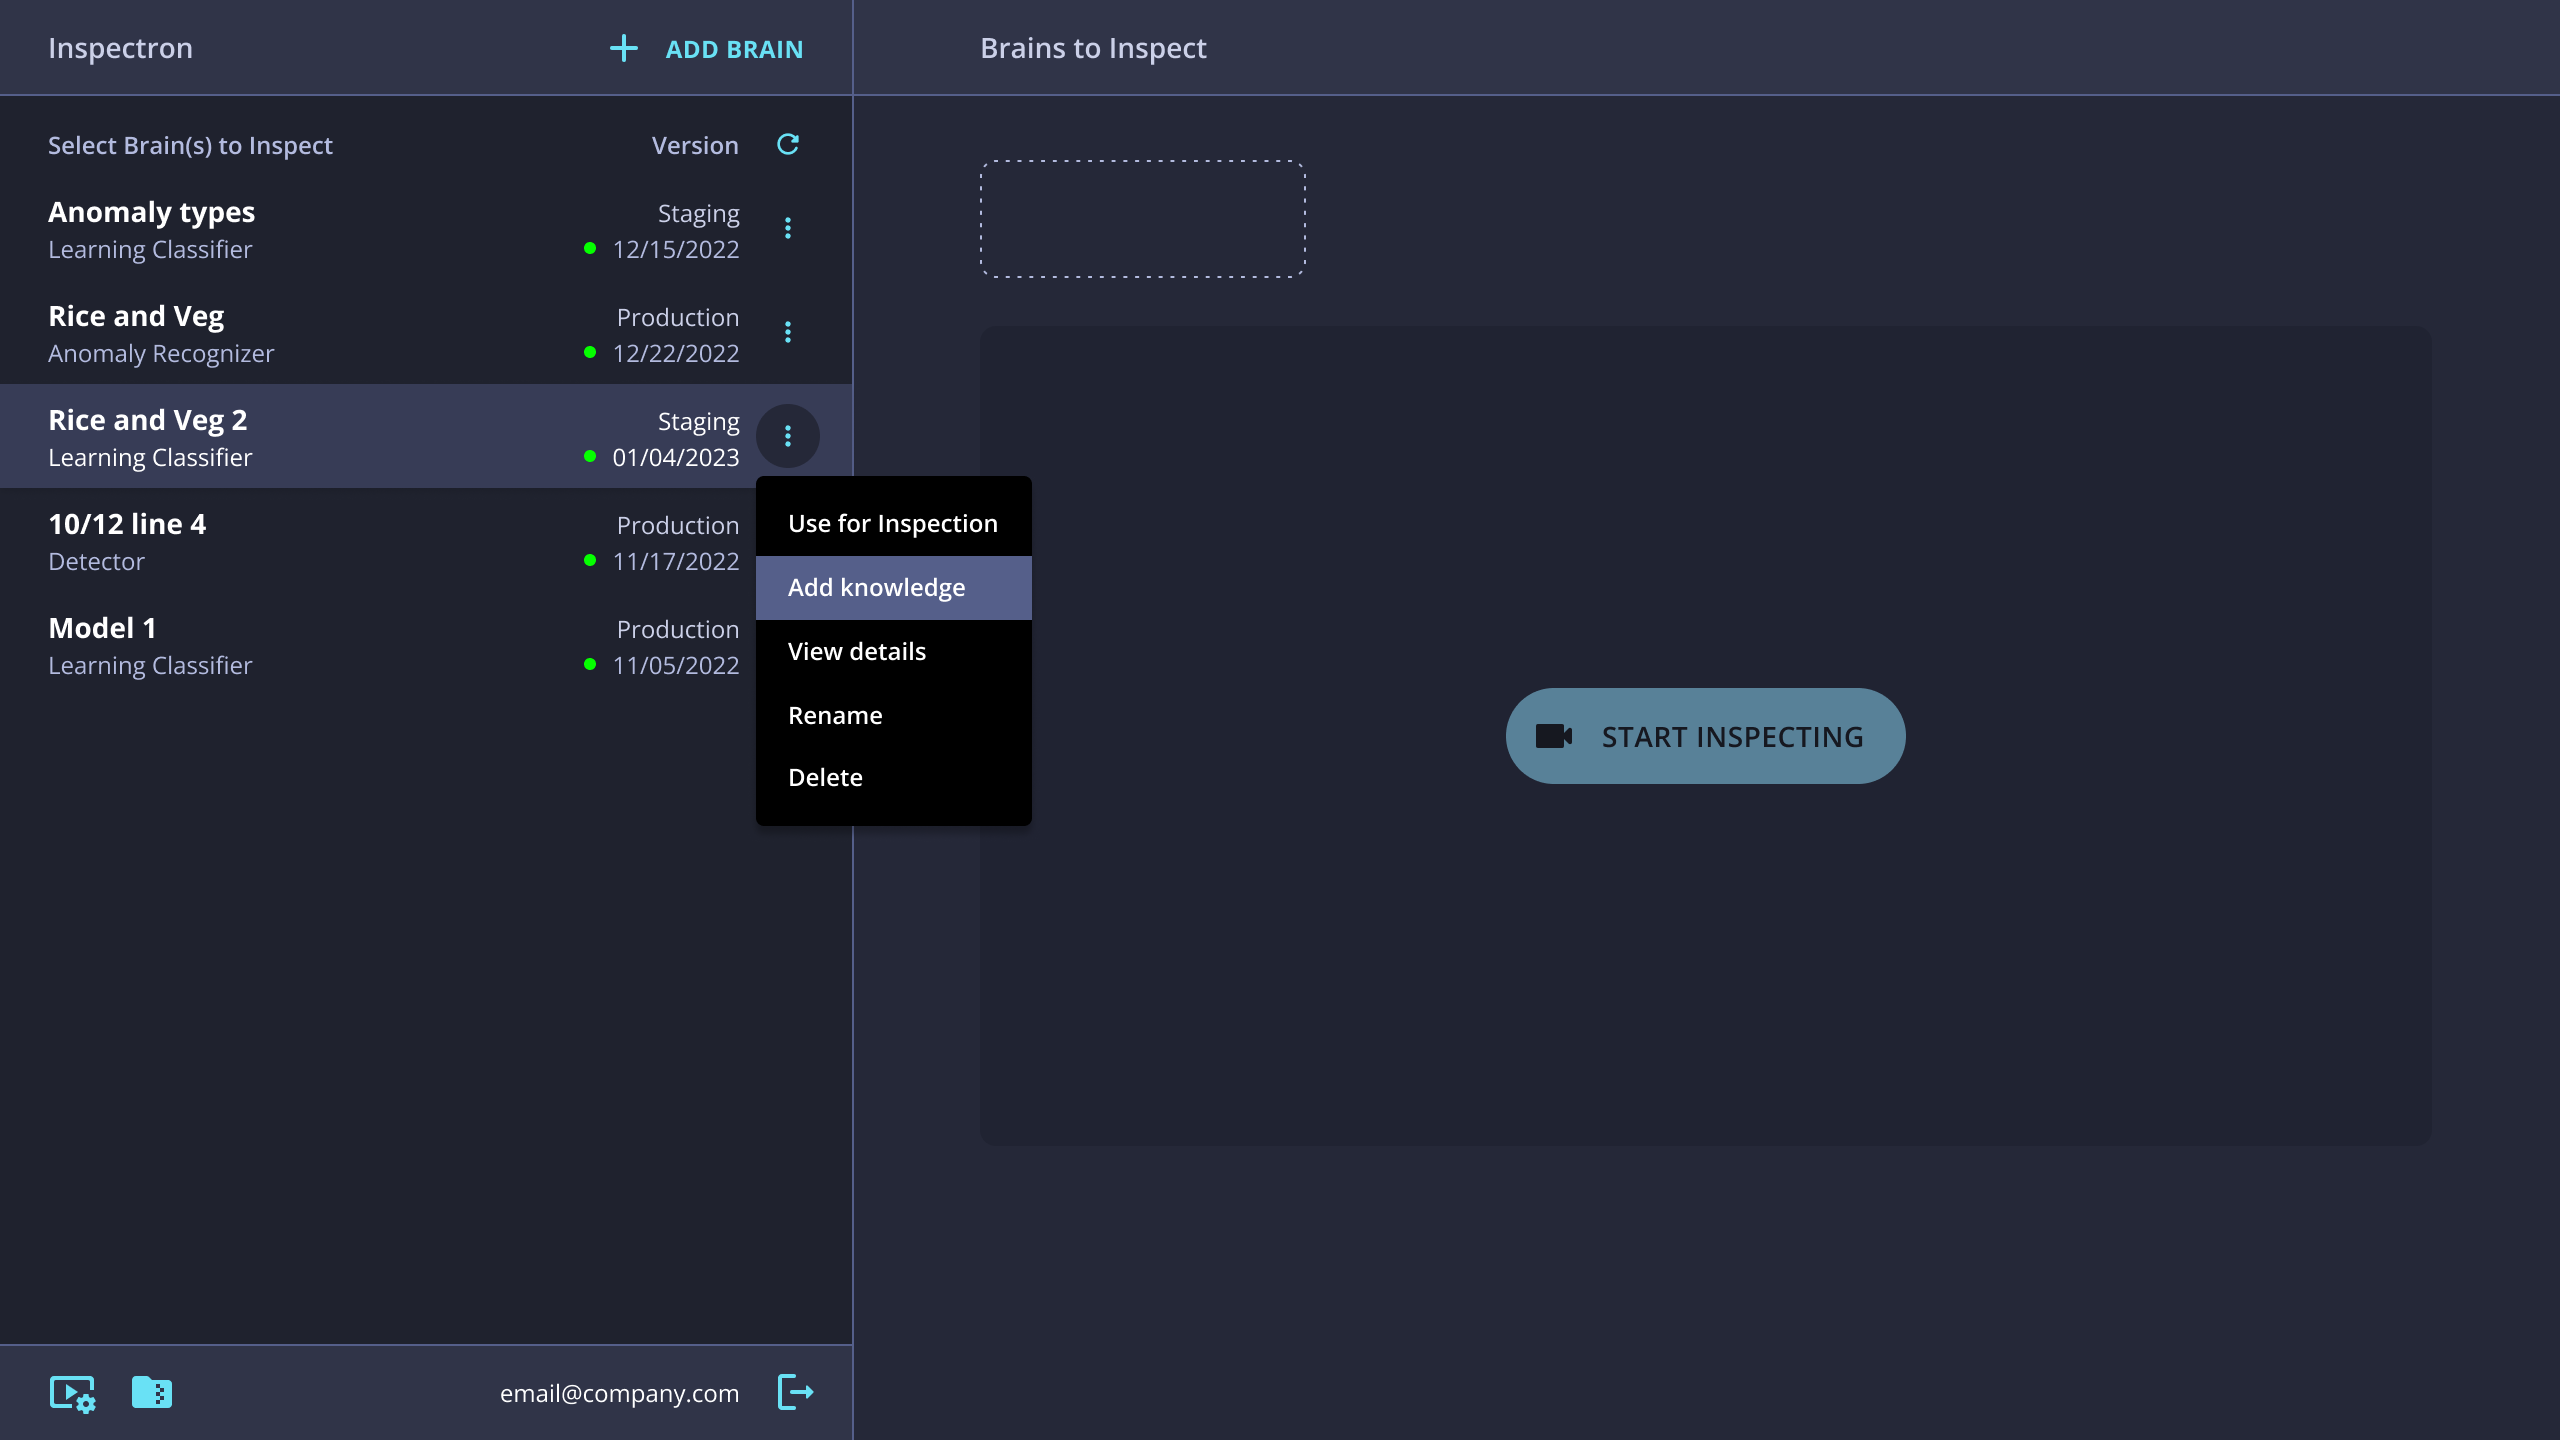
Update an imported brain
With InspectorWeb, it is also possible to add knowledge to a Learning Classifier that has been imported from Brain Builder.
-
Locate the desired Learning Classifier in the list of imported Brains and click the three dots on the right to open the menu. Select Add knowledge.
-
Follow steps 5-9 above to add images to existing classes within the Learning Classifier and/or to create new classes and capture images to train them.
Updated about 2 months ago