Running Inspections
Inspect is the process of running Inspector during production to analyze images from your line and using the outputs to improve your processes and efficiency.
Before you can run Inspections, Inspector will confirm that you have completed the required setup steps.
- Capture a Dataset - have you captured images that you used to train a Brain? This step is not required if you used images for training that were collection via other means.
- Import a Brain - does Inspector have an imported Brain that can be used for Inspection?
If you have not yet completed these steps, you will not be able to activate inspections. If all of the necessary steps have been completed, click Set Up Inspections.
🔍 Setting up inspections
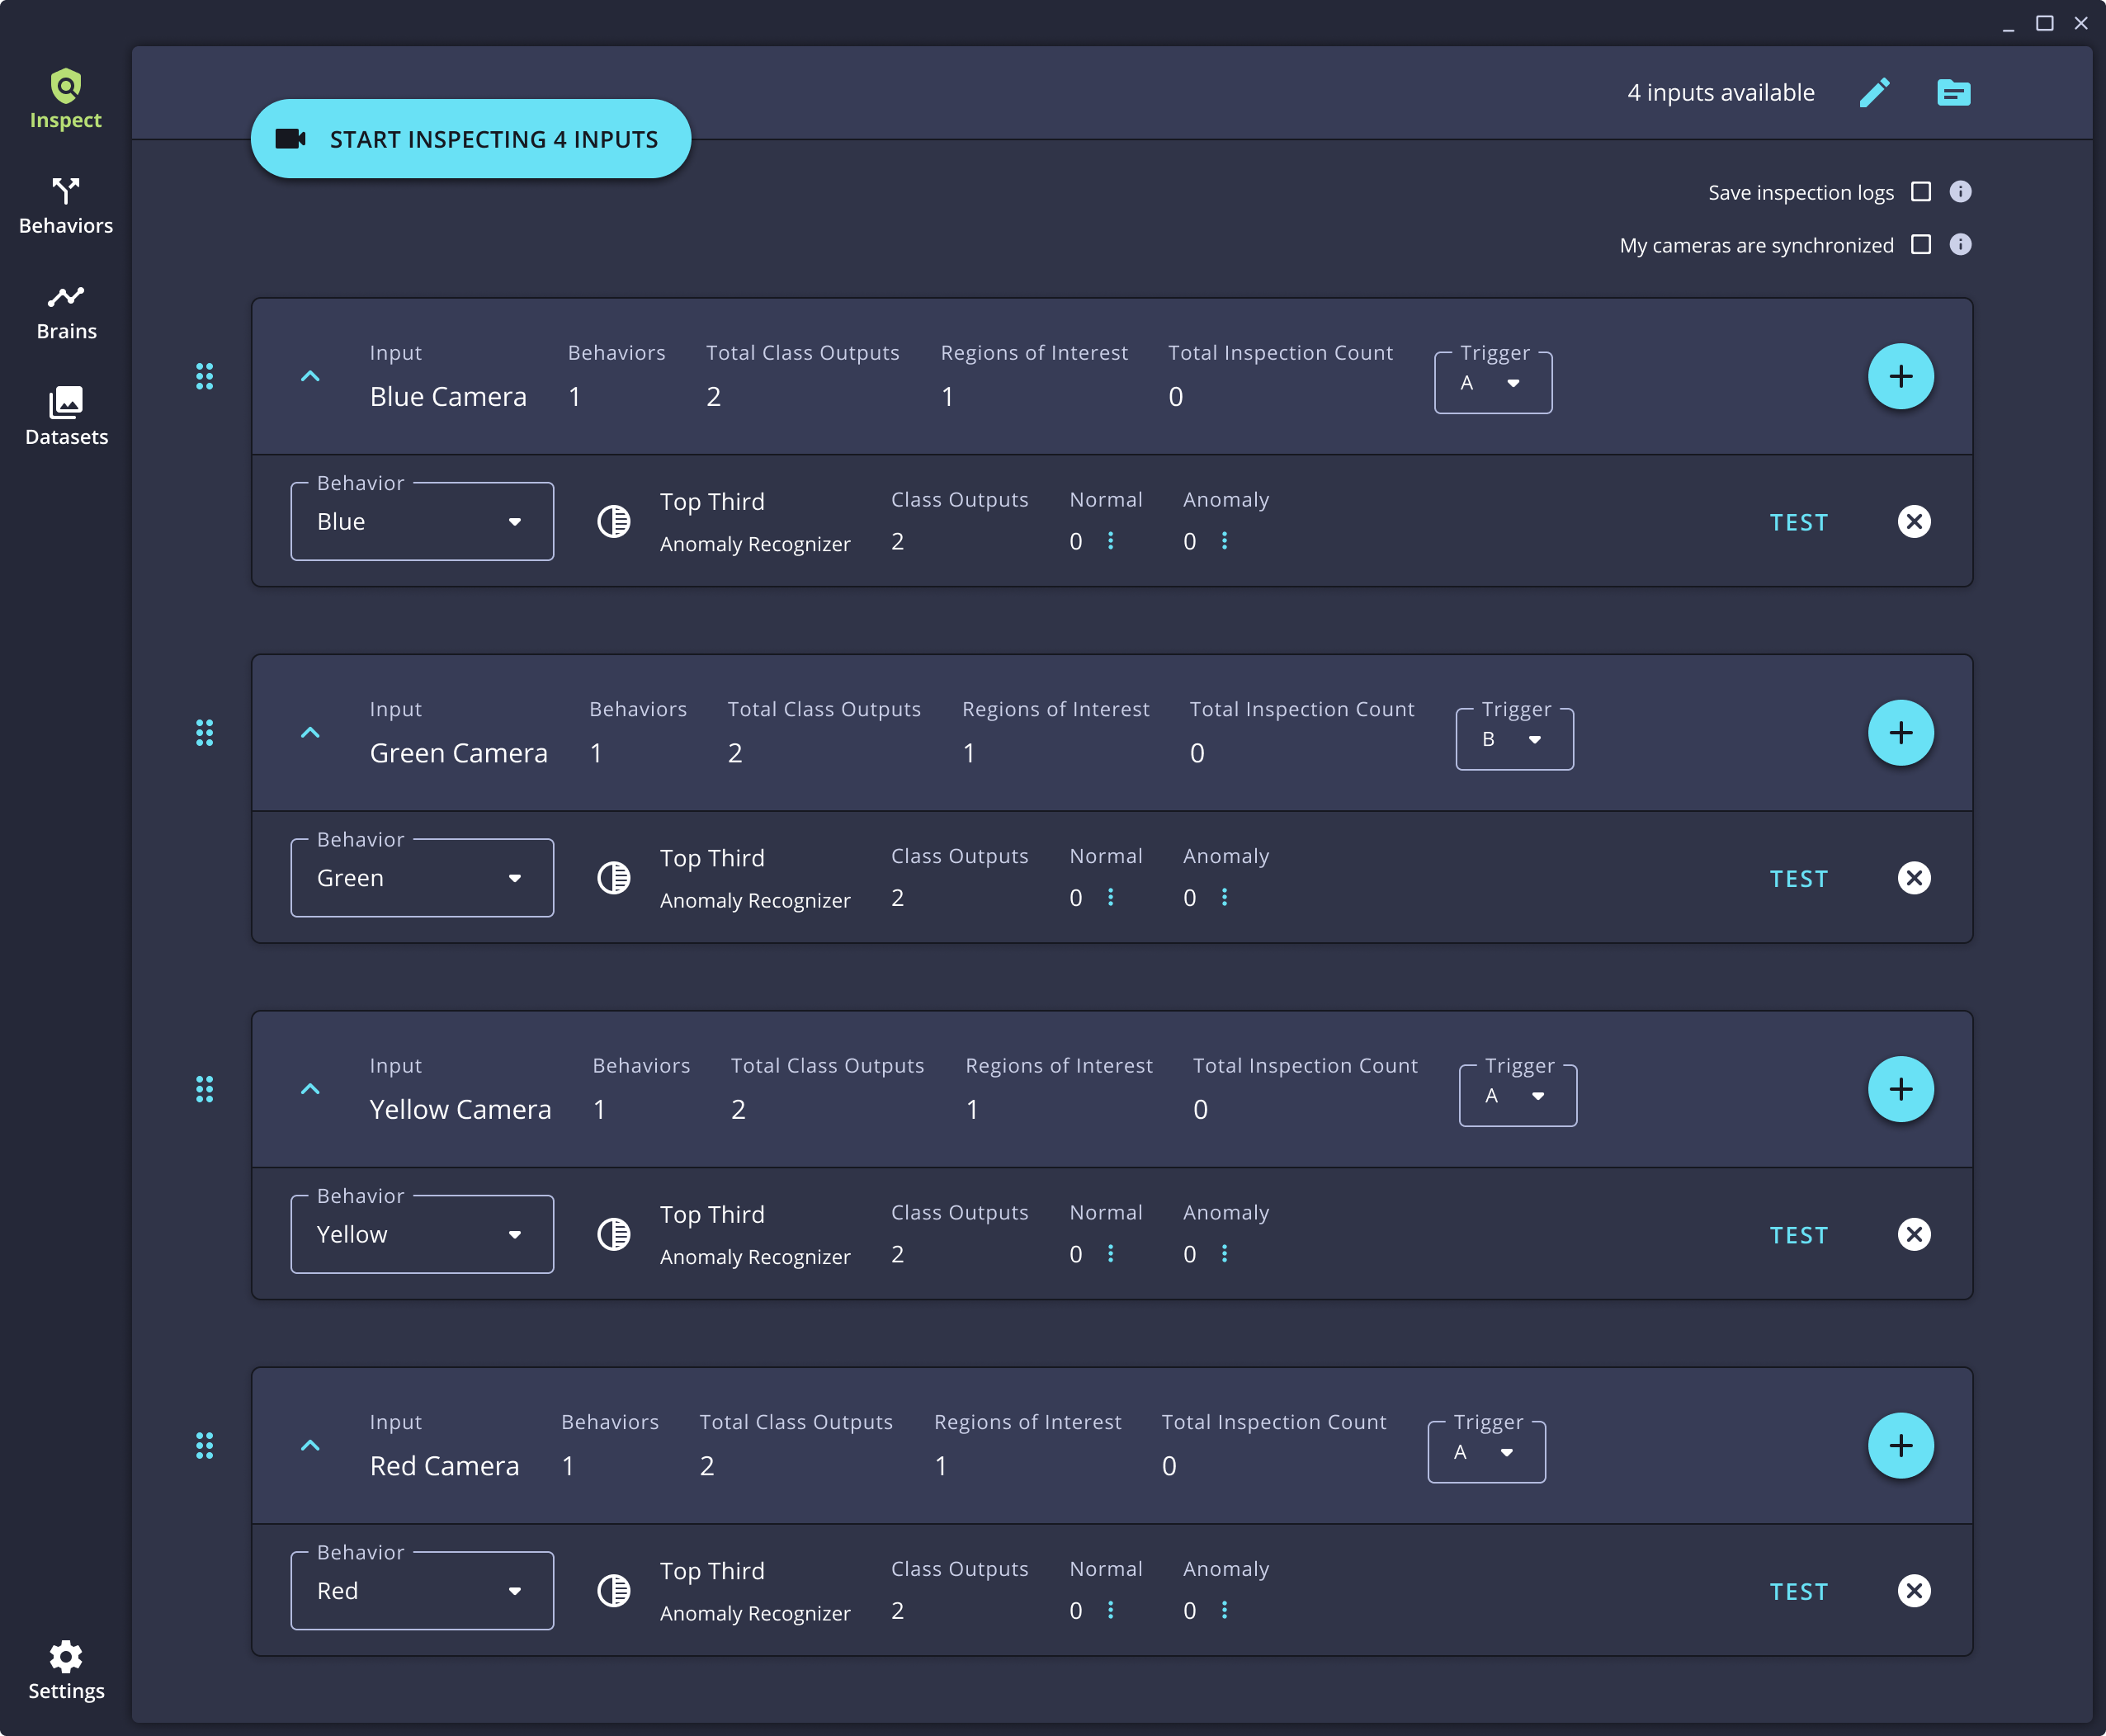
On the Inspect page, the Inputs that have been configured within Inspector will be visible.
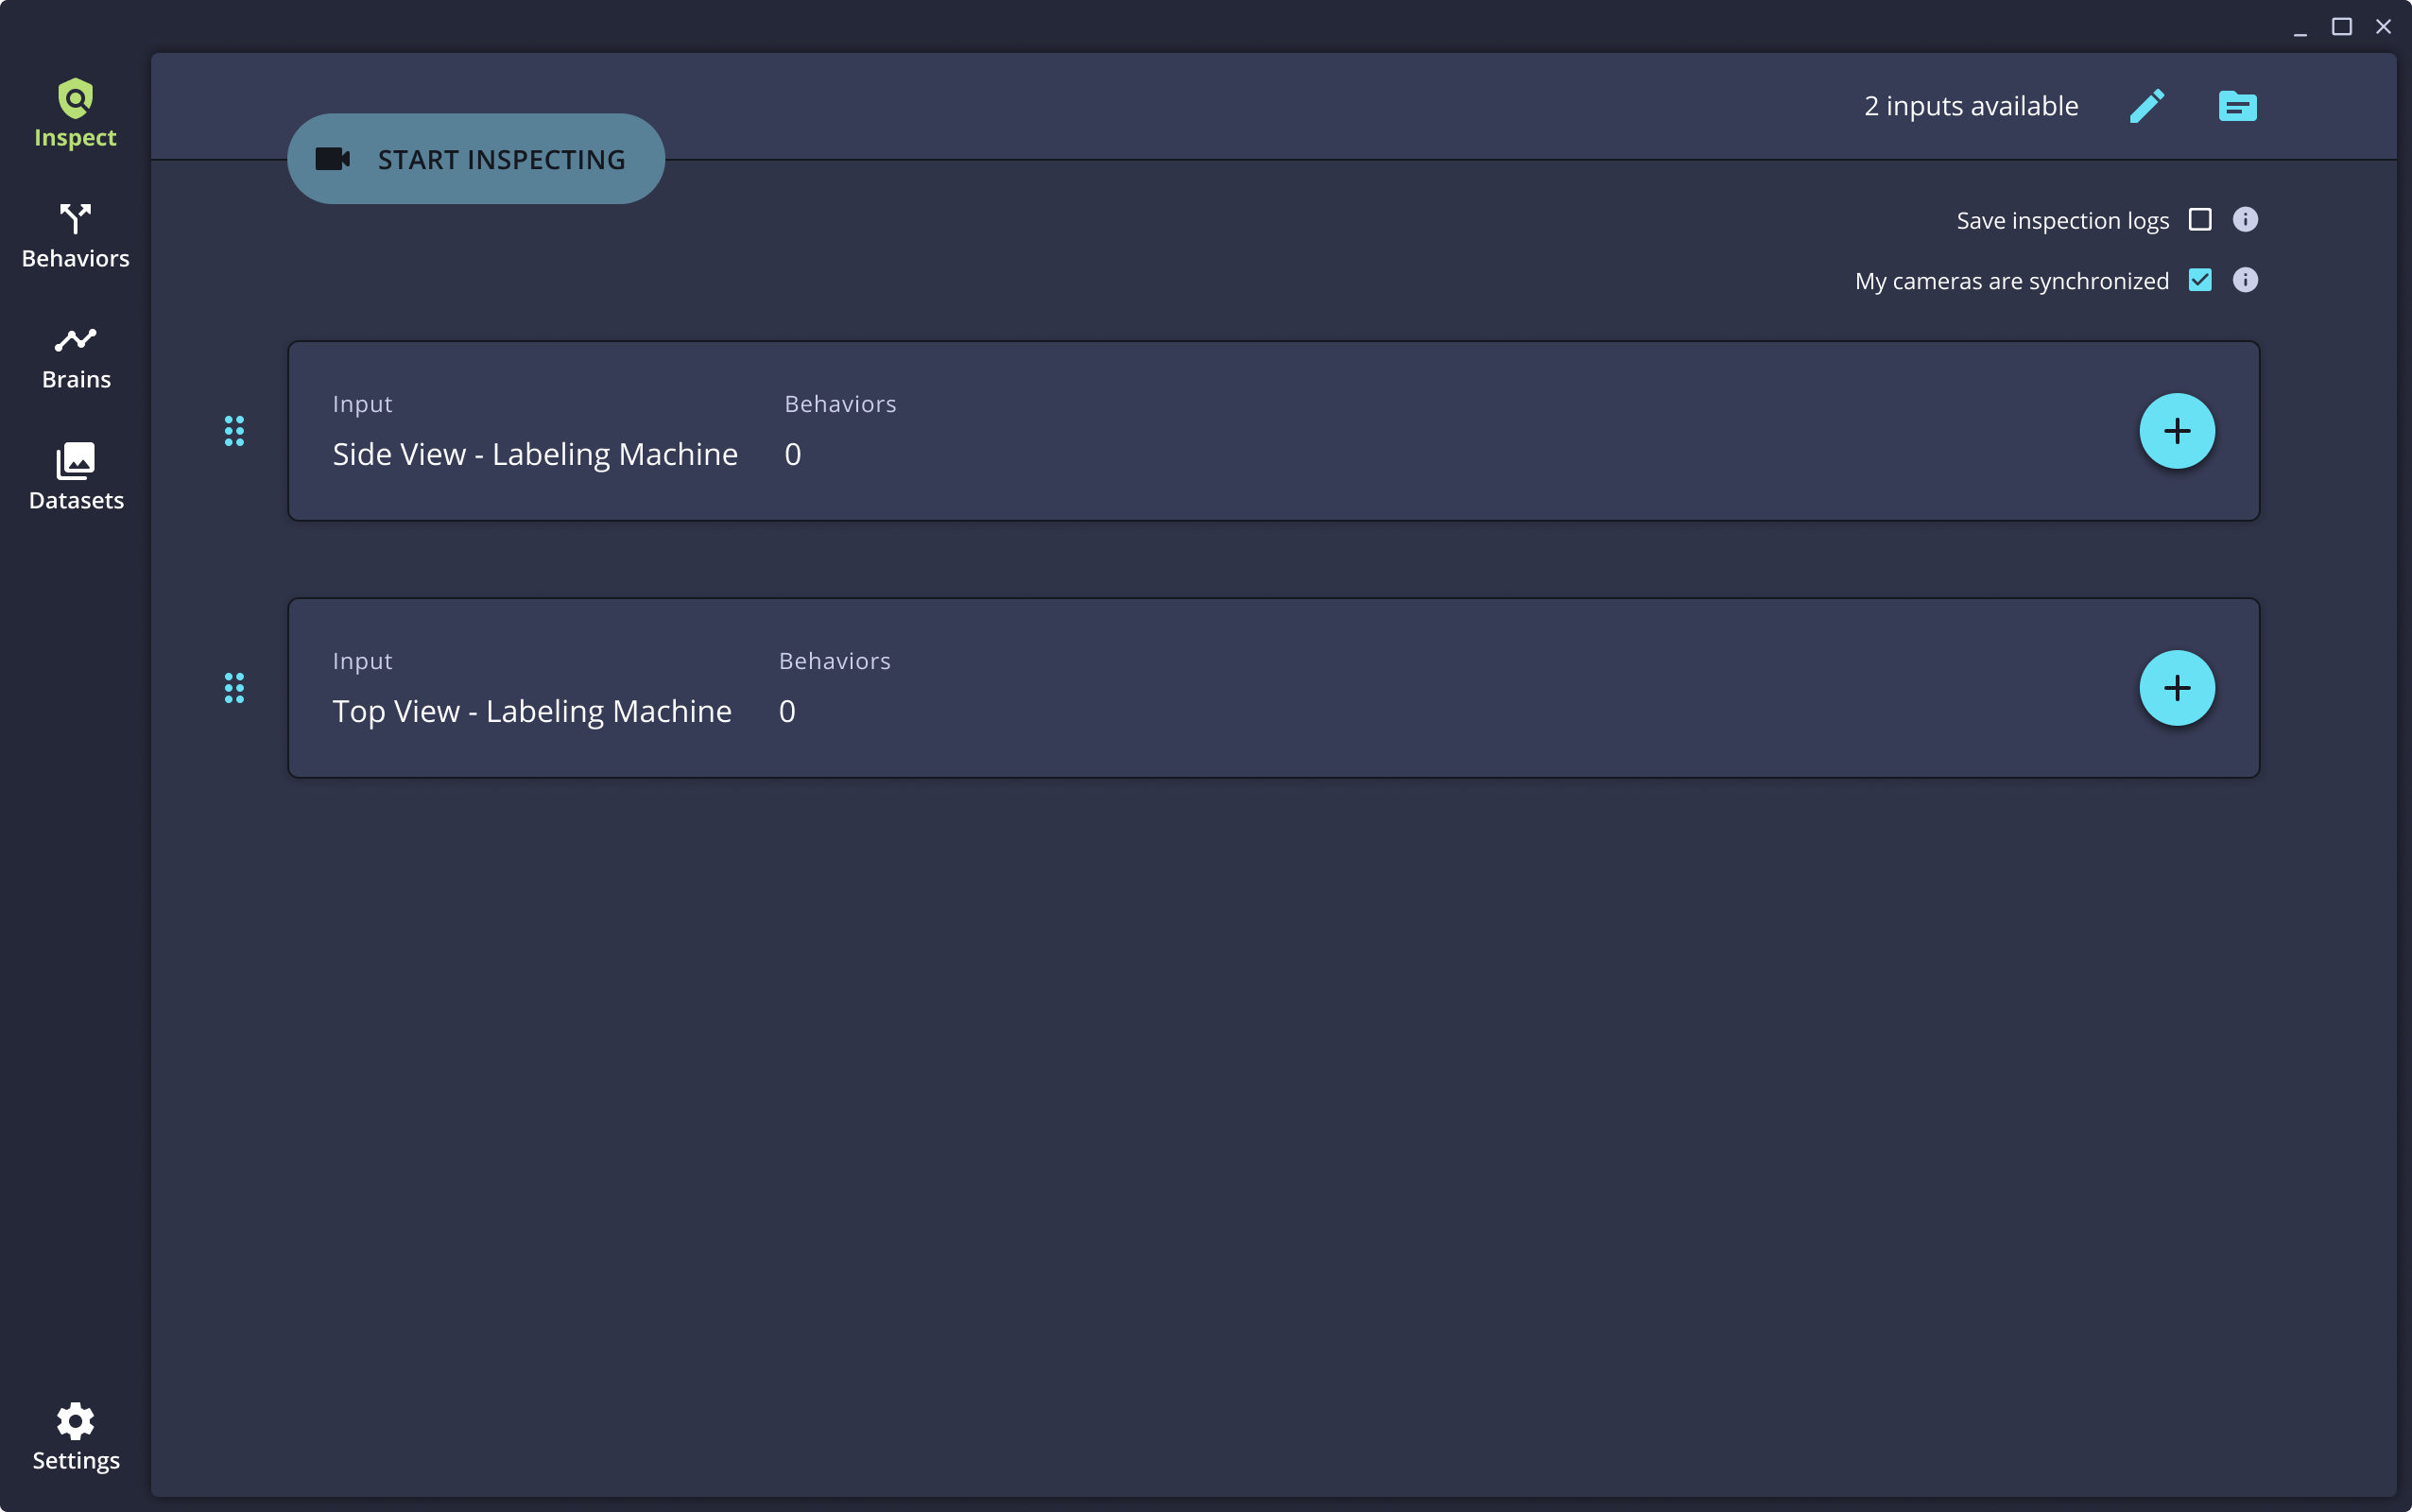
To run an inspection, associate the Brain with the input.
-
Click the + button on the desired input.
-
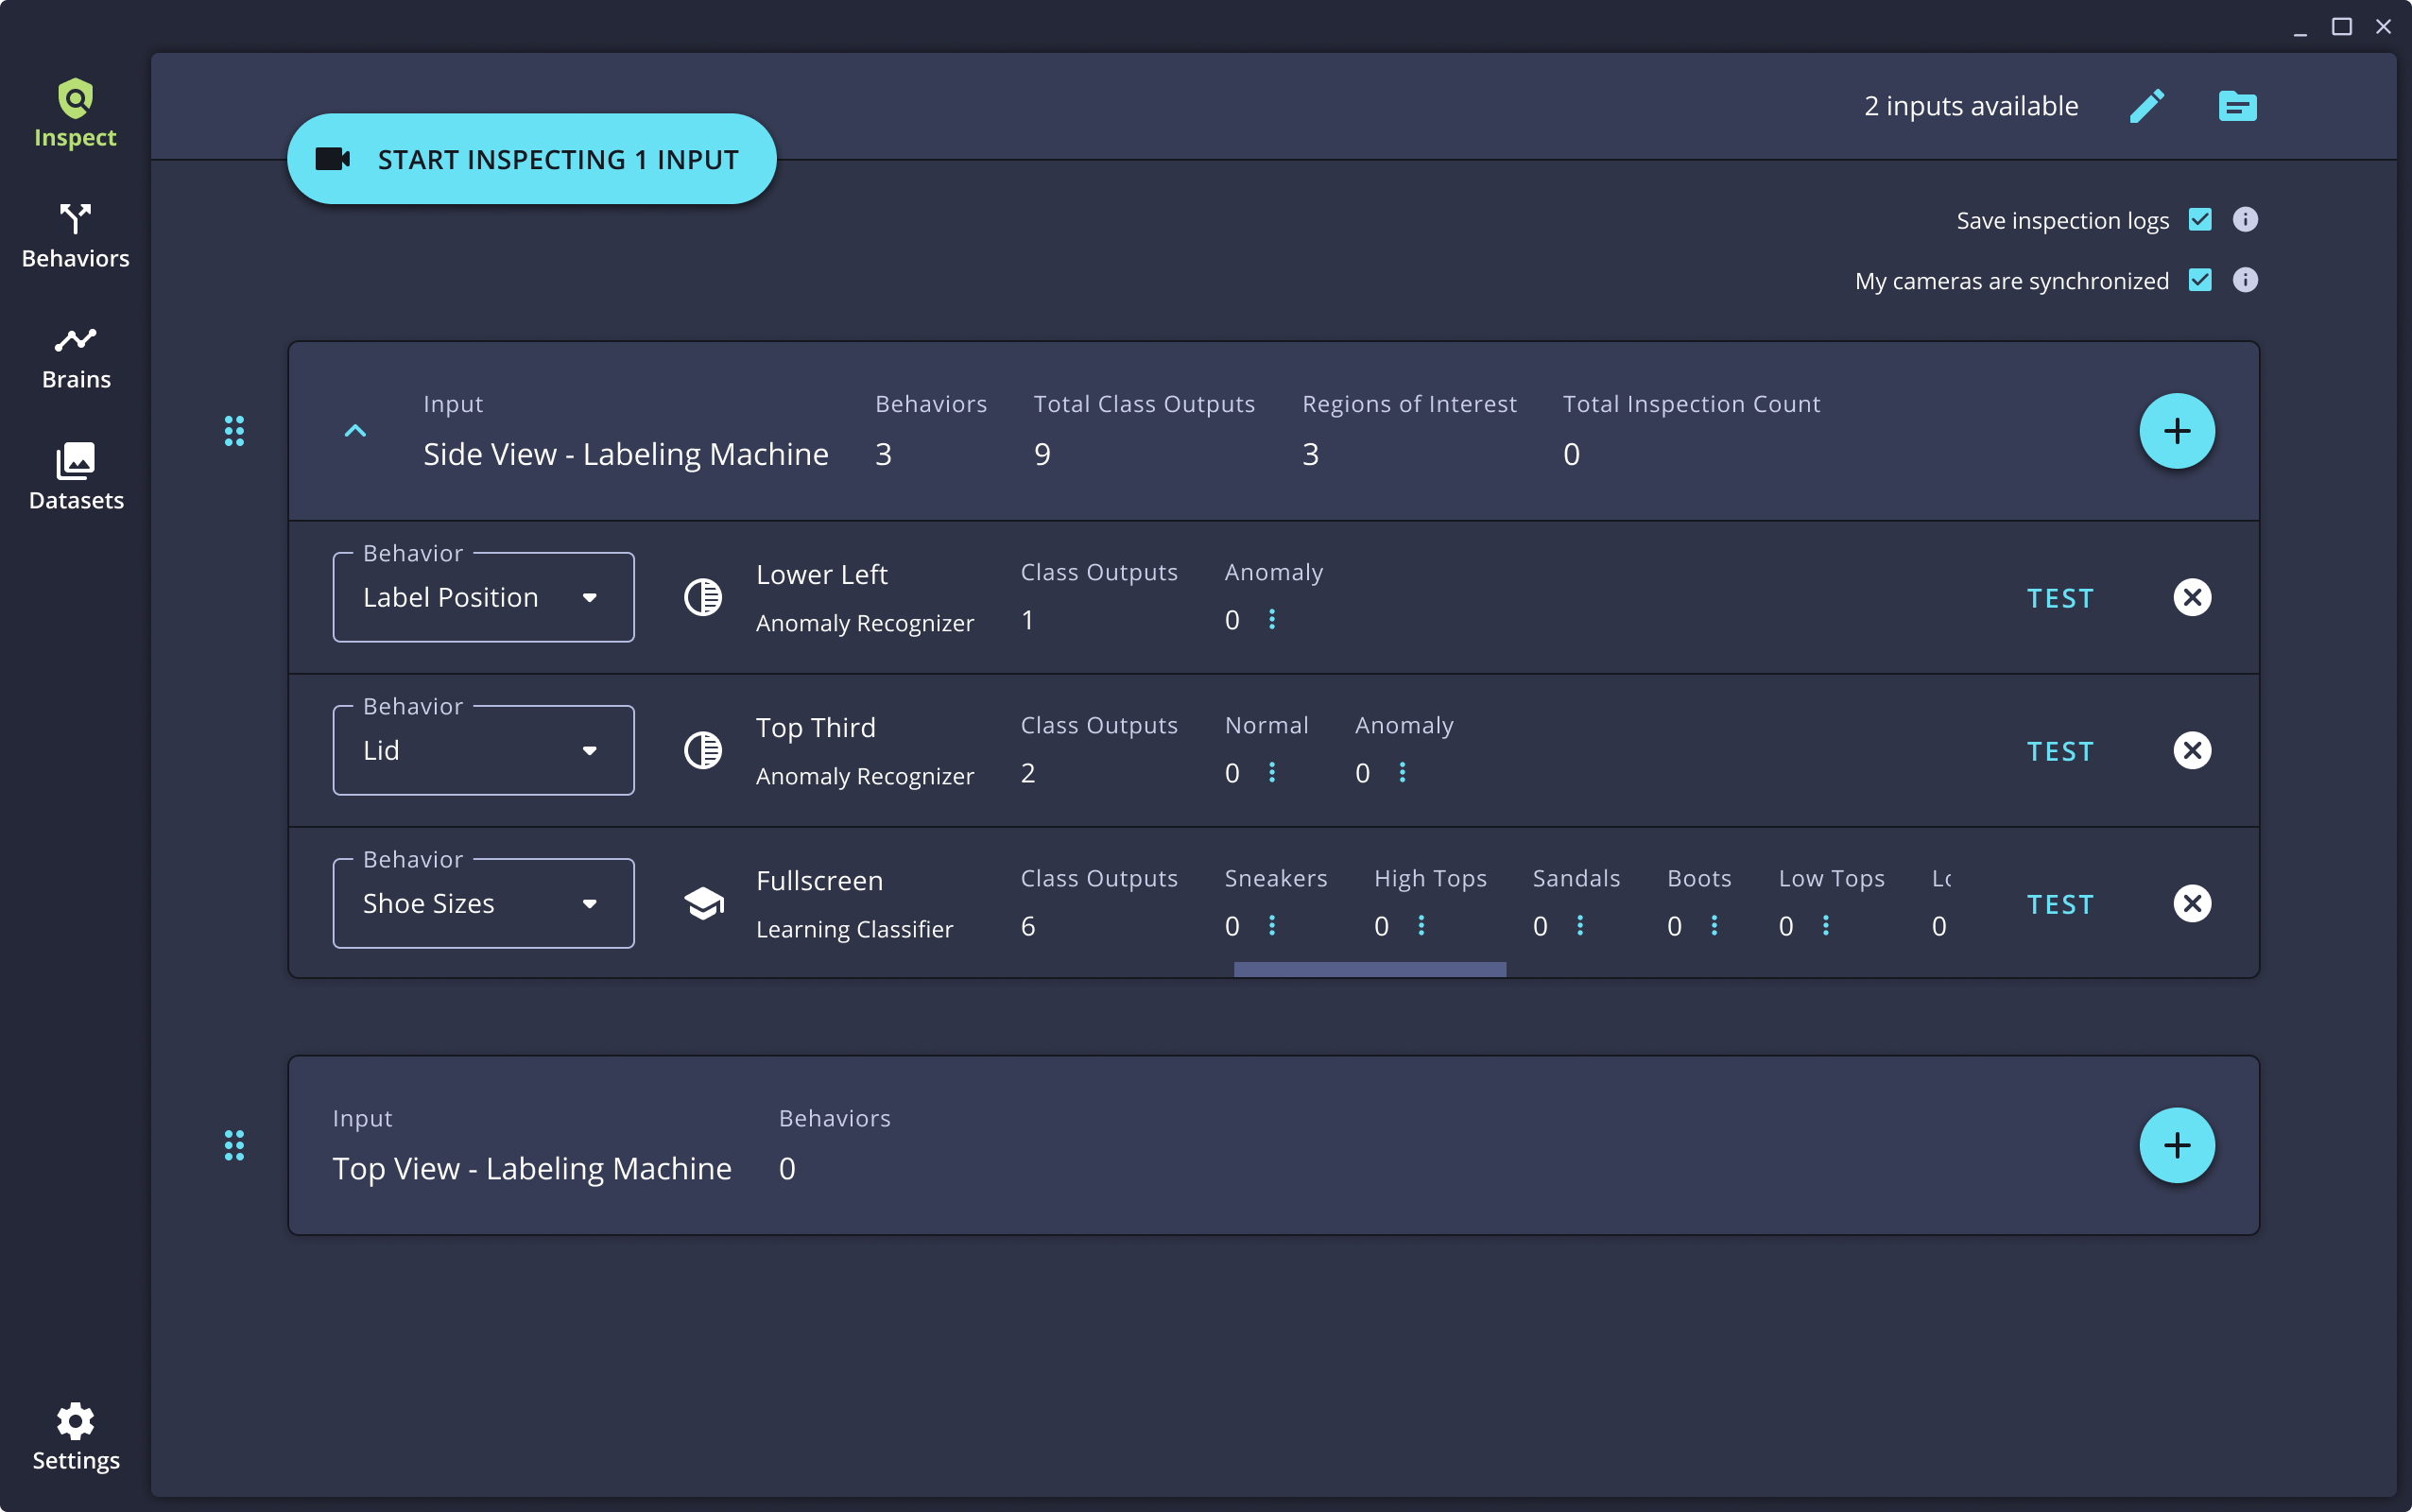
In the menu that appears below the input, select the Brain from the dropdown. The Brain details will populate once the Brain is chosen.
It is possible to run multiple inspections on a single camera by associating more than one Brain with that input. To do this, click the + button again to add more Brains.
-
To confirm the Brain and Input are correct for the desired inspection, click the Test link to the right of the Brain choice. This will open a window that will run the Brain against the the live input feed and show how the Brain will inspect each image.
In test mode, the camera can be triggered with a hardware trigger or with a software trigger, by toggling the Software Trigger selector at the top of the screen. Note that outputs are not enabled during the test mode.
-
When all Inputs and Brains have been set up, click the button at the top of the page that says Start Inspecting 1 Input (the button will update to show the count of inputs that are configured with Brains to begin inspections). Inspections will begin running.
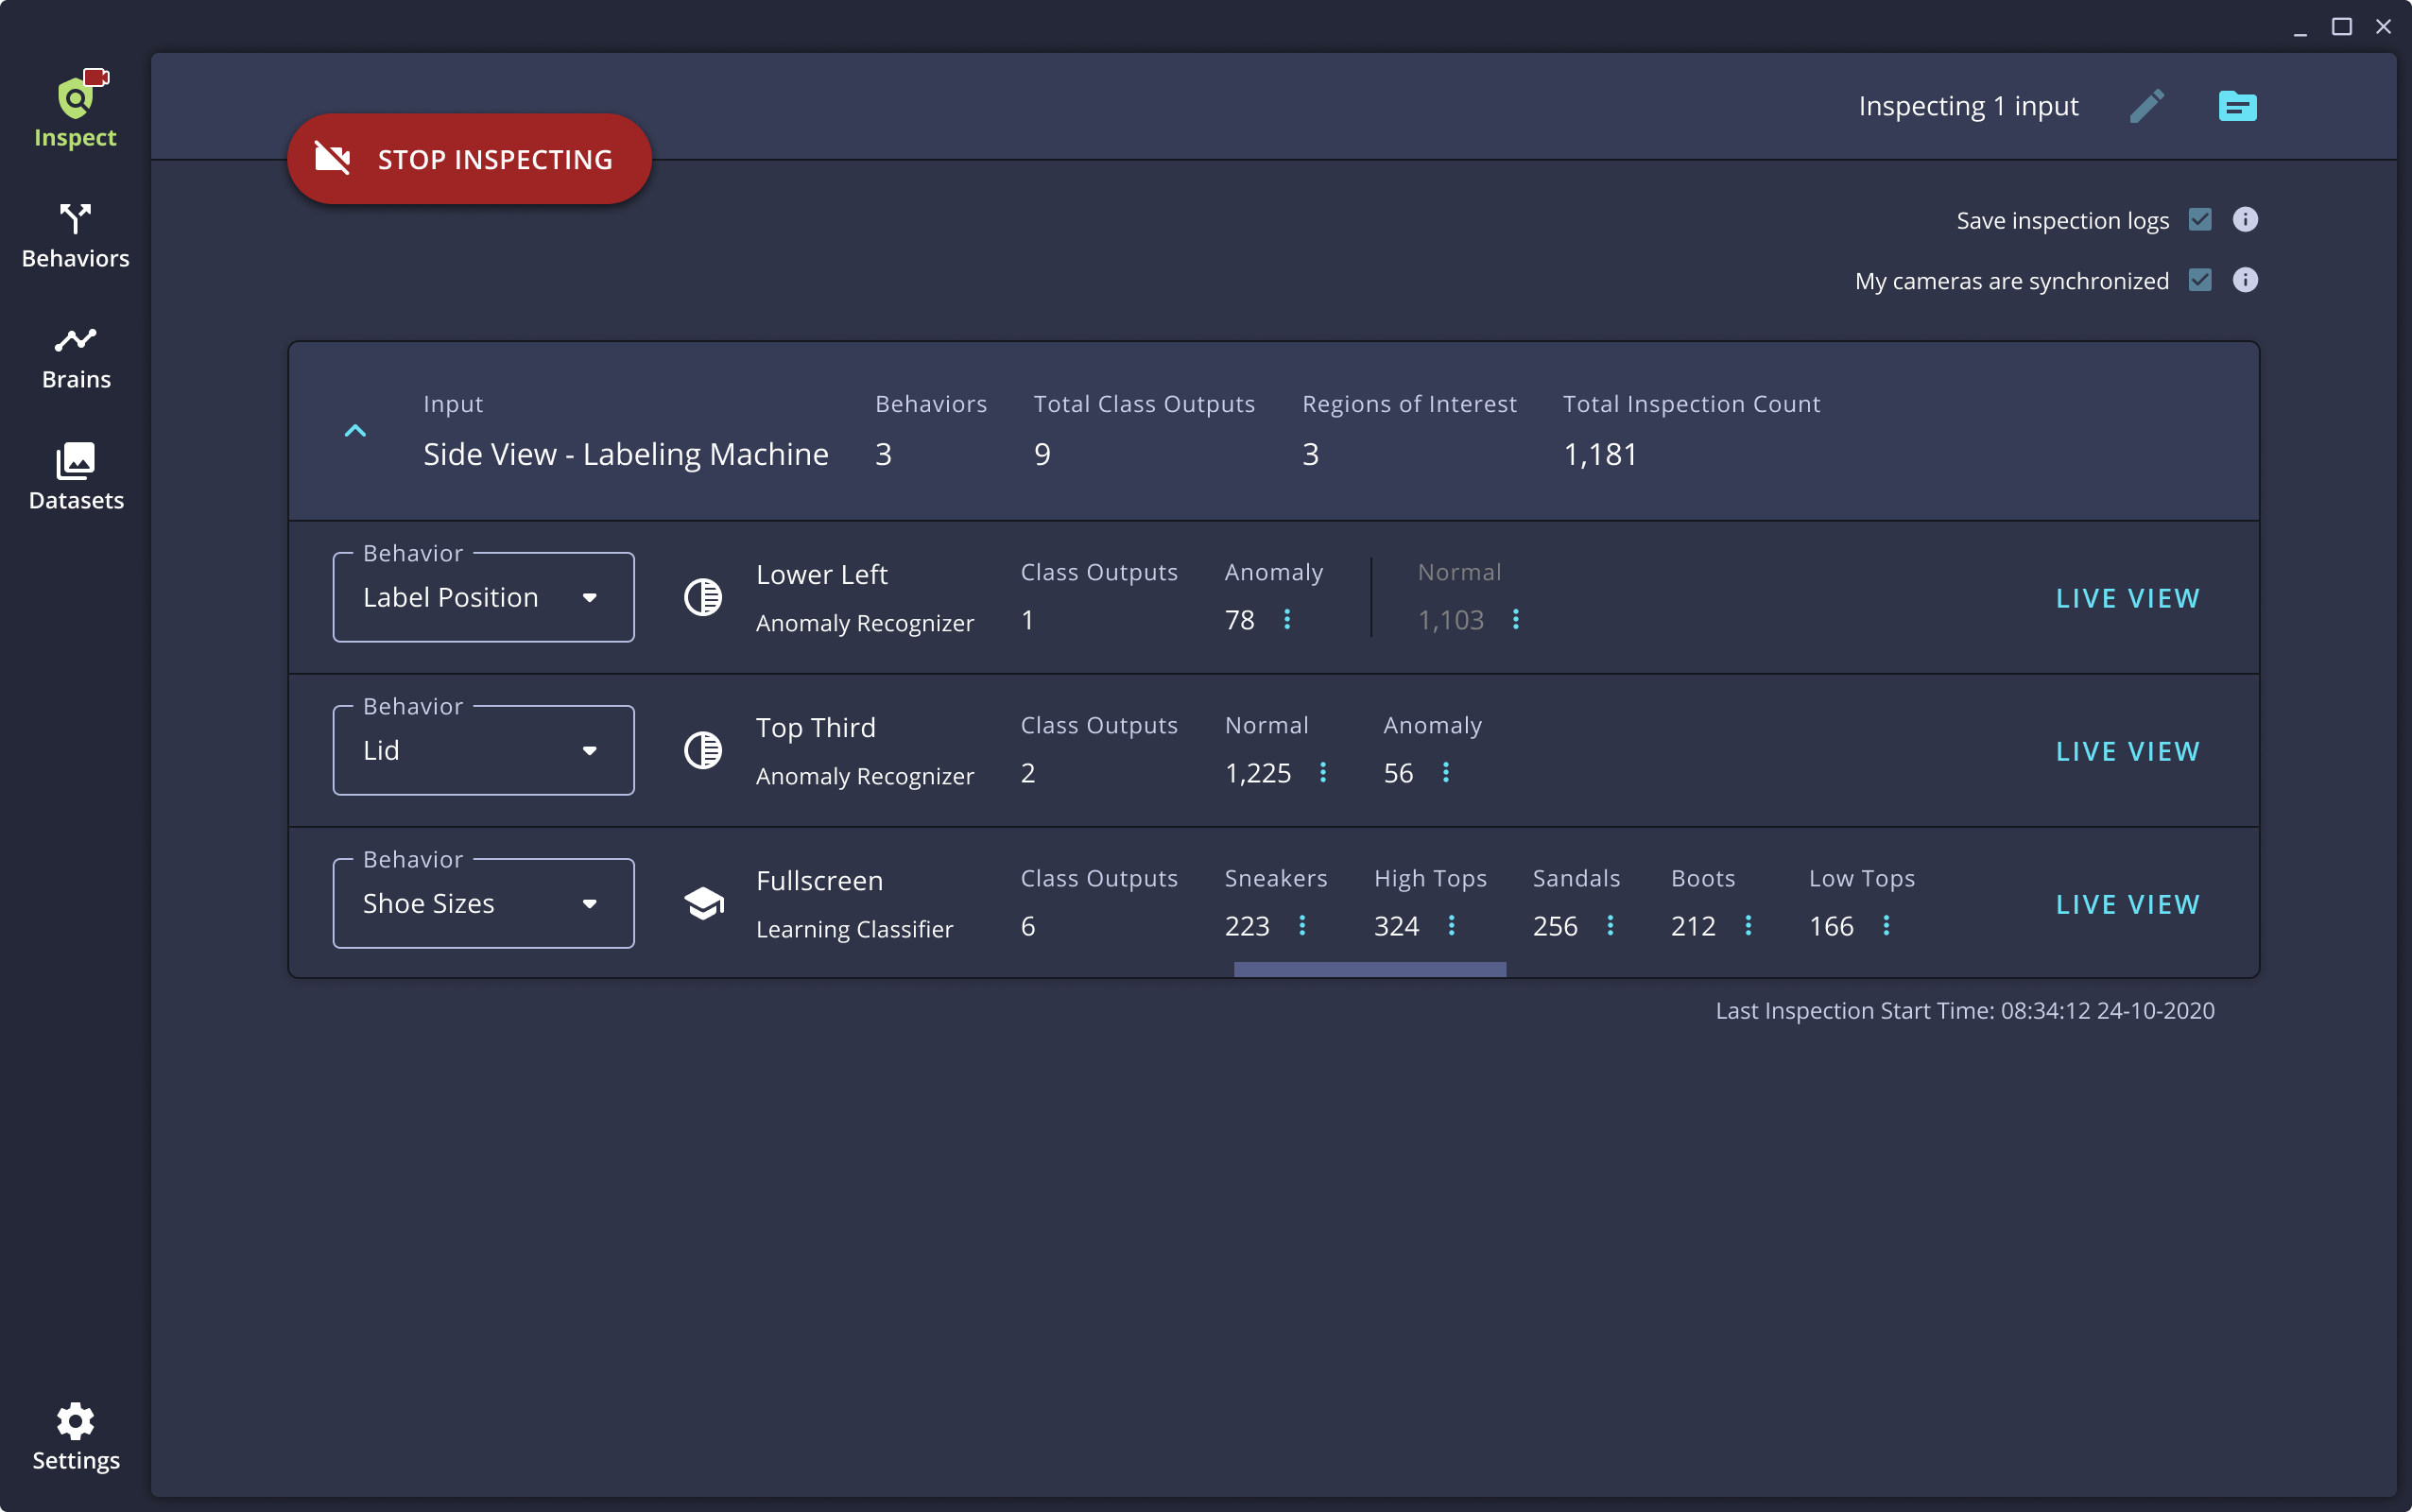
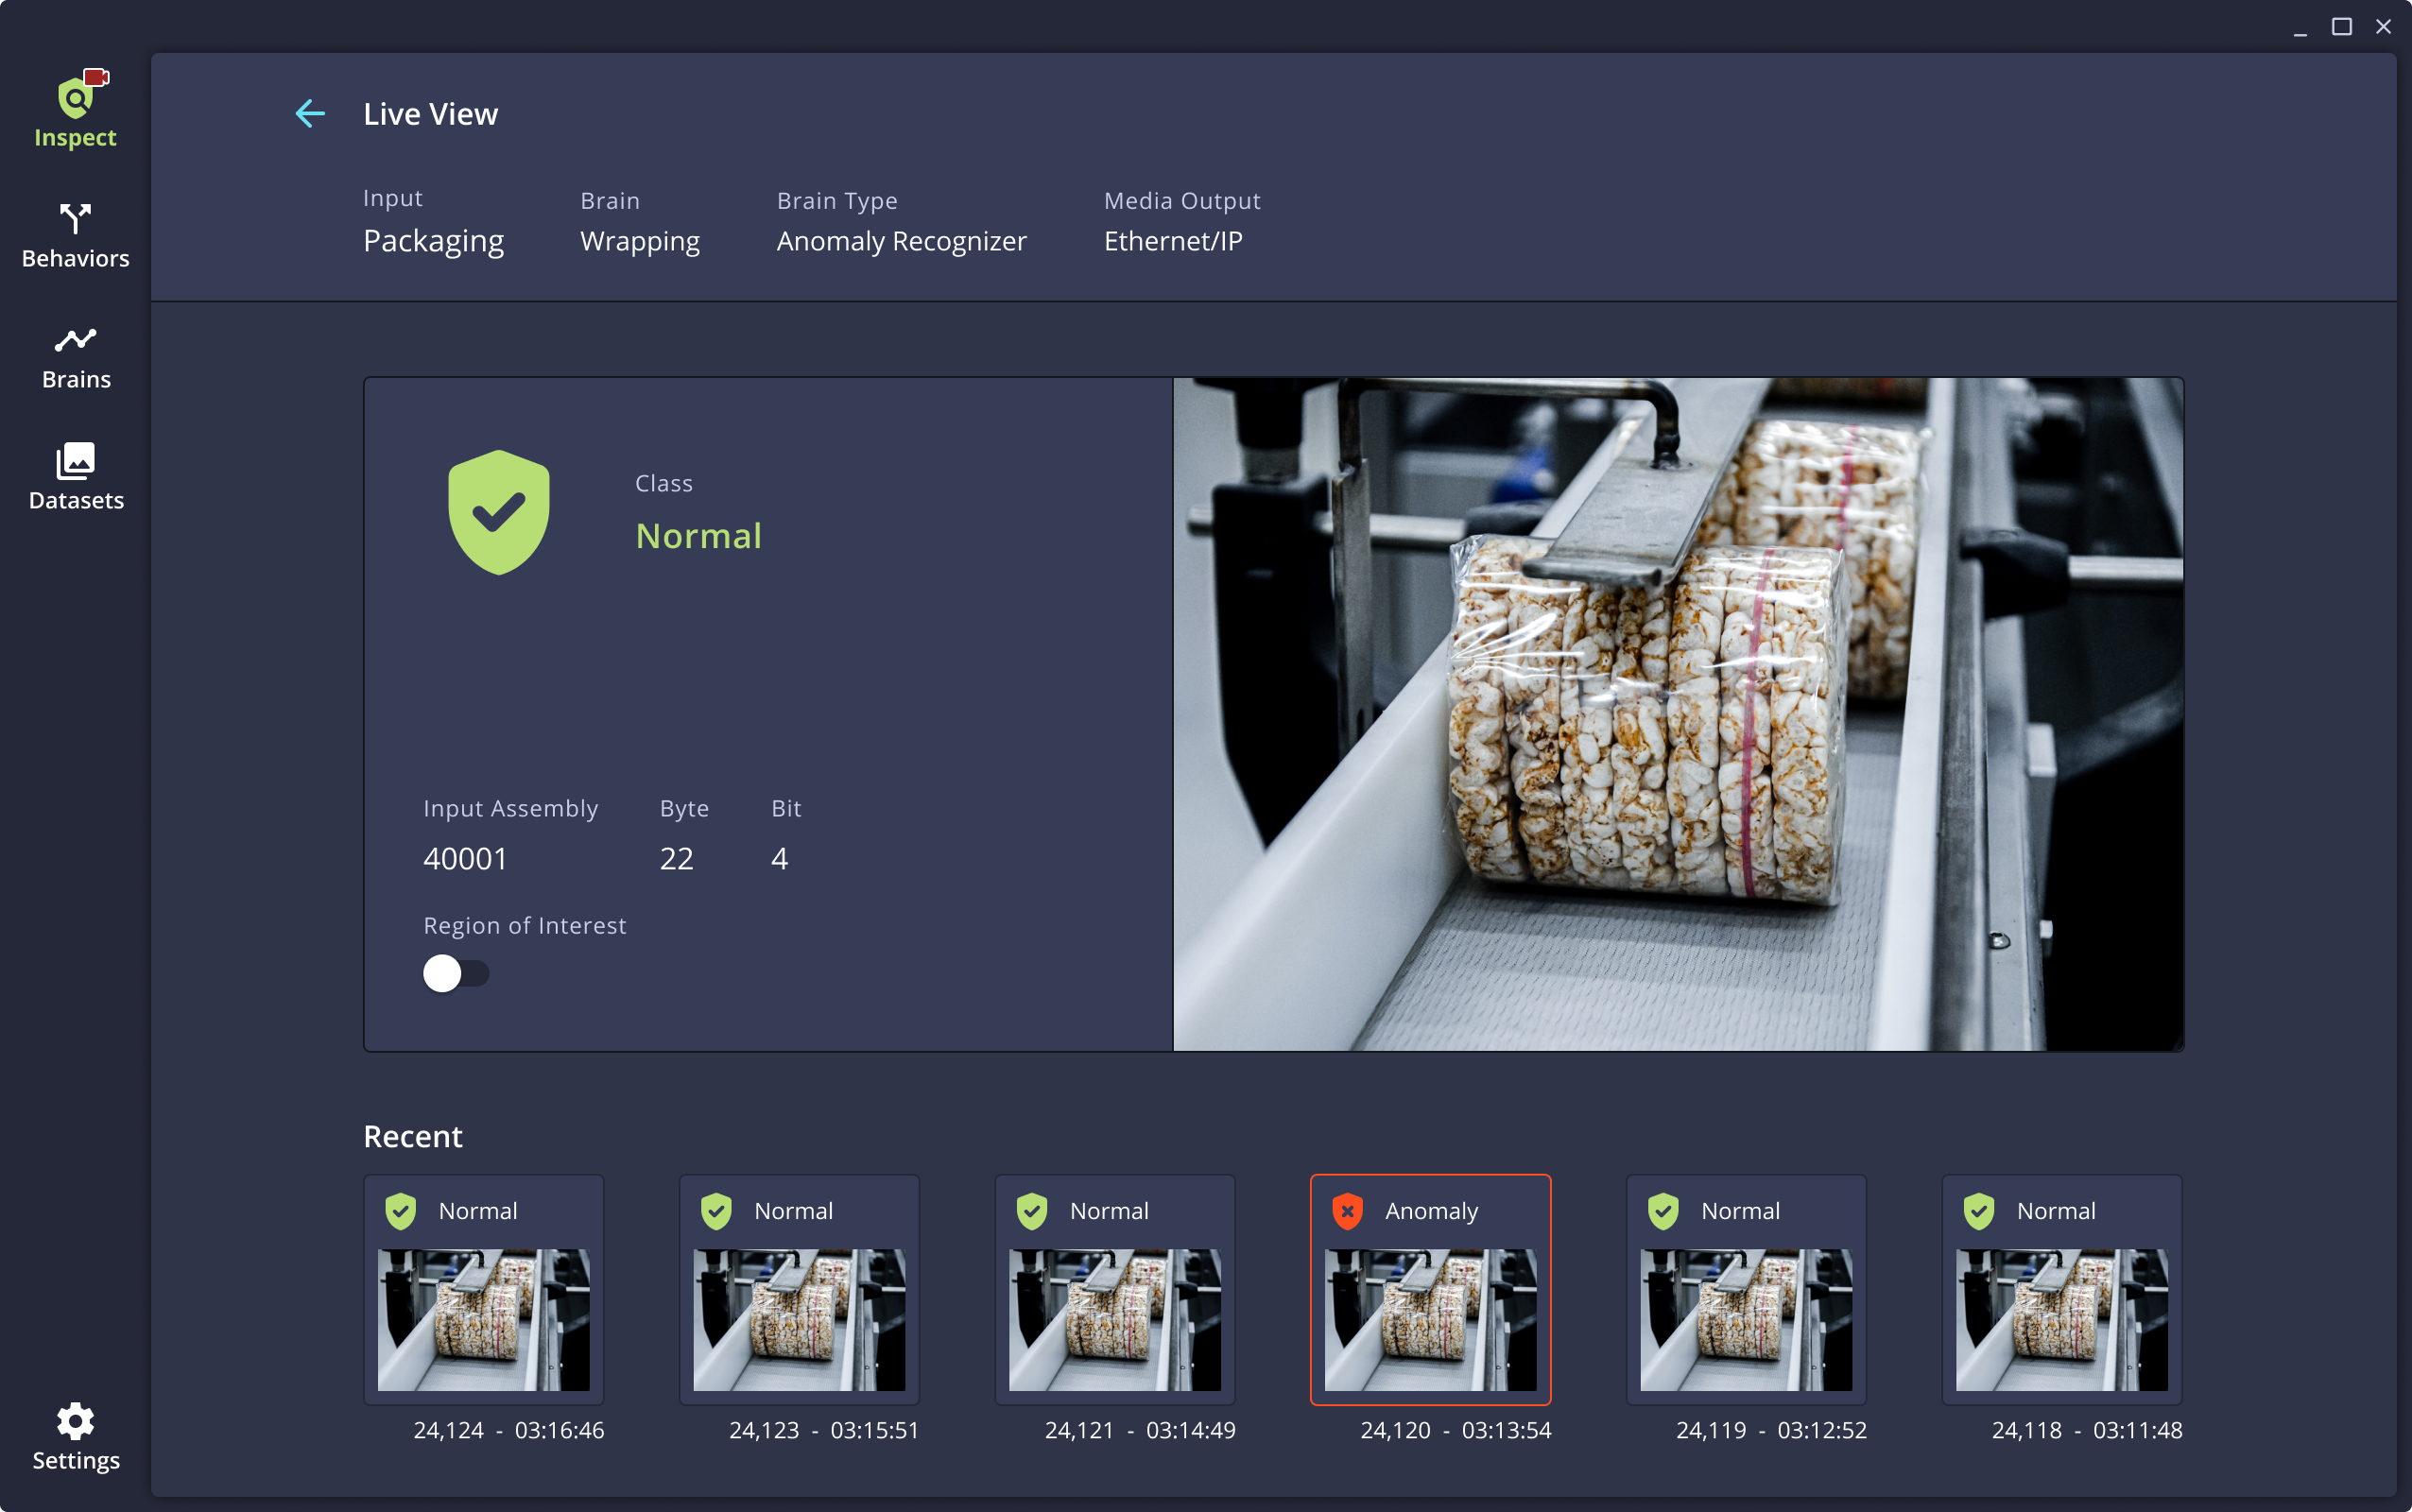
Inspector can display a live view of each behavior while inspections are running. These are accessible with the Live View link to the right of each behavior.
-
To stop inspections, click the Stop Inspecting button at the top of the page. That will stop inspections on all inputs. Inspector will then allow changes to inspection configurations.
Camera synchronization
If there are multiple cameras sending images to Inspector, there are two ways that Inspector can ingest and process those images:
- Synchronized cameras send images to inspector at approximately the same rate as one another, meaning they are most likely capturing images of products that are all on the same line with product moving at the same speed.
- Asynchronous cameras capture images independently of each other. These cameras may be operating on completely separate product lines running at different speeds, or they could be working on the same line but capturing images at different rates.
When setting up inspections with multiple cameras, use the check box at the top-right to indicate if the cameras are synchronized or asynchronous.
Timing for asynchronous cameras
If multiple cameras are being used asynchronously, then it is necessary to indicate if any of them are in fact timed together.
- First, uncheck the box that says My cameras are synchronized at the top-right corner of the Inspect page.
- This will expose the Trigger setting for each input. Use the trigger drop-down to indicate if any of the multiple cameras are timed to work together.
If any cameras are running at the same speed, assign them the same letter with the Trigger drop-down. Any cameras running at different speeds should have different trigger settings.
Inspection Logs
Inspector can capture and save logs while inspections are running. To enable this feature, click the Save Inspection Logs checkbox at the top-right of the screen. The details saved in inspection logs include the input, timestamp, inspection count, inspection result, Brain name, and image name (if the image is saved).
These log files will be saved in the hard drive location specified in the Inspector settings. This folder may be easily accessed by clicking the folder icon at the top-right of the screen.
🎛️ Calibration
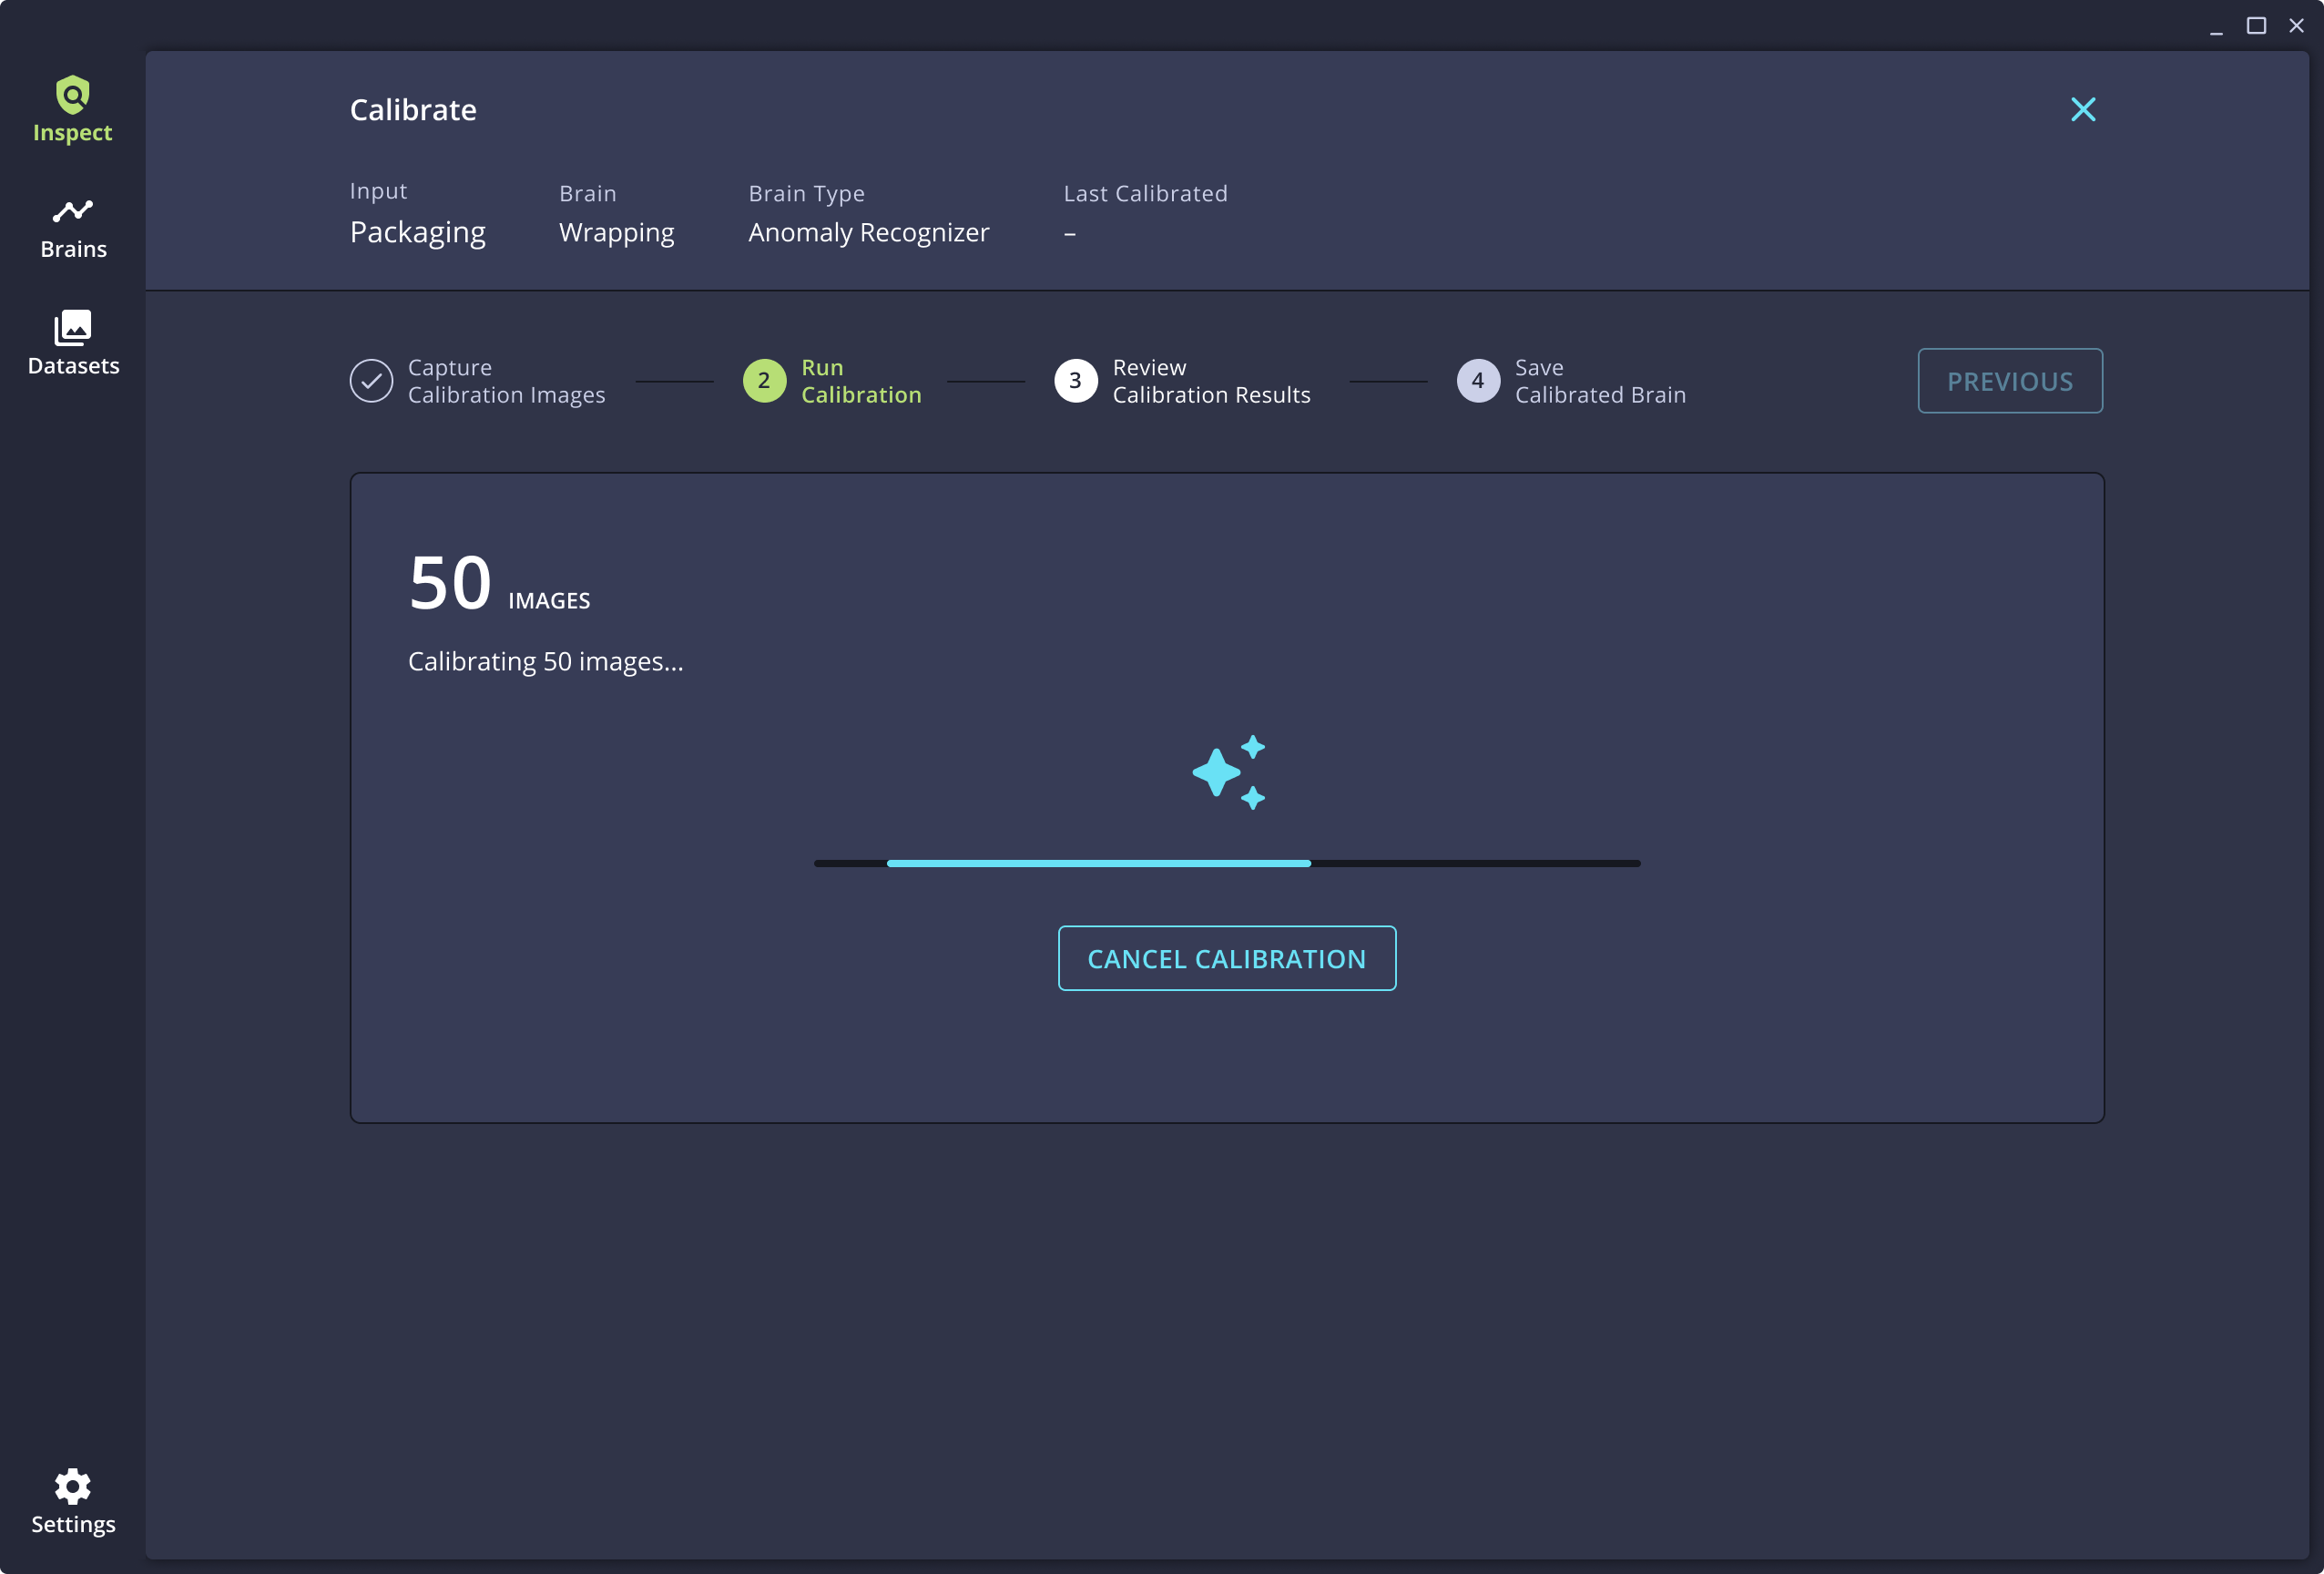
Calibration is a feature that is used update a Brain when the production environment has changed in a way that is causing poor performance during inspections. Calibration can be used with Anomaly Recognizers and Anomaly Hi-Fi Brains.
-
To start the Calibration process, click the Calibrate link on the Inspect page for the desired Brain. This will open the Calibration workflow.

-
First, Inspector will capture additional images that will be used to calibrate the Brain. Specify the number of images to capture, then click Capture Calibration Images.
-
After the images have been captured, click Run Calibration.
-
When the calibration process is complete, Inspector will show the results, including updated accuracy metrics for the calibrated Brain.
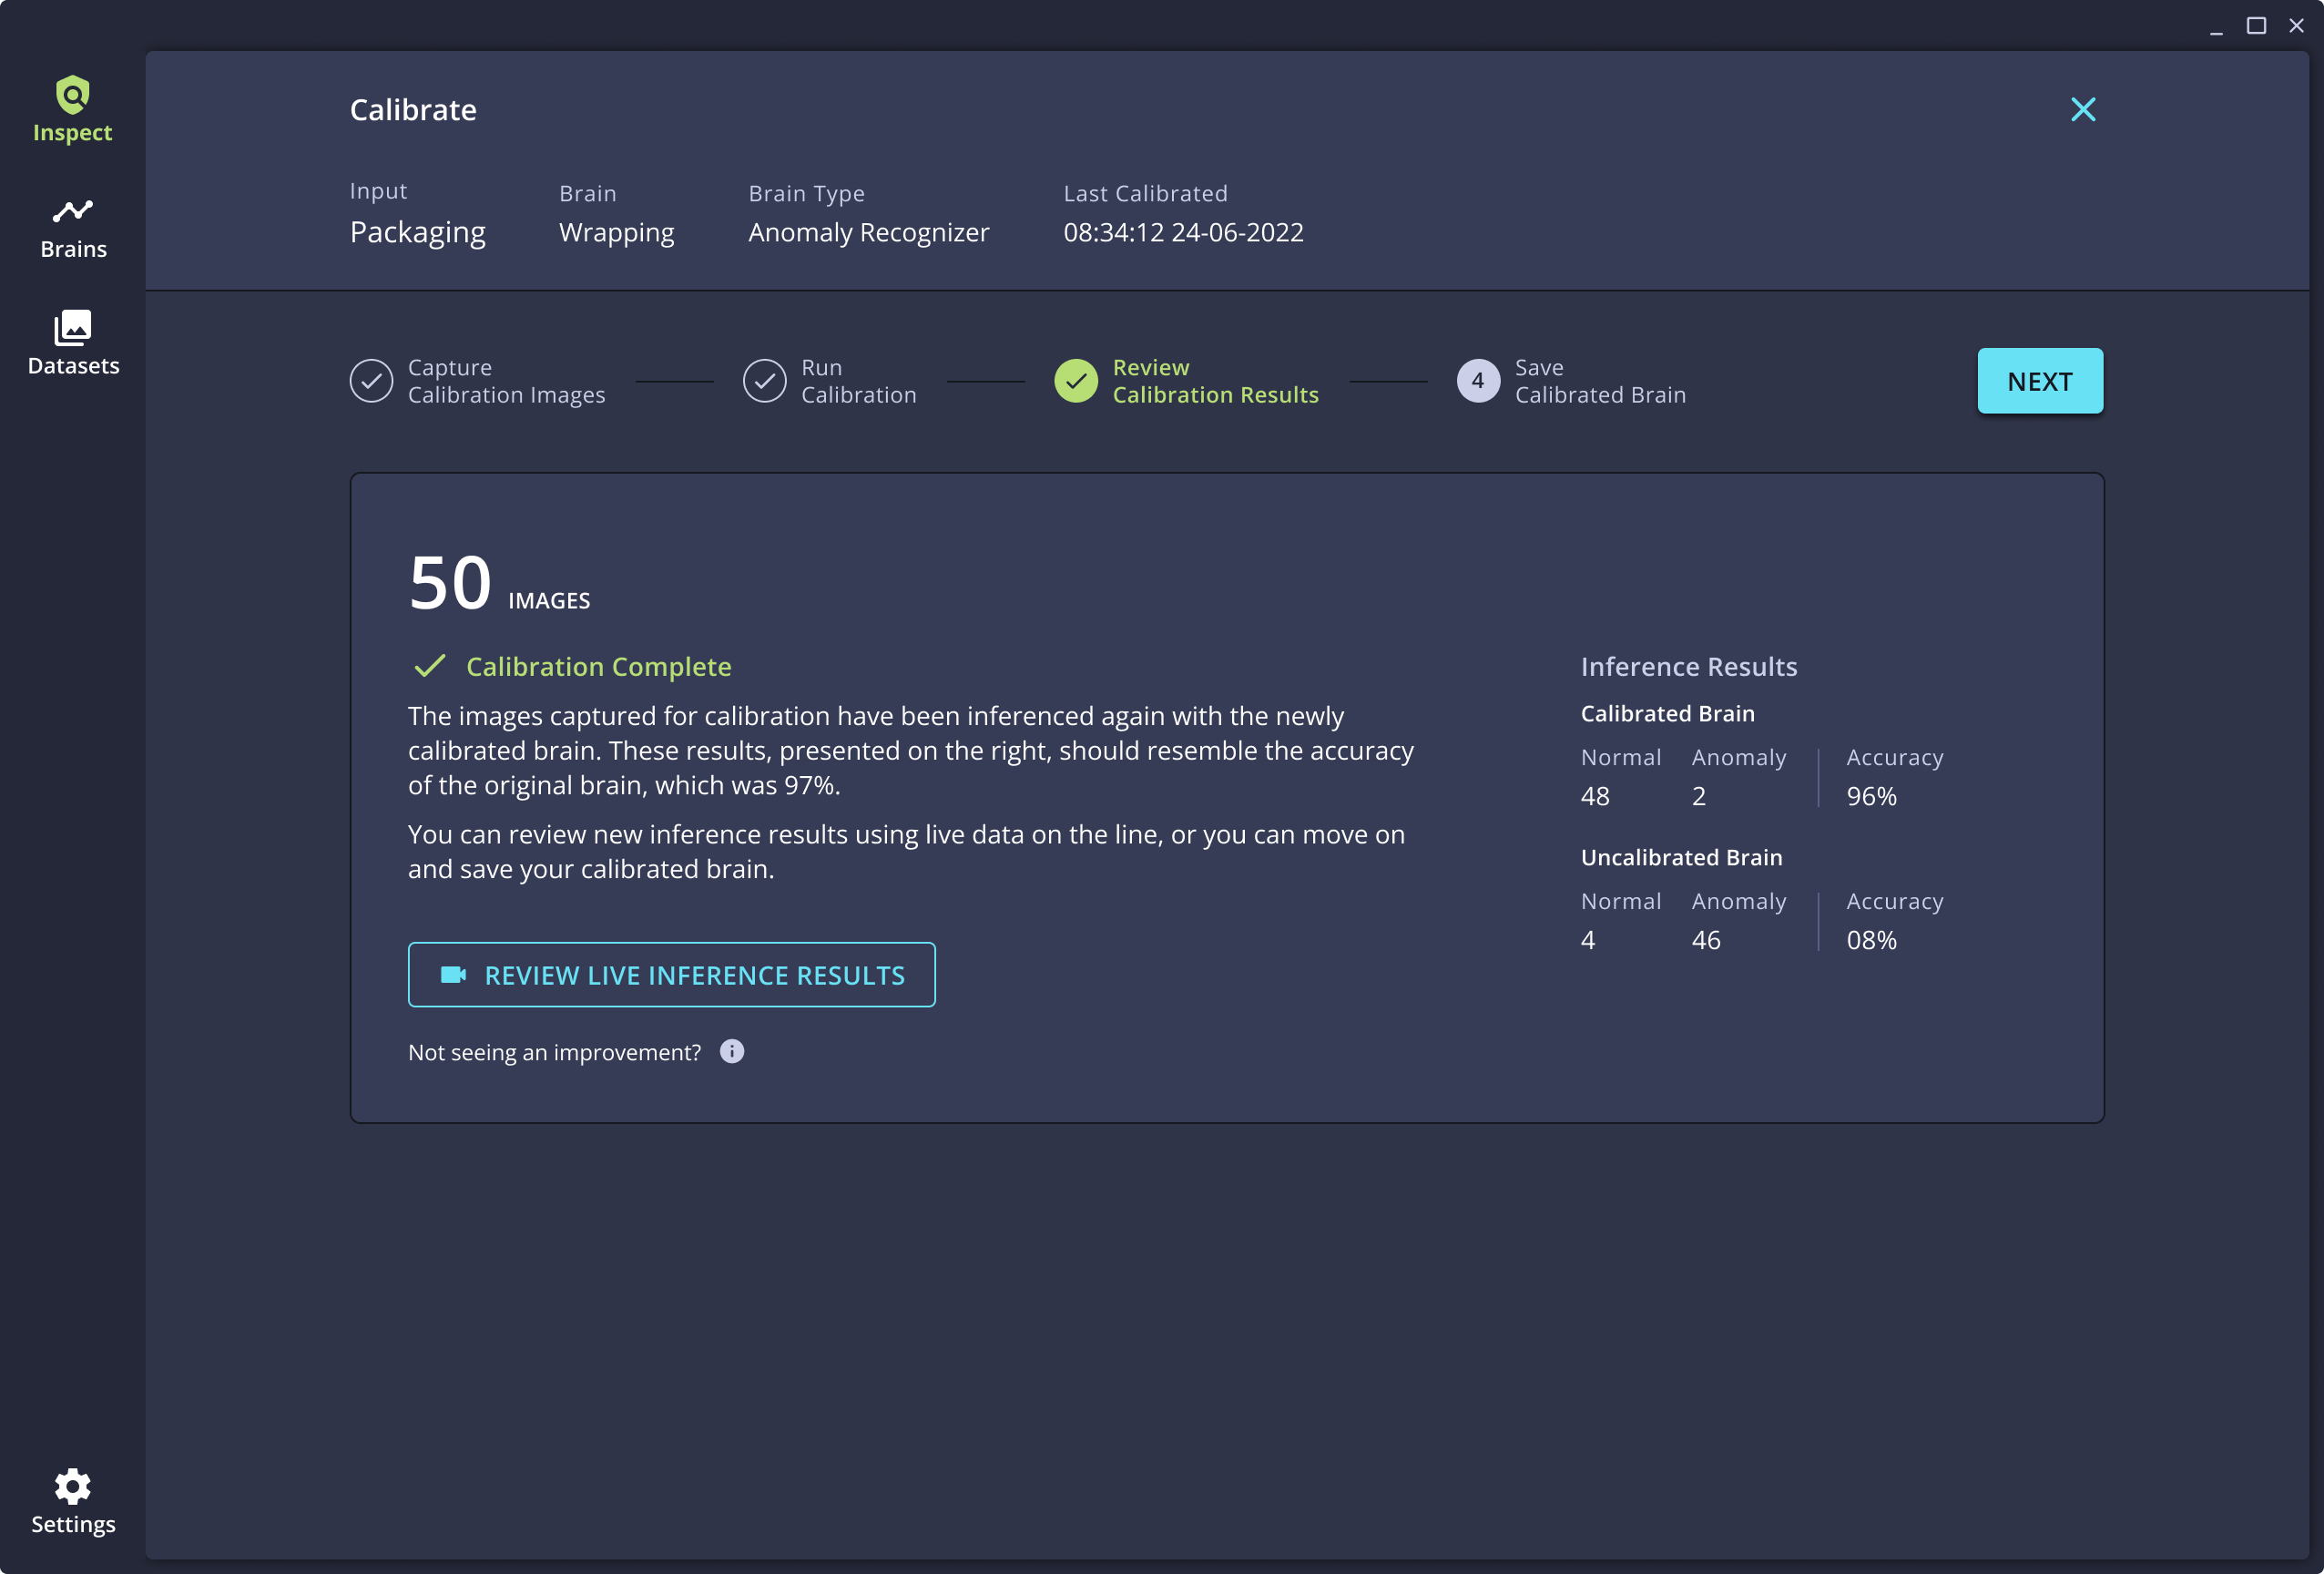
To see how the calibrated Brain works against live images from the camera, click Review Live Inference Results. When satisfied with the calibration results, click Next.
-
The calibrated Brain can either be saved as a new Brain or as a replacement for the original Brain.
Updated about 2 months ago